Basics

If you're wandering into this tutorial, or even if you searched for it, you're probably wondering exactly what WebAssembly actually is.

Well in simple terms WebAssembly is a way to run sandboxed, performance minded low level code like Rust, C/C++ inside the browser.

All while still maintaining the flexibility to interact with modern web browsers and being functionally useful for web development.

Web Assembly (or WASM for short) is composed of two essential parts that interact with the modern web browser(technology) environment:

Additionally this tutorial demonstrates the usage of WebSockets (RFC 6455). WebSockets allow for full-duplex communications over a single TCP connection which minimizes server-overhead while not facing the complexity of previous implementations of this types like Comet.

The WASM Binary

The Javascript Glue

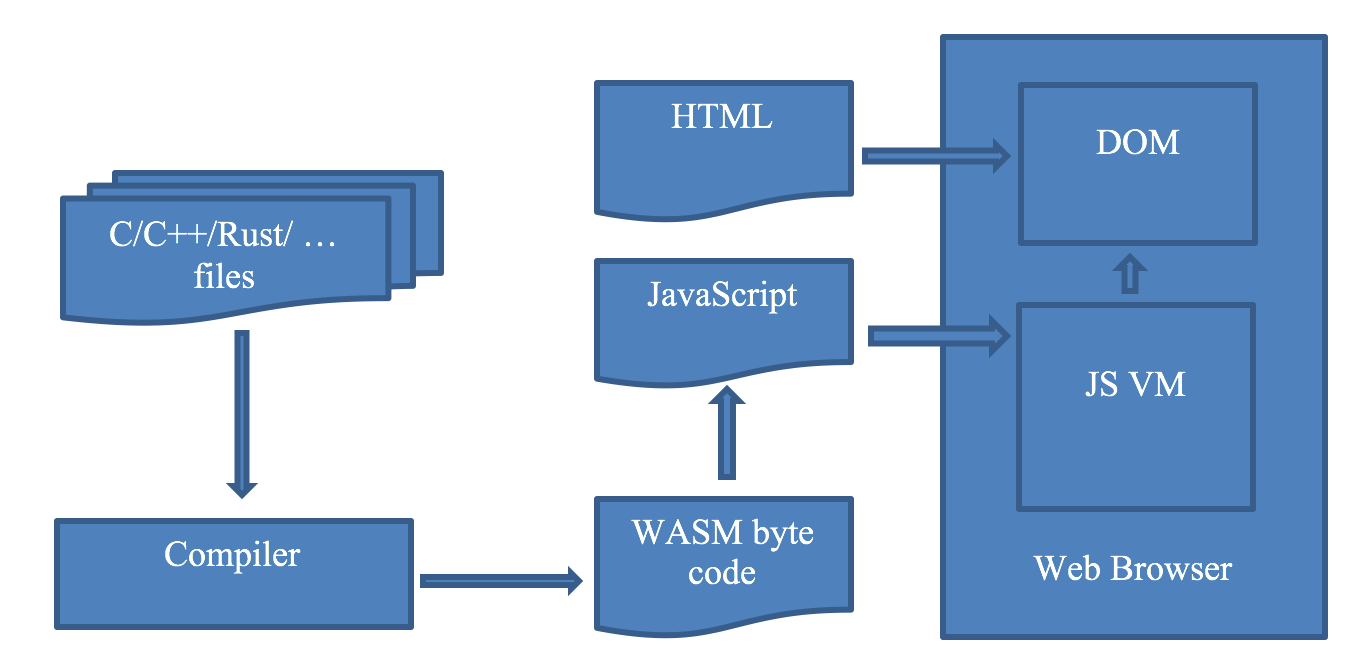
For the purposes of this tutorial, we are interested in the WASM/Browser interop that allows us to demonstrate directly interacting with elements of the HTML document without needing to specifically use any javascript at all on our end, while demonstrating the use of an advanced networking feature, websockets.

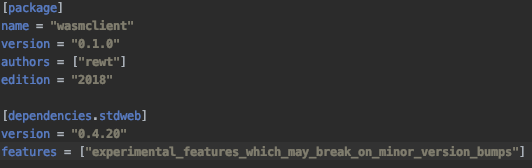
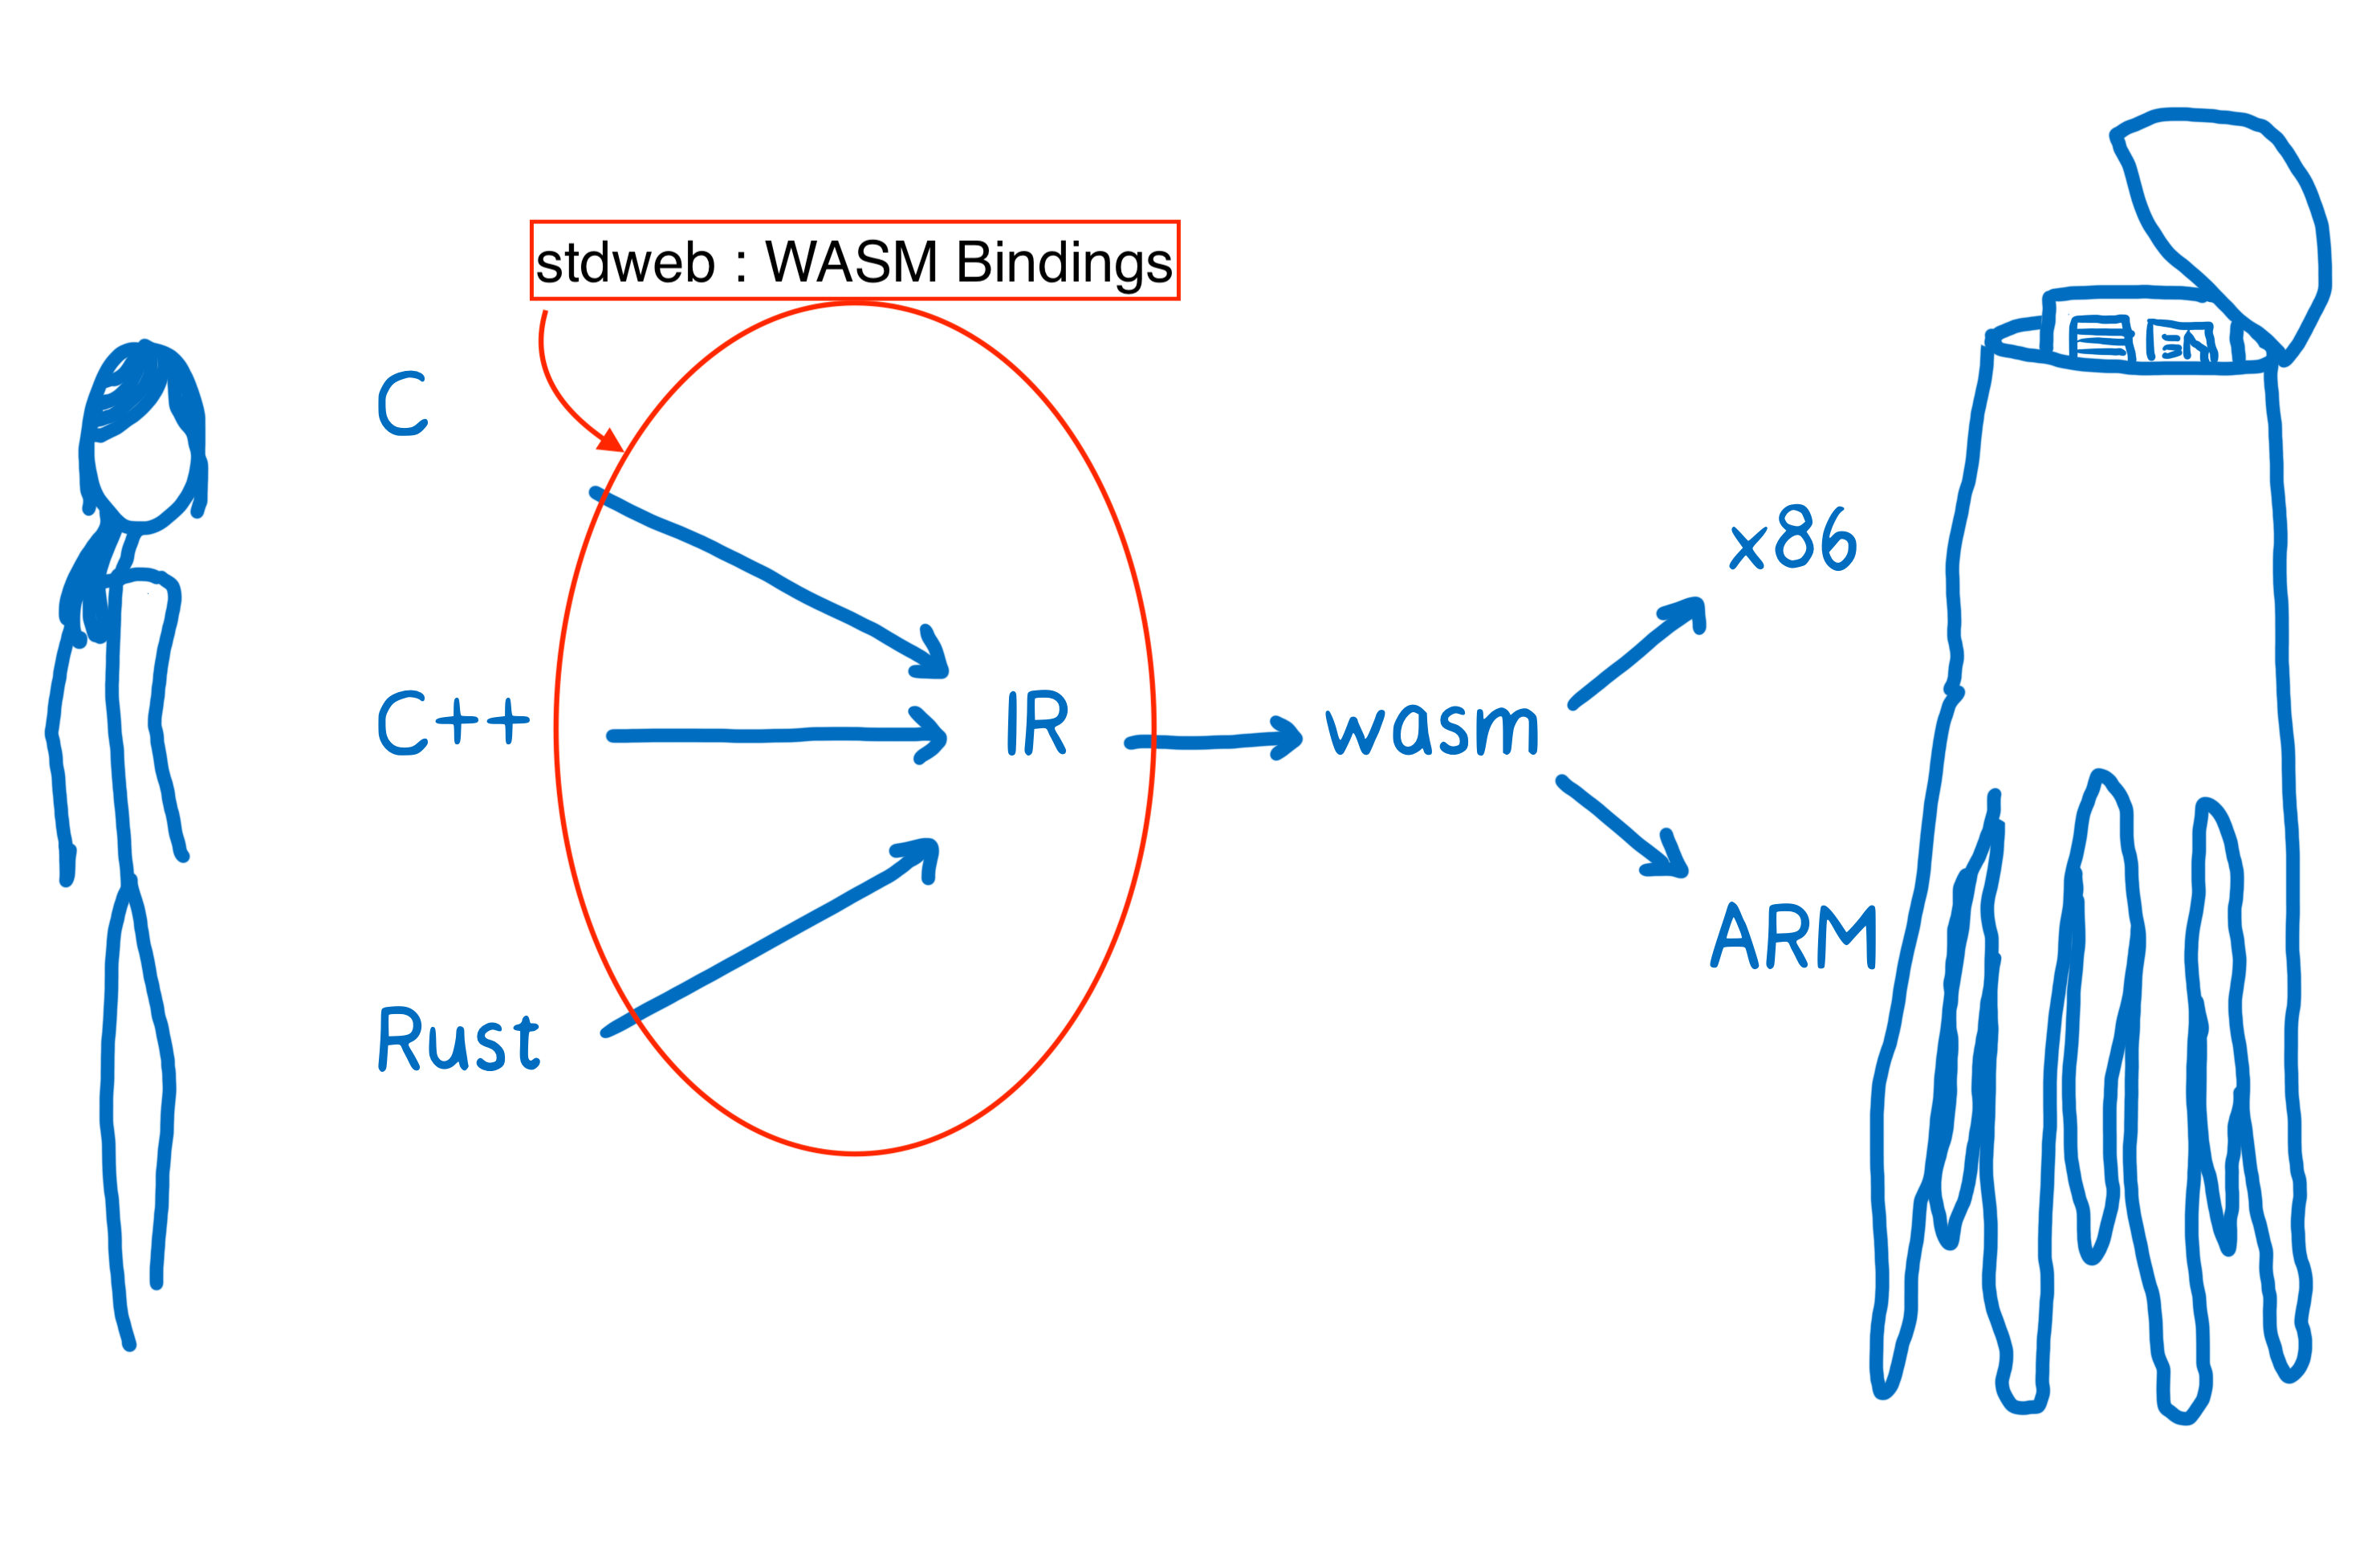
This project is completely based on the Rust crate called stdweb stdweb is essentially a binding agent for creating the linkages required for compiling to WASM. The crate exposes a series of ways to interact with the browser through internal methods that correspond to javascript bindings without having to actually write javascript. The compiler takes care of everything.

If you would like to read more about WASM, please go to Mozilla's developer page, this will also give you additional API resources and tutorials on how to use WASM. MDN Documentation : WebAssembly

Demonstration! Please go here to test the site against your locally running grizzly-service !

Demo Application


Installation

This segment of the tutorial will quickly run through the easiest way to install rust and the tools you need to quickly compile and test running WASM modules in a live environment.

Installing Rust and required components

The easiest method to installing the entire rust ecosystem is to use the Rust systems installer Rustup. Rustup will install all the necessary base components for you to finish this tutorial. For the purposes of this tutorial all steps are written in the perspective of using Mac OSX, but the steps will be fairly equivalent for Linux and mostly the same for Windows without getting into envrionment specific details.

Run the following command in your terminal to download and install all the necessary components to begin this tutorial:

curl https://sh.rustup.rs -sSf | sh

Once done installing we can create a project and then start developing our application.

The next step is to create a new folder, cd inside it and run the next series of commands in order. These commands will install cargo-web which is a compilation tool for compiling applicable rust applications to WebAssembly either using the native-Rust WASM backend, using Emscripten to compile to WASM, or to ASM.js.

Installing Rust and cargo-web can take some time so please be patient as for a first time install.

cargo init
then

cargo install -f cargo-web

Finally, verify that rustup worked correctly by running the following commands in terminal.


cargo -V
rustup -V
rustc -V


Rust - WASM Component

This segment of the tutorial covers the rust code that runs the web model

WebClient

Here is the full code for the WASM-based portion of the application(the browser portion).

We can separate the WASM-target into a few requisite sections.

Imports

This particular segment is the import ortion of the import statements. These imports allow us access to the stdweb modules required for this program. Please refer to the documentation on stdweb : docs-rs for the specifics on each module and other functionality they offer.

Macro

This is the macro used in the program in order to take ownership of passed elements and pushes it for use in a Rust closure.

embedded javascript

This is the way to execute pure javascript from a pure-rust side using the js! macro. If your javascript has no return values(With exceptions) just define it using the js! {} structure and your vanilla js internally.

Dom, get entry

This gets inputs from a div on the page and sends them via a websocket

WebSockets, better TCPStreams!

This is the entirety of the websocket portion of the WASM component. We declare a new WebSocket and point it to our "server" at 0.0.0.0:8844. Don't forget the ws:// portion of the URL to indicate that this is in fact a WebSocket connection.

The next portions of the websocket code follow the same particular structure. We create an event listner attached to the WebSocket we opened in order to print out specific events associated with the Socket. The first portion of this structure is calling the enclose! macro. This macro takes ownership of the variables that are then moved into the following closure for socket events.

Static Resources!

This is the html structure used by our application. It's all vanilla html and has one script call for our compiled wasm.js target


Java - WebSockets with Tyrus and Grizzly!

For serving up remote content from several apis, a websockets intermediary java service was designed in order to accomodate handling and translating websocket requests into normal http api requests. This was primarily done because the interfacing between javascript promise/return asynchronous structure is difficult even with bindings setup for the normal equivalent futures api in rust. So it was easier to write an asynchronous(of sorts) java service to handle the requests themselves and the websocket requests.

WebSocket server components


WASM - Project Structure/Building!

This segment covers the proper way of setting up the WASM portion of this project.

WASM Project Layout


Directory/File requirements

Your folder you created for your WASM Client should contain the above 4 files. The .rs file should be underneath the "src" directory and the index.html should be under the "static" directory. Cargo.lock and Cargo.toml should be in the base directory from when you ran cargo init earlier when you created the directory.

Cargo.toml setup

Make sure that your Cargo.toml includes the stdweb dependency as shown below

Building the WASM client and serving it!

To serve your client on a localhost server for easy access, all you need to do is type the following command while inside your project directory!

cargo-web start

or if you're looking to build the static binaries to just copy into your project, run the following command to compile the entire wasm structure. Make sure you copy all 3 files into wherever you put the compiled js file

cargo-web build

See the webm below to see what your output should look like!

At a technical level, this command is compiling the rust file you wrote into a web assembly binary file which is then attached to your index.html using some javascript glue code. The created script is then served along with your index.html on an embedded webserver for each access!


WebSocket "Server" - Project Structure/Building!

This segment covers the proper way of setting up the WebSocket server portion of this project.

WebSocket Project Layout


Directory File requirements

This instruction set is different since it relies on using maven to build your project and dependencies, rather than cargo. Your project should be structured similarly to the image above.

You will need to create a pom like the one below in order to properly import and setup all tools. If you need help installing maven, please look at the resources at the end of the page.

Pom.xml setup

Make sure that your POM.xml includes the following dependencies.

Building the WebSocket server and running it in conjunction with the WASM Client

To run the server, all you need to do is do mvn install or run the java code via your IDE(make sure to point to the main thread in socketserver)

See the gfy below for what you should see when running mvn install

After building the jar you want to go to your "target" directory and run the snapshot jar with dependencies, you might get issues with resources if you run an externally configurable file for loading api-key stuff, so make sure to either hardcode those values in(bad) or configure your own store. The project is setup currently to read in a configurable json file of your key information for all data.


Resource List!

Java Resources

Install Maven
JRE/Java Resources

Rust Resources

STDWeb
Rust WebSockets

WebAssembly Documentation

WebAssembly textformat
MDN - WebAssembly
Moz://a Hacks - WASM

WebSocket Documentation

MDN - WebSockets