When installed it will look like this.
Ruby on Rails, or Rails, is a server-side web application framework written in Ruby under the MIT License. Rails is a model–view–controller framework, providing default structures for a database, a web service, and web pages.
Ruby on Rails was originally extraceted from work done on Basecamp, a web-based project management tool, by David Heinemeier Hansson. He released the framework as open-source in 2004, but did not initially share commit rights until 2005. The framework gained notoriety when Apple decide to ship it with Mac OS X v10.5 in 2007. Since its release it has seen a large amount of upgrades and improvements the frameworks functionality. Introducing gems, templates, engines, Rack and nested model forms in 2009. This added functionality made Rails an intuitive and user friendly framework, that can create beautiful functional webpages quickly.
Most sites that users are interacting with implement a simple CRUD(Create, Read, Update, and Destroy) structure. Sites like Twitter, Facebook, Instagram and Reddit, follow this structure. Users create a post, read other posts, update tehir status, and delete posts. Rails' functionality is invaluable in creating these types of sites(as you'll see in our tutorial). With simple command line executions we are able to create whole CRUD structures. Rails automatically generates the files, routes, and functions necessary to make these types of sites quickly and easily.
For our site, we wanted to create a CRUD application that allows users to seek out new music releases, get more information, update the reviews with their opinions or add new songs to the site, and to delete their previous reviews. With Rails we are able to create a beautiful and effective app in this style, easily.
Unfortunately, Rails was originally developed to be used with Mac's. So Windows installation is a little more difficult than on Mac.
*Install of these with the default settings*
Rails installer is great for getting us necessary software we need to use Ruby on Rails(Bundler Sqlite, TinyTDS, etc.). However, the versions of Ruby and Rails that come with this installer are out of date, so we will have to update them later.
Download and install the package containing Ruby version 2.3. Following all of the default prompts.
Go to rubyinstaller.org to download the latest version of Ruby.
The most recent, stable version is highlighted in bold. Follow all of teh default prompts, making sure everything is checked.
This will update the old version of Ruby we installed with Rails installer.
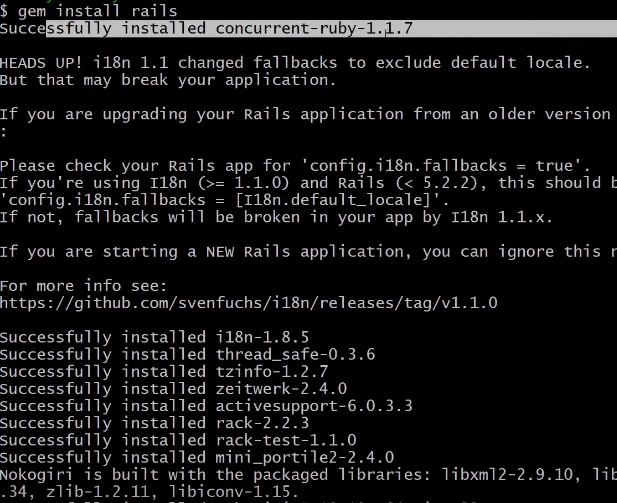
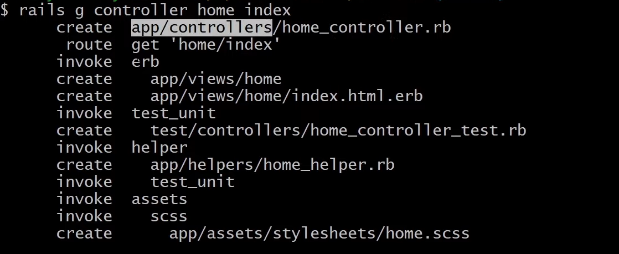
Open the Git Bash terminal and run the "gem install rails" command.
When installed it will look like this.
First we need to make a directory for our projects. We are going to place it in our C drive.
Next let's navigate into our new folder.
Now that we are in the correct directory, lets make our project.
This command will create the necessary skeleton of our project.
You should see this message when complete.
Now let's navigate into our new project
And now we can initialize the server to see if it works.
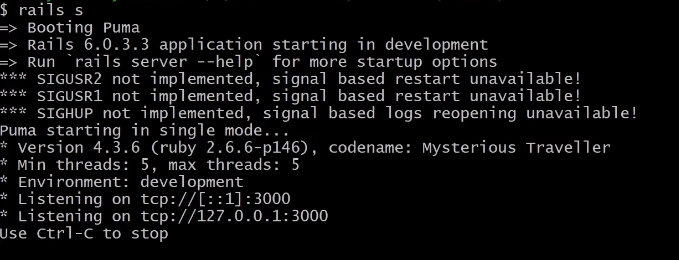
This output means the server is working.
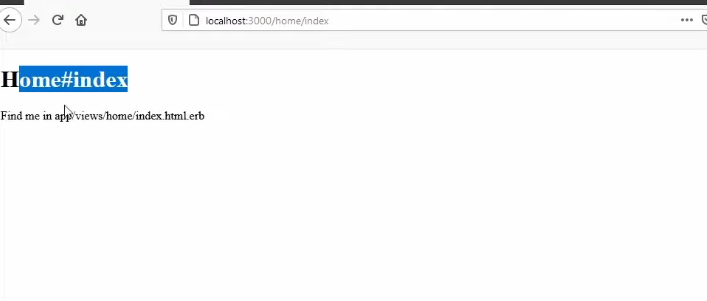
In your browser enter:

If you see this landing page, Congratulations! You made your first Rails site.
We need to have a few things open to work on our project
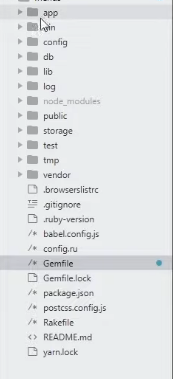
When opening your project in Sublime you'll see Rails has created a number of folders and files for us
Remember from earlier, Rails is an MVC framework. The Model being our database, Views are our actual pages we create, and Controllers execute the requests from our application. So to start we need at minimum a Controller and a view.
So we want to create a Controller and a View for our homepage. To do this Rails has generate helper files that we can use to easily generate the things we need.
So navigate to the Git Bash terminal for our musicReviewSite directory and execute the following command.
Rails has now executed all of these commands, creating the necessary files we need.
We should see a page that looks like this.
Lets make this our root page. To do this we have to change the route. In Rails routes allow us to navigate to a specific page based on http requests.
To do this lets go to our text editor and open config/routes.rb.
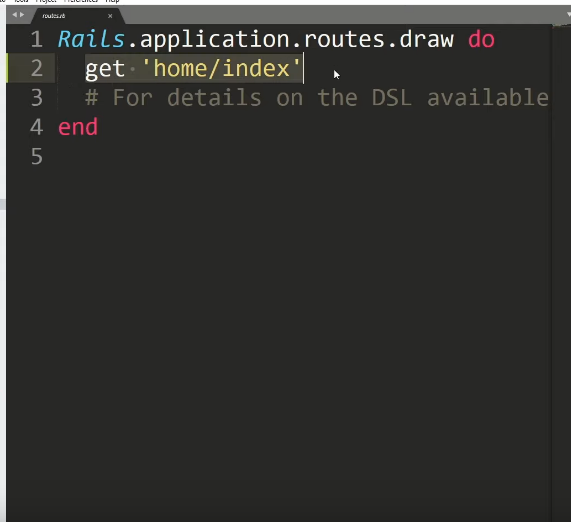
The routes file should look like this.
To make our new page our root, we need to edit this file. First comment our the line "get 'home/index'". Then add:
When comeplete 'localhost:3000' should now bring us right to our homepage.
Now we can edit our homepage and add whatever we like.
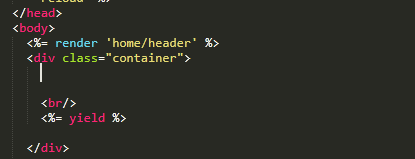
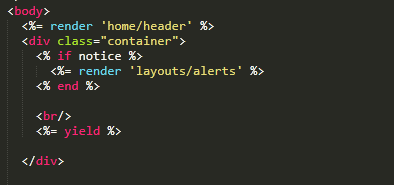
In order to start developing a styling our webpage we need to open the 'application.html.erb' file. This file is located inside app/views/layouts folder. This file is essentially our base template for all of our webpages. We can use this file to keep consistency with our site, while also making it dynamic.
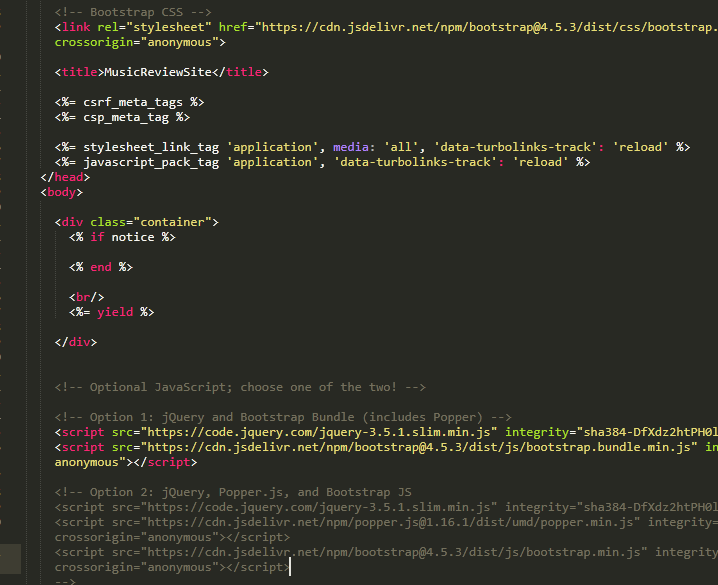
Your application,html.erb file should look something like this.
In this file you'll notice a 'yield' tag, surrounded by '<%= %>'. This tag is used for embedding ruby. This tag is here for us to output the content we create for our other pages within the blueprint that Rails has created for us
Now within our views folder we also have a home folder. This will house our pages we create. If we navigate to index.html.erb we will see the text we saw when we created out homepage
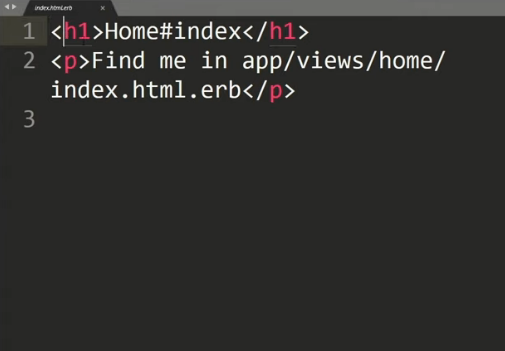
Your index.html.erb file should look like this.
Within this file we will be adding all of the content we want on our homepage.
For the sake of the tutorial we will be using some Bootstrap elements to get us started.
For our navbar we are going to create what's known as a partial. This allows us to create a separate file containing only a navbar, foot, etc. And use it throughout our project. It's good practice in Rails to implement partials to enable code reusability.
To create a partial, right click on your app/views/home folder and create a new file. Then save this file as:
The underscore in front of the filename shows Rails that this is a partial.
Now lets a bootstrap navbar.
Bootstrap navbarView the page source and copy and paste the code in the nav tags into your _header.html.erb file.
Now to get our navbar to display on all of our webpages, navigate back to application.html.erb page. And we are going to place an embbeded Ruby tag right above the yield tag from earlier.
Adding this tage will render our navbar on all pages
We can use this same technique to create a footer as well
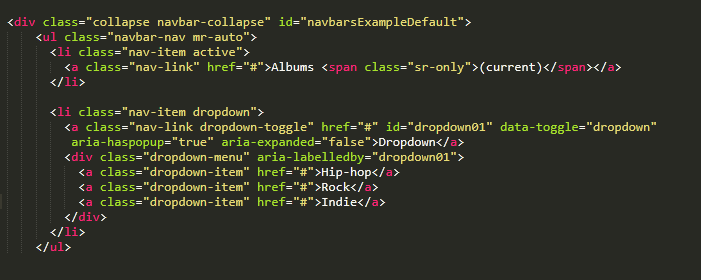
Next we need to edit some of the included links. Change the home link to Albums, delete the other two. And finally edit the dropdown to show our album categories. We will be editing these again later when we add album models and views to our site.
Our site's purpose is to be a community for music lovers to share their opinions on albums they love. So we want to add some content to our homepage to refelect that.
All of the following content will be added to our app/views/home/index.html.erb file. As this is the file designated for homepage content.
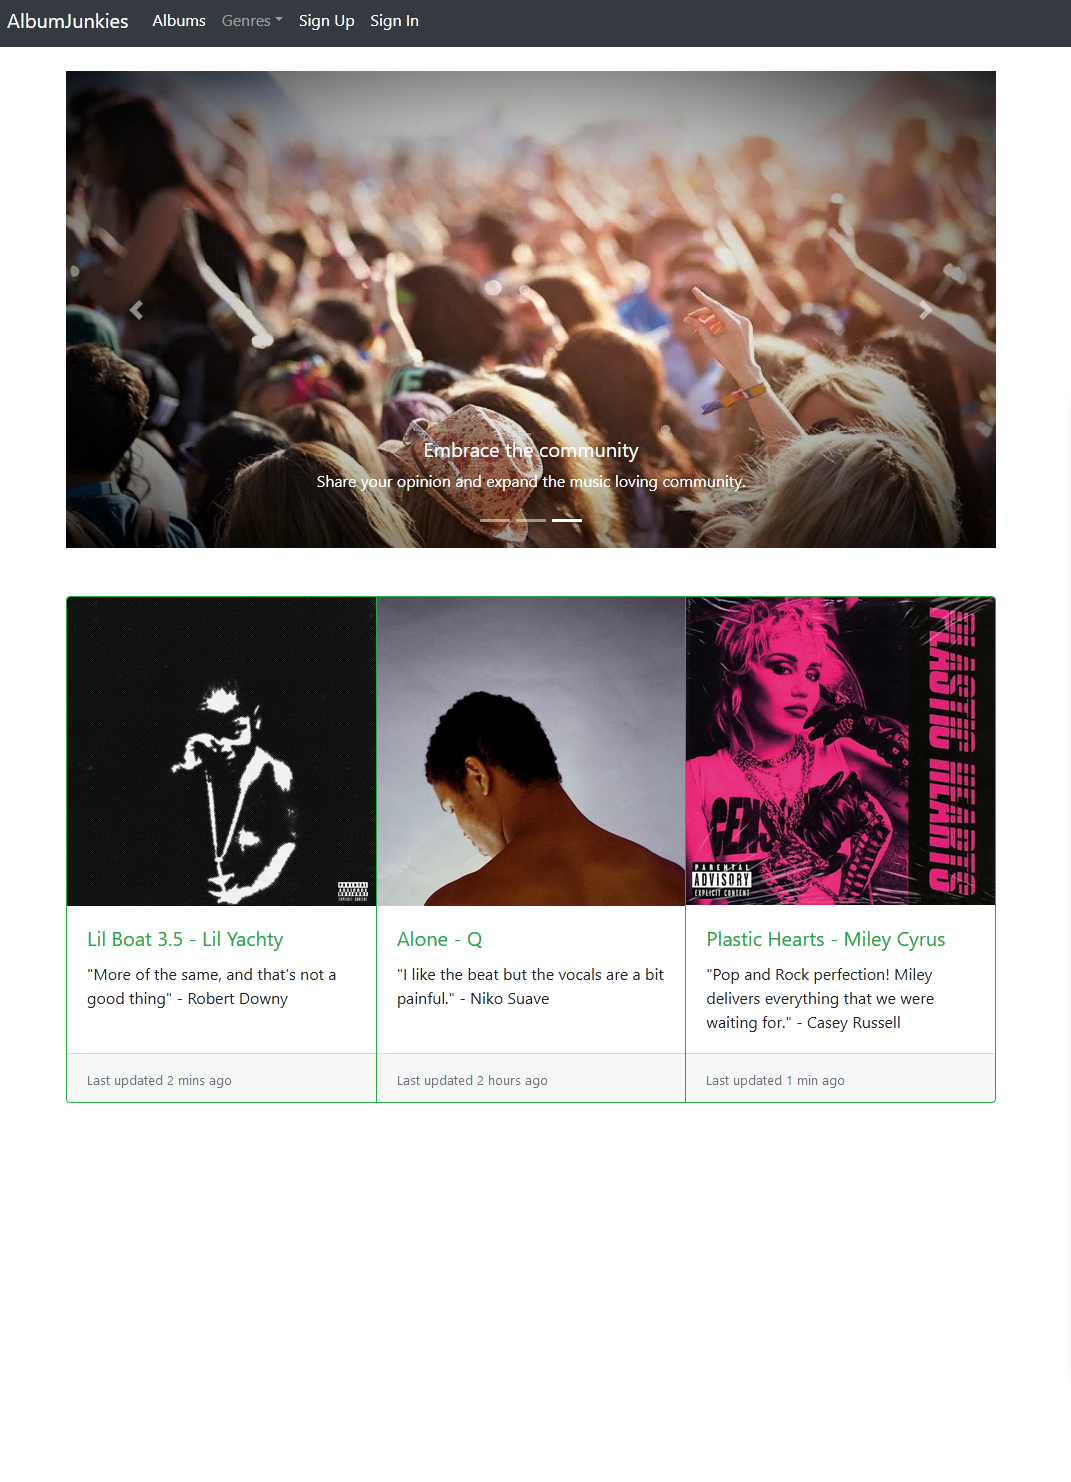
I started by adding a Carousel from bootstrap and added some content and images to kind of explain the purpose of our site to users.
We used to the carousel with captions for our site.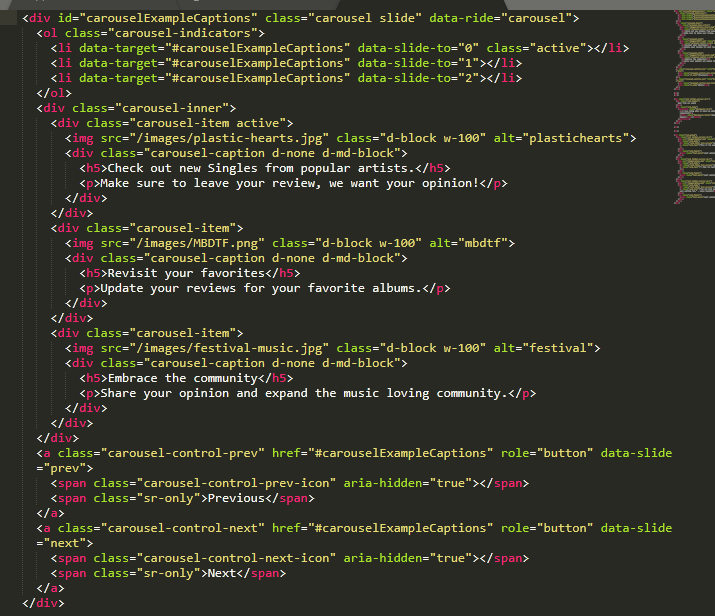
Here is the carousel code with all of the added text and images.
Next we added a card group with footers, to show some reviews on the homepage of new albums, to give a greater idea of site function.
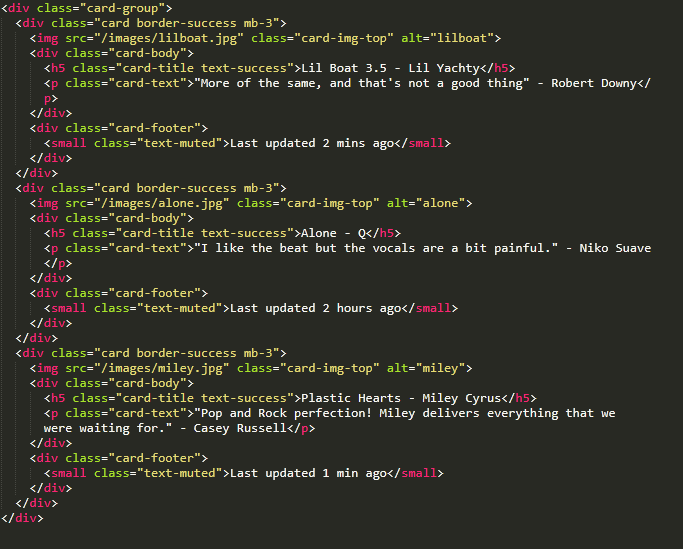
Here is the card group code with all of the added text and images.

Now we should have a site that looks similar to this.
In order to add sign up, log in, log out and edit progfile functionality, we will be using a gem called Devise. RubyGems is a package manager for Ruby that allows us to add in Gems, which are essentially libraries that you can install and use in your project. It's a huge aspect of the Rails framework and helps us add useful tools to our site without having to reinvent the wheel.
So first we want to take a look at the Devise documentation. Which can be found here. And navigate to the "Starting with Rails?" section. Here we will find valuable information to help us install the Devise gem.
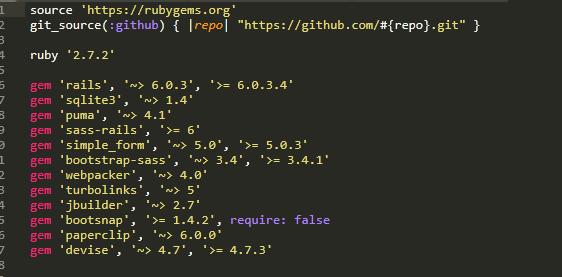
In order to install the Devise gem, we need to edit our GemFile. First make sure you do not have the rails server running in Git bash terminal. Then in Sublime, navigate to the Gemfile.
We need to add the "gem 'devise'" line as it appears in this image.
Save your project and return to the Git Bash terminal for your root project directory. And run the following command:
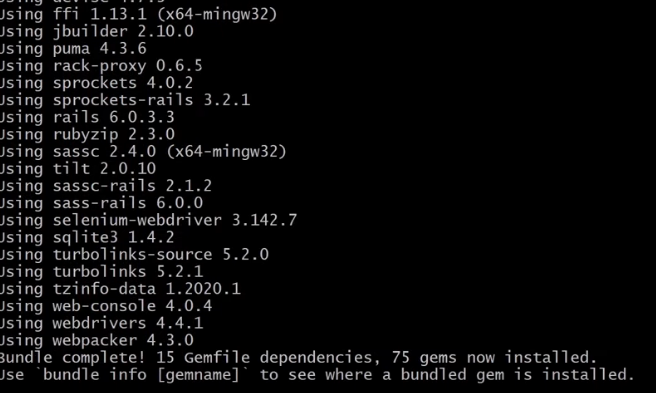
If all installed correctly you should see this screen.
Next run this command:
This command will run but it will also give us some instructions that are essential to correct installation.
The first direction is to make sure that you have a default url option in your environments files. To do this we navigate to our config/environments/development.rb file. And at the end of the file, right before the last 'end' tag add this line:
If you are publishing this site, you will add the same line in the config/environments/production.rb file, but with your host and url.
Next we need to configure flash messages. This will add functionality to show alerts on the page for when the user creates an account, logins in, etc.
To do this we need to create another partial. So in our app/views/layouts folder create a new file and save it as "_alerts.html.erb".
Next we are going to grab and alert from bootstrap and paste it into this file.
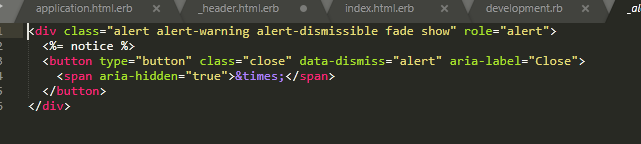
We used dismissable alert in the bootstrap documentation.
Finally we need to add a render tag in our application.html.erb file
Should look like this.
To do this run this command in the Git Bash terminal:
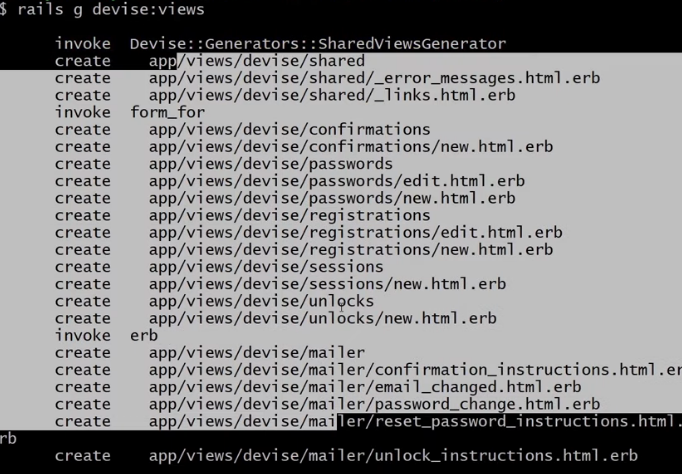
This command should create all of these helper files in our app/views/devise folder.
The way devise works is it stores user login and session info into a database. We need to create a model for this functionality and push it to our dev database. To do this run the following command:
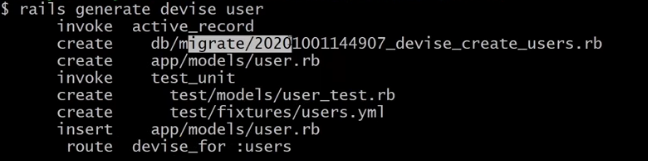
Rails has now generated all of these files for our db model.
Now we need to migrate our database model to the database. Run this command in the terminal:
Lastly we need to setup routes so we can now acces the login functionality and add them to our navbar. And while we do this we will use the "user_signed_in?" devise function to make our navbar dynamic. To do this navigate back to the header partial file we created earlier and with in your navbar unordered list tags that contain all the navbar links.

Add this code into your header file.
What this code does is setup navbar links that route to the devise login, logout, edit profile and signups views. Also since we created if statements using the "user_signed_in?" function, when a usere is not logged in, they only see sign up and login. And when they are logged in they see, sign out and edit profile.
If we start our rails server and navigate back to our page.
Our homepage should now have the Sign Up and Sign in Buttons.
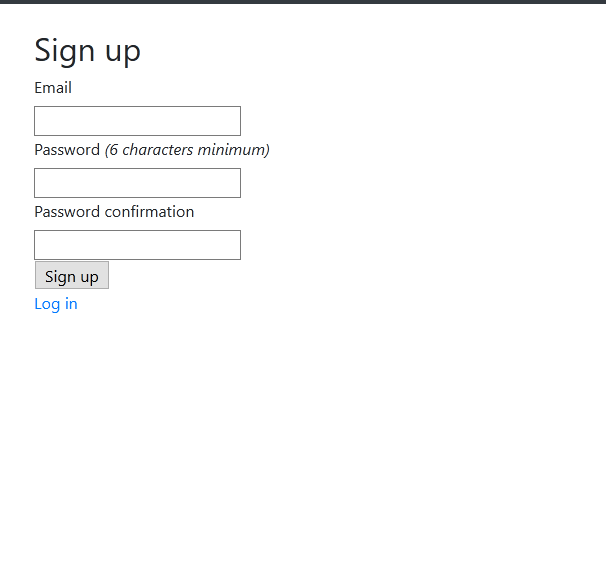
Sign Up page.
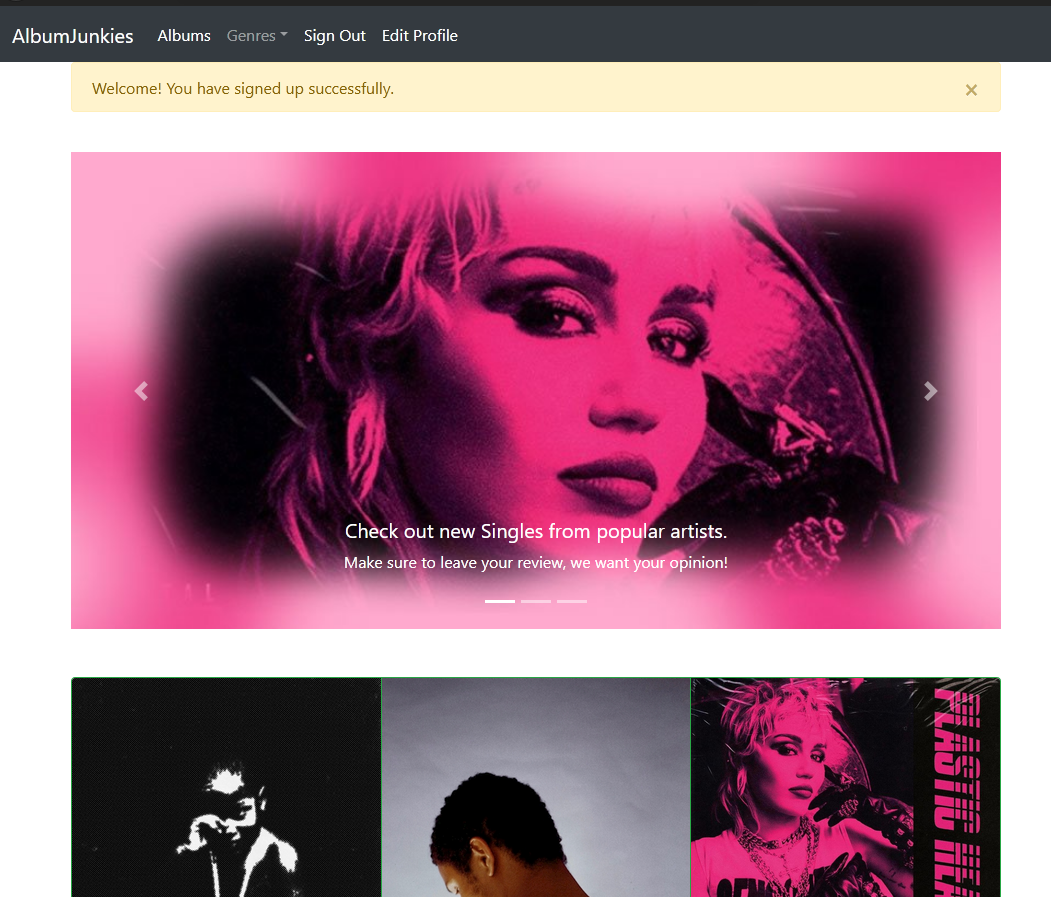
Successful signup with alert working.
We need generate an album model in our Git terminal:
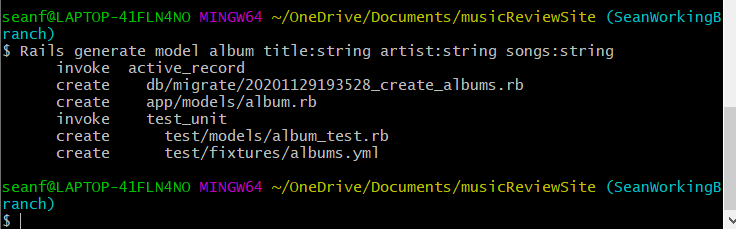
Rails will generate all of these helper files.
Then we need to migrate our model to the Database:
Next a route to our routes.rb file
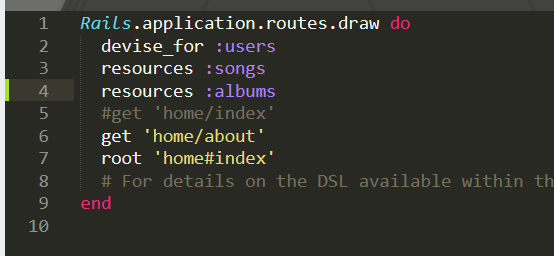
Now our URL can access the albums model
Now in our app/views/albums folder we need to create a new file and name it index.html.erb. This will be the page we go to when we navigate to albums.
We now need to add the simple-form and bootstrap-sass gems to help us style the CRUD scaffold of our applciation.
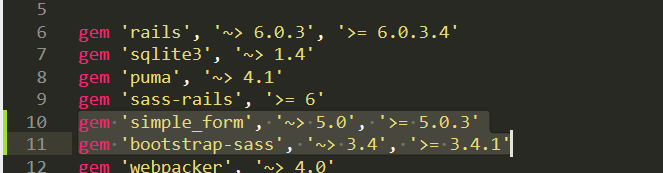
Add these to your gem file.
Then run bundle install in the Git terminal
Then we need to creat a controller to handle the CRUD structure.
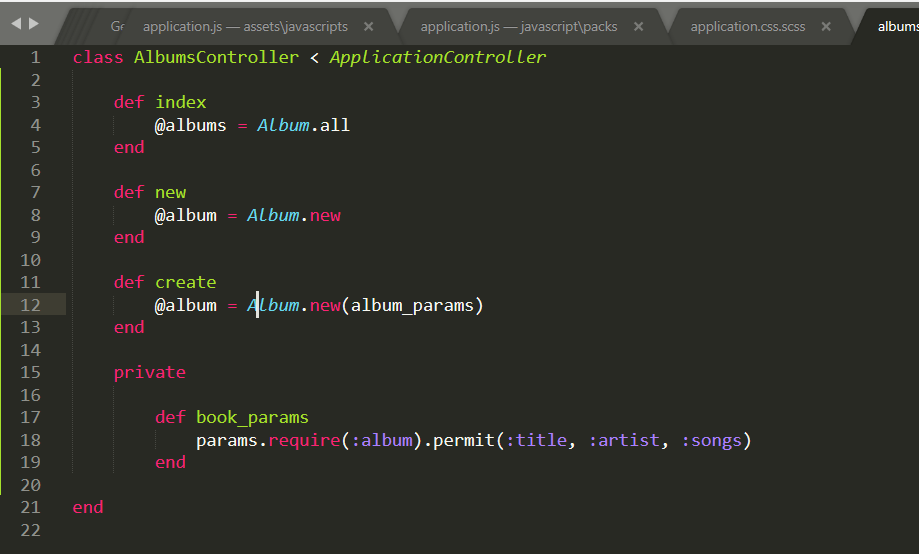
This is a simple controller, we will be adding more to it.
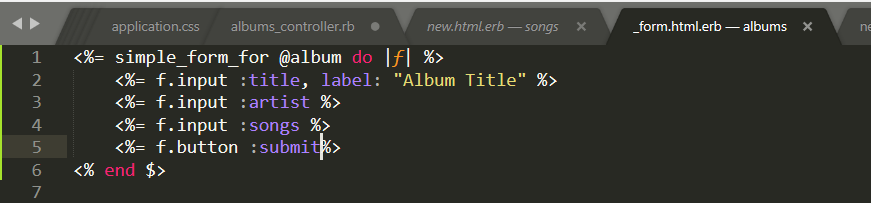
In the form partial view, we then need to add the code for the inputs of a new album.
To do this we need to generate a migration that adds user_id to albums. To do this we run this command in the Git bash Temrinal:
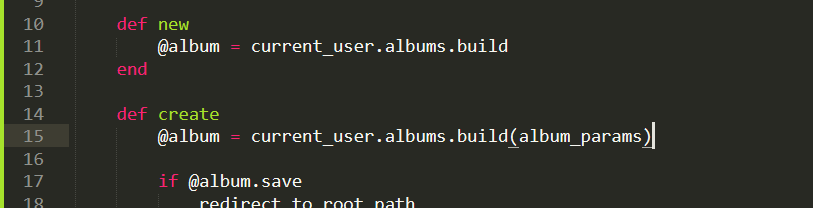
Then edit the albums controller so that new albums are associated with teh current user.
Next we need to edit our albums model...

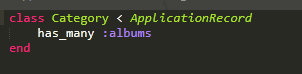
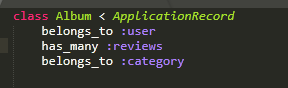
Albums belong to user.
And our user model
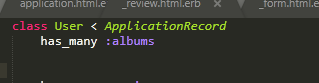
User has many albums.
Then we need to make sure that only registered users can edit or add albums. So navigate to the app/views/albums/index.html.erb file and add the following.

This will make it so that only users who are signed will have access to adding albums.
Then go to the app/views/albums/show.html.erb file and add the following.
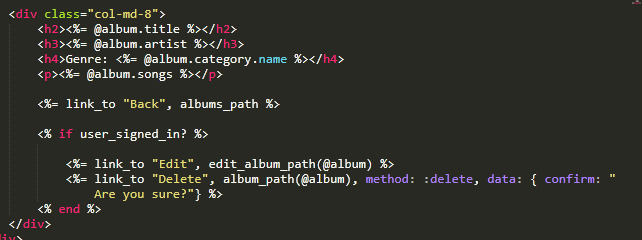
This will make it so that only users who are signed will have access to editing and deleting albums.
The process for creating and associating reviews is the same as with albums and how we associated them with users.

These are the associations needed for the review model.
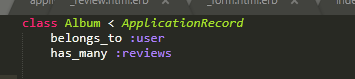
These are the associations needed for the album model.
Then we need to create another form partial for the reviews and link it to the show views for albums.
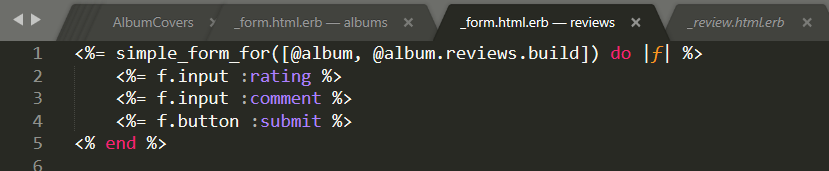
This is what the form partial should look like.
This is what the form partial should look like.

Then add this code to the app/views/albums/show.html.erb. This will show the reviews when the user clicks an album.
To create this model we want to run:
Then we need to create a migration to our database.
Then migrate:
Then we need to add the appropriate associations to our category model.
This will associate review with an album and a user.
This will associate review with an album and a user.

Add this into the new method of your album controller
Now we need to make the categories, to do this navigate to the Git Bash Terminal, and run 'rails c' to enter the rails console. And to create our categories by running "Category.create(name: "categoryName")"
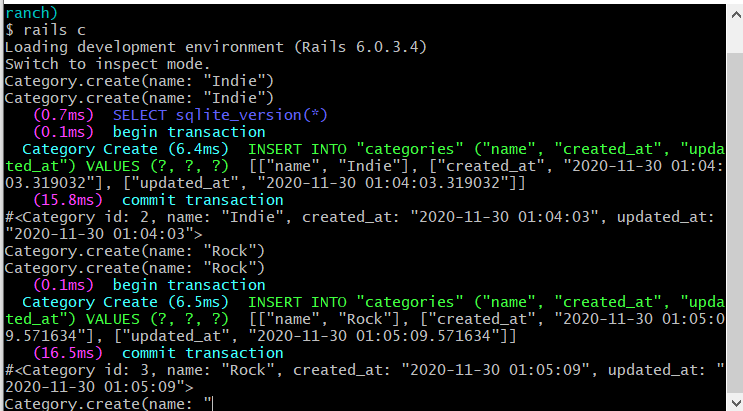
Adding all of our categories
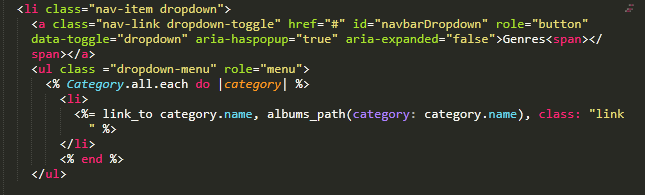
Lastly, we need to add this code to our navbar so we can access the categories with oru dropdown menu.
To do this we need to install ActiveStorage. So in our Git Bash terminal we need to run:
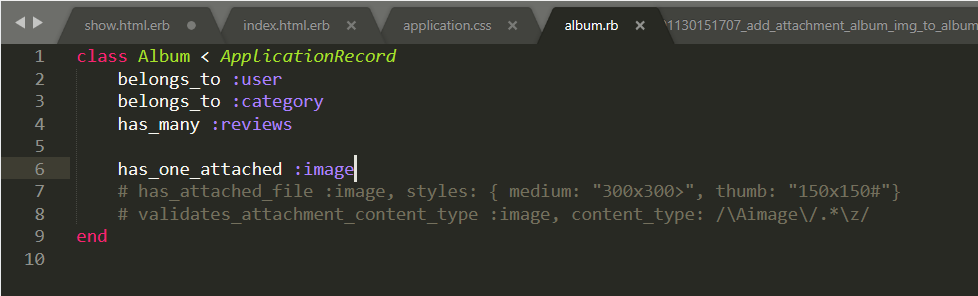
We need to edit our album model so it has one attached image.

Then in our form partial for albums we need to add a field to add an image.

Then edit album_params method so that it requires and album image.
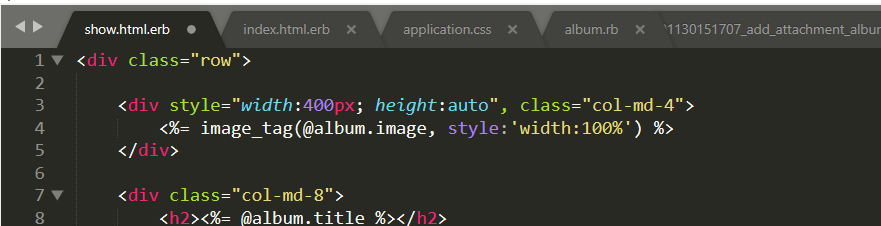
Then edit album view show.html.erb file to include a place to show images.
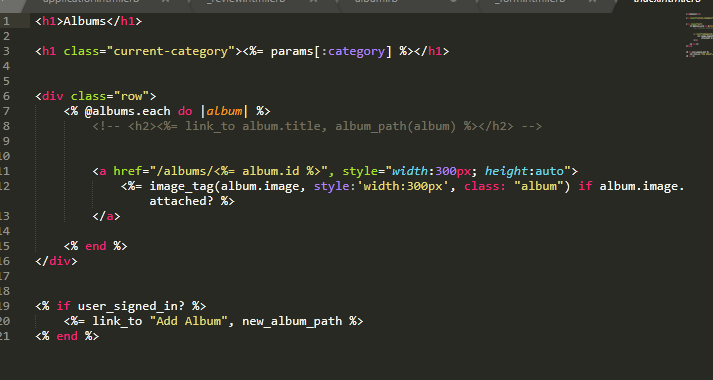
Then edit album view index.html.erb file to show all album images.