What are we learning?
Ruby on Rails is written in programming language, Ruby, created by Tukihiro Matsumoto in 1995. Ruby is a mix
of multiple languages such as Ada, Lisp, and Perl. Rails was created in 2003 by David Hansson,
he extracted Ruby on Rails and officially released it in July of 2004. Ruby on Rails or just Rails, is an open source
server-side web application framework that is written under the MIT License.
Importance/Relevance of Rails

There are many reasons for using Ruby on Rails. It is very cost-effective,
this is because it is 100% free since it is an open-source framework. It is easy to use
and is very flexible to developers and allows them to develop fast. This is because it uses frontend and backend abilities.
Rails is relevant to CIS 3344 because our projects are completely based on web developments and working with rails
on certain projects can make things easier. Rails can be a tool that can be helpful in the future as well,
which will cause us students to be better developers.
Let's install/setup Ruby on Rails!
Software Needed
- Ruby
- SQLite3
- Node.js
- Yarn
- Sublime Text
- A terminal
Installing Ruby
Rails needs Ruby version 2.5.0 or later. To install Ruby on windows,
you will need to install Ruby Installer.
Installing SQLite3
You will also need the SQLite database installed, the link to download it can be found at SQLite3.
Installing Node.js and Yarn
Node.js needs to be installed to manage your application's javascript.
A guide to downloading Node.js can be found at Node.js.
Yarn also needs to be installed to manage your application's javascript.
A guide to downloading yarn can be found at Yarn.
Sublime Text
Sublime Text needs to be installed to write your source code editor.
A guide to downloading Sublime Text can be found at Sublime Text.
Terminal
You will need a Terminal, the one used for this tutorial will be gitBash, but you can use any other
kinds that are similar if you prefer, such as ConEmu, PowerShell, Hyper, etc.
Let's finally install Rails
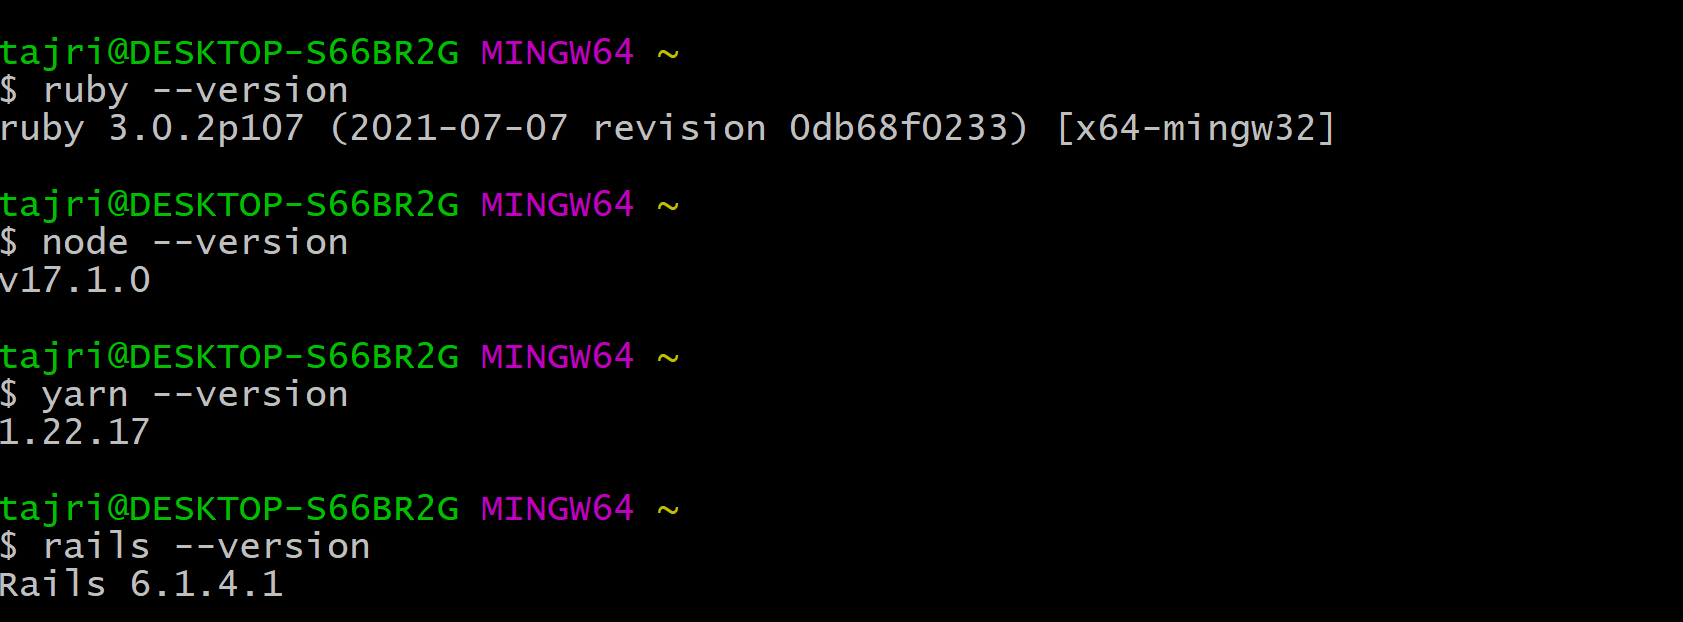
To install Rails, type in "gem install rails" into your chosen terminal. You want to make sure you have the latest version of rails,
so in your command, you should run "$ rails --version", and you want to have it say "Rails 6.0.0" or above. You should actually do this for some of the things
you downloaded to make sure that everything installed correctly. Look at the picture below to know which ones to check.
Starting a new application
So now, you have everything installed and ready to go. Here you will be showed how to
create an email application using rails.
You want to open your terminal, go to a directory where you can create files and run "$ rails new railsEmail".
This will create a Rails application called railsEmail.
After that is done downloading, you want to run in your terminal "$cd emailWebPage", which directs your terminal to an emailWebPage folder.
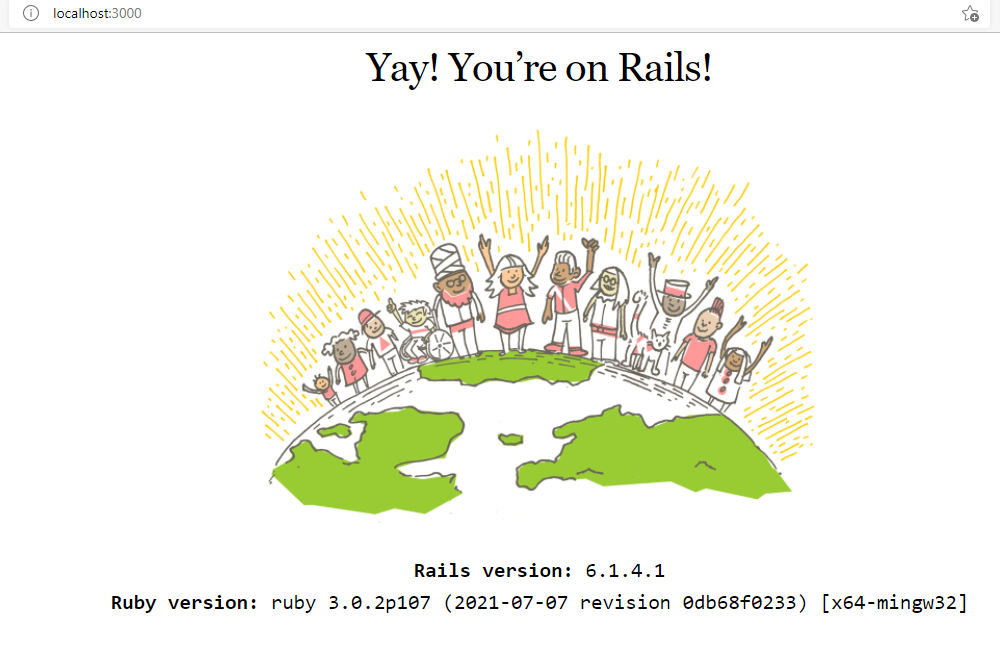
The last thing in the setup stage is getting your Rails application server running. All you have to do is simply type in your terminal,
"$bin/rails server". Open a browser window and go to "http://localhost:3000". You should see this screen pop up.
Let's Code!
How to get started - Creating your Home Page
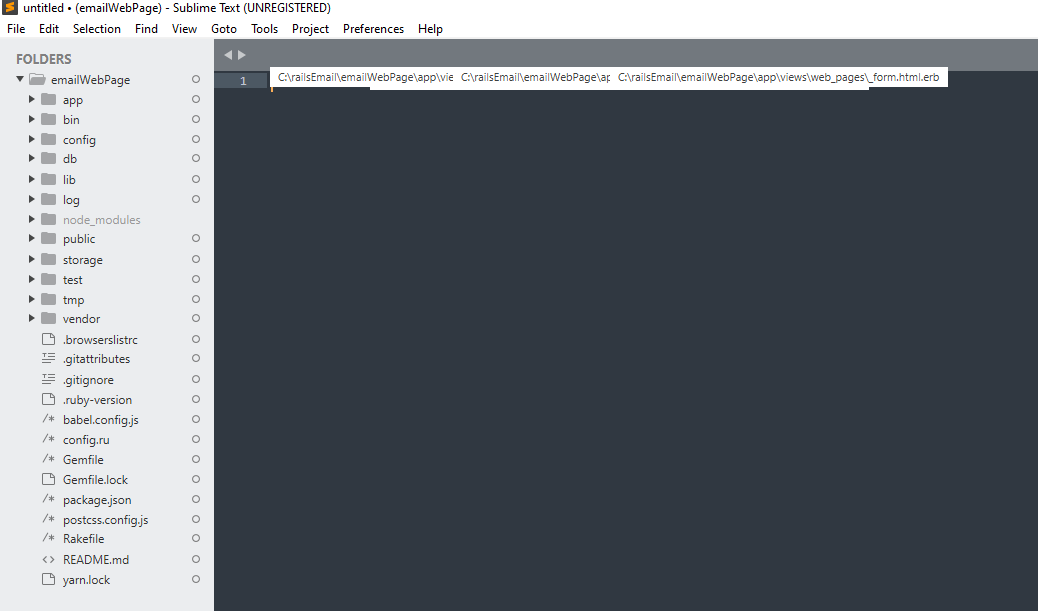
Open Sublime Text, where you will see the folder directory that you created earlier to the left of the screen.
Go to your terminal and run your rails server again if you closed it, if not then enter in the terminal
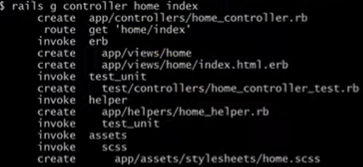
"rails g controller home index". This is what creates your webpage for you. After pressing enter, this is what your
screen should look like:
When you type in "localhost:3000/home/index" into your web browser, then you will get something similar to this screen.

Congratulations, you have created your first web page using Ruby on Rails! To edit the contents on the web page, go to sublime text,
at the left side of the screen where your email folder should be, go to app --> views --> home --> index.html.erb
There you can edit your home page as much as you want to. We used bootstrap to edit all of our pages, it is a very easy and quick way of
doing it.
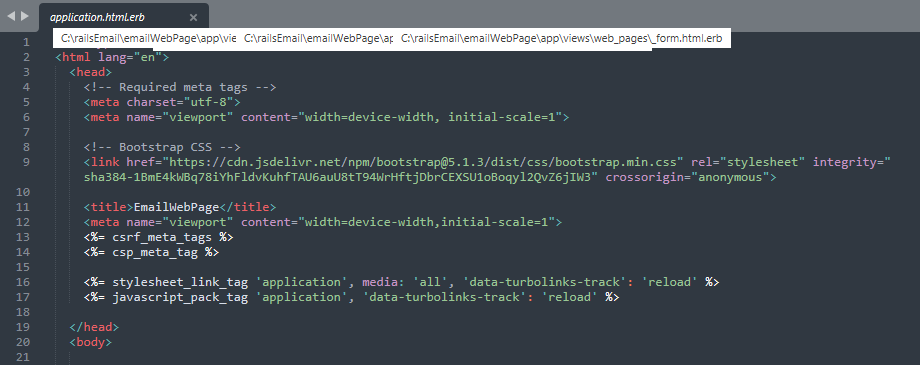
The great thing is that bootstrap is already downloaded into your project, in sublime text, if you go to
apps --> views --> layouts --> application.html.erb
then you will see where bootstrap had been downloaded.
Go to getBootstrap.com and there you can find all kinds of things to help you and all you have to do is
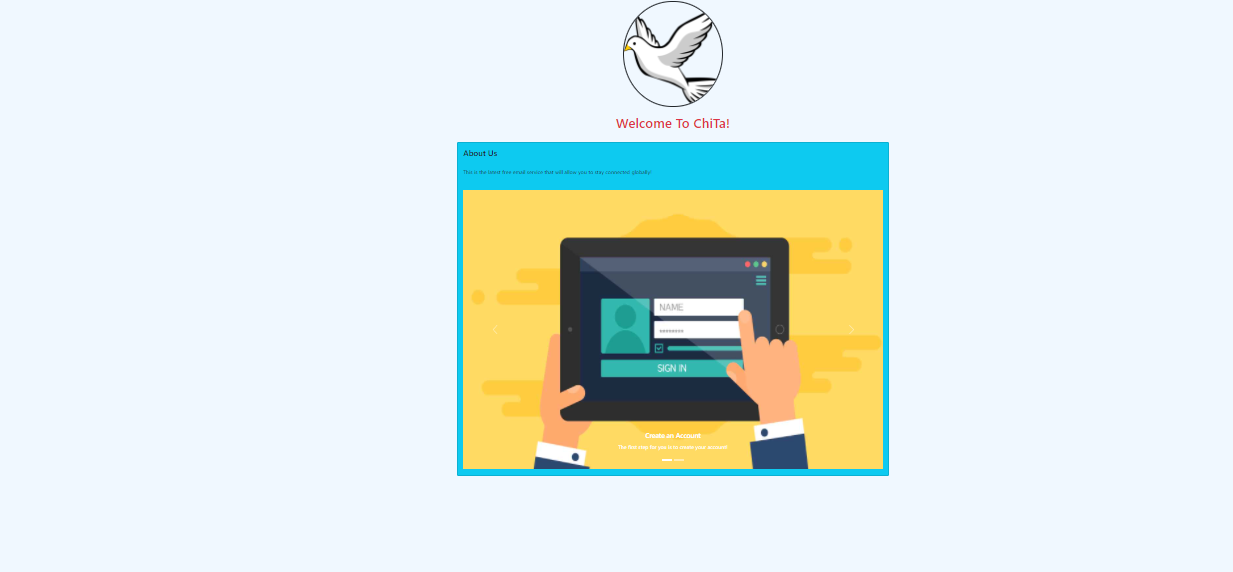
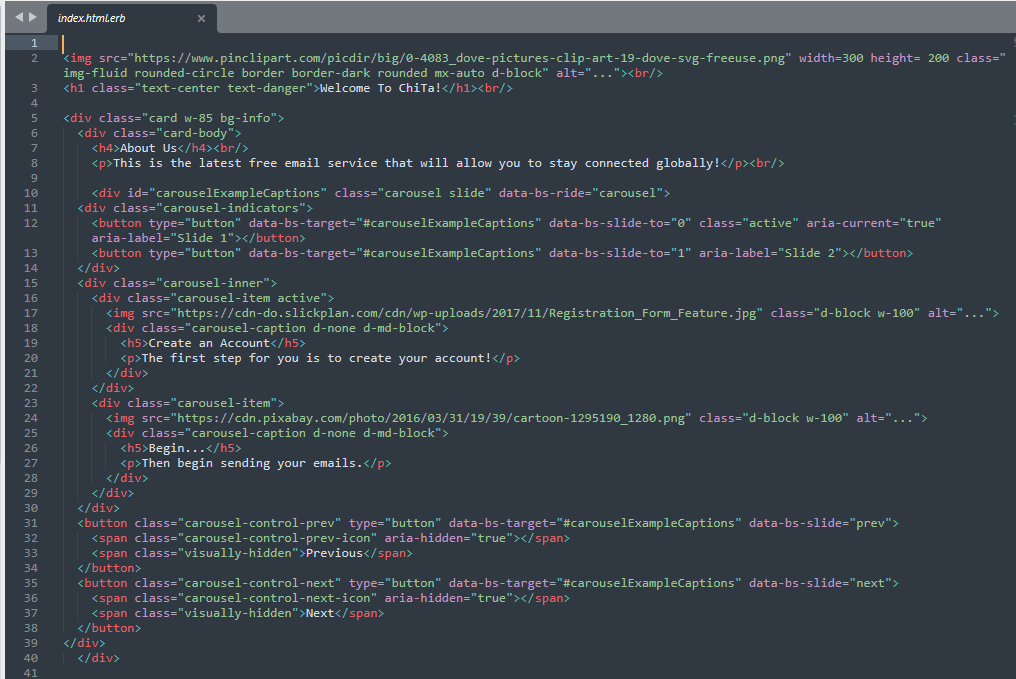
copy the code from there that fits what you're trying to create. For our home page we wanted to keep things simple but a little bit informative
so we decided to put a carousel into a card. The codes for these selections can be found in the Components section on the bootstrap site.
This is how our finished home page looked like, including the code.
Enter in "localhost:3000" into your web browser again, you will see that it takes you back to the
rails page not the page you just created. We don't need that page, now that you have your home page done, we want to now make
it the page that is gone to when you enter "localhost:3000" and to do that, we have to make it the root page.
Go to config --> routes.rb, you will see a line that says "get 'home/index'", you want to comment that out
and type in root 'home/index' instead. Go back and refresh your "localhost:3000" screen in your browser and voila, you should now
see the web page that you created.
Creating a Nav Bar
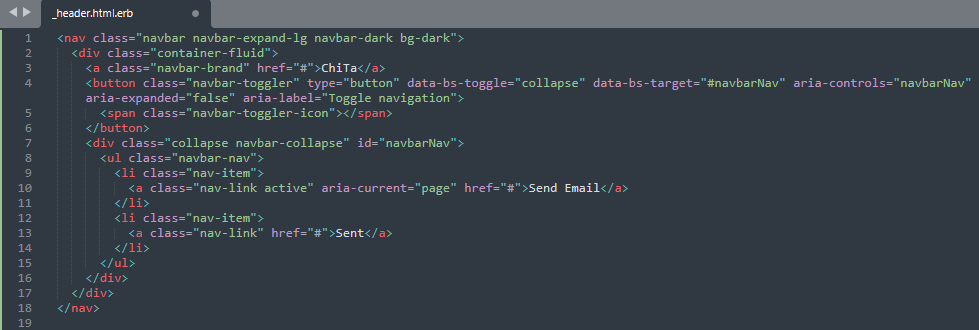
To create a nav bar, simply go to app --> views --> home and create a new file and name it
"_header.html.erb". Then go to bootstrap, the section for navbar and choose which navbar style you like and copy the code
into your "_header.html.erb". Then go to app --> views --> layouts -->application.html.erb
and there insert this line of code:
<%= render 'home/header'. This will allow your navbar to be shown in every page that you create.
You can go ahead and edit the code from your nav bar to fit to your style. As you see, none of the buttons in the nav bar work, you have to create a link from the specific button in the nav bar to a specific page.
For example, to make the 'ChiTa' part of our nav bar to go to the home page, we inserted this line of code.
<%= link_to 'ChiTa', root_path
, class: "navbar-brand" %>
. Now when we click on the "ChiTa" button in our nav bar, it takes us back to our homepage. That is how you create a nav bar!
Database
Now it's time to create a "Sent" page where users can view emails that they have sent and also a
"Send Email" where users can "send" an email. To do this, you need to create a database to store things that one needs
in an email, such as recipient, subject, and the email message. Go to your terminal and enter in this code:

Then in your terminal, enter in rails db:migrate This creates a table in your
rails folder that stores information on recipients, subject of an email, and the actual email message.
When you go back to your site, you will see that you're able to send a new email,
as well as read past emails that you have sent, or delete an email. Rails literally creates
the pages for you. See how easy that was?
Next, you want to add your new pages to the nav bar. To do this, you want to go to
your terminal and enter rails routes. This shows the different routes that has been created,
You should be able to see the route to the page for new email is and also for just seeing an email is. Then go to your
header file and like we did with the home page, we added these lines of code:

Now go back to your site, and you will see them in your nav bar.
Devise - Part 1
Now we will learn how to create users, go to Devise and follow the steps
on how to add the gem 'Devise' into your rails folder. After you have generated your devise install and followed the steps in the output,
enter in your terminal rails g devise user then enter rails db:migrate again.
This creates full sign up/log in/edit profile/log out etc. pages. To be able to see this, you will need to add a path from those pages to your header. Follow the
same steps as done in creating the path from send email/emails sent pages to the nav button. When you go back on your site, you will see
that you now have the ability to create an account.
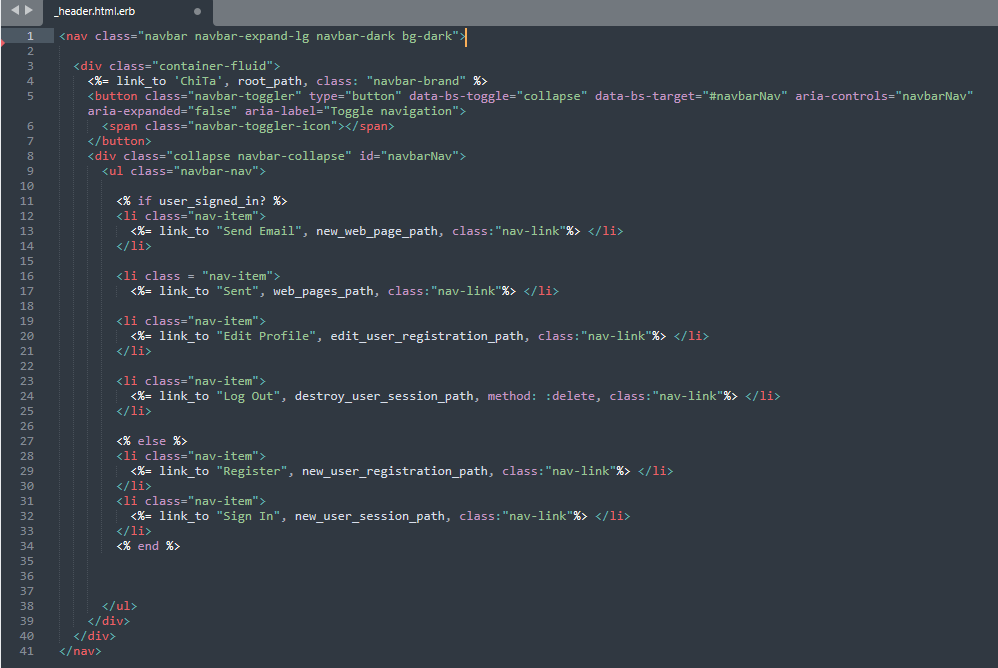
We made it that a user can only see the log out and edit profile buttons when the user is signed in and if user is signed out then they should one be able to see the
Register/Log in buttons in the nav bar. We did that by adding an if statement. This is how our finished nav bar code looks like:
Devise - Part 2
The last thing really that needs to be done concerning user database is creating a way for users to have their individual accounts. If you create two different
accounts, both accounts will show the same emails that are sent even though you are sending the emails from different accounts, we don't want that.
Go to your user.rb and web_page.rb models in the app folder and insert these codes:


Then in your terminal, enter rails g migration add_user_id_to_webpages user_id:integer:index. This assigns each users a user id to help differentiate the users.
Then we added code so that the current user signed in can only see his/her emails

Bootstrap
Rails does such a great job of making your work easier when it comes to creating web pages, however you will need to put in some work
to making it look put together, and we used bootstrap to do so.
Summary
Congratulations, this is the end of the tutorial and we hope you have learned a great lot about Ruby on Rails.
Rails is a great open source code tool that can help in enhancing your web application. Hopefully through this tutorial, you too can create a web applicaton on your own.
You can even go ahead and create an email web page as has been shown
though we covered a lot of important points on Ruby on Rails, please feel free to use the links below
to continue expanding your knowledge. There is always more to learn!


