We are creating a food/fitness blog that has a responsive design and
also implements a web API that allows the user to leave reviews under recipes and
fitness blog posts. The user will also be able to subscribe to service up to the extent of
validating information. No server-side code will be introduced in the blog subscription.
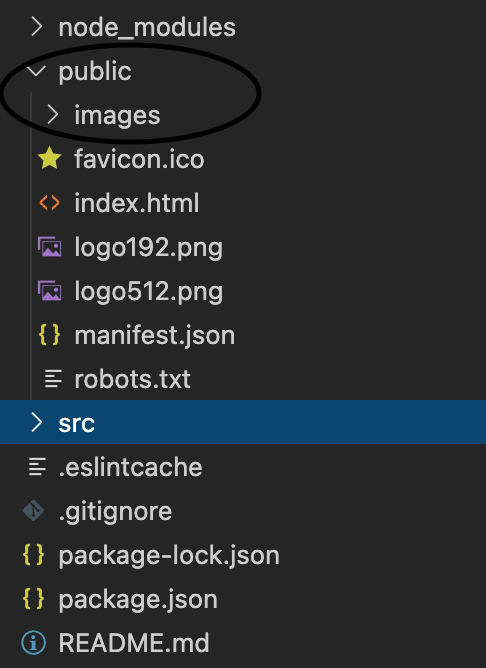
Since the files you current have are for the default page, follow the screen shots
and make sure you only have three files: App.cs, App.js, and index.js. Make sure
each of these files match their respective screenshots. We are only using the files that we need
and getting rid of the files that were auto-created when we created our project in the terminal.
Add an images folder to your public folder. We are going to implement the pictures in this
folder to our blog posts on the blog page.
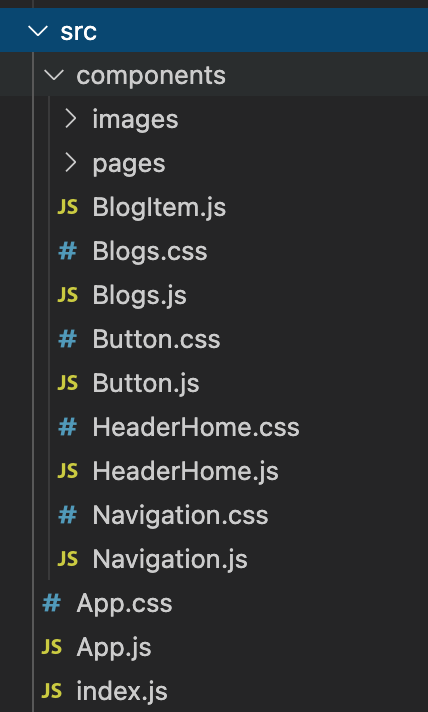
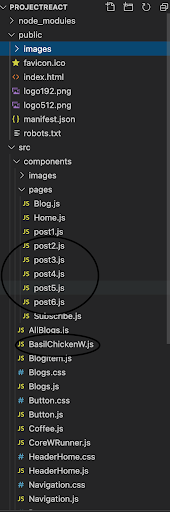
Next, create a new folder inside the source folder named components and add all of
the files and folders to it as shown below.These files will make up the necessary code
to build the pages and set up the navigation in this project.
LETS ADD SOME CODE!
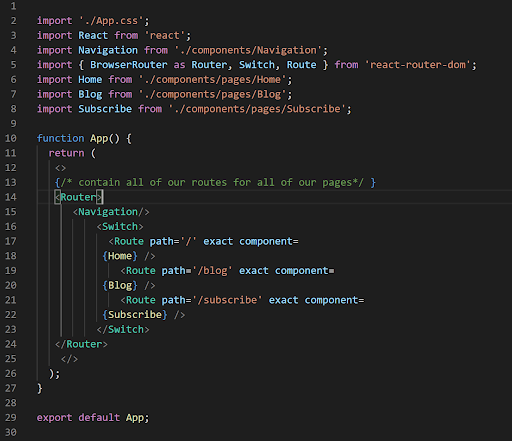
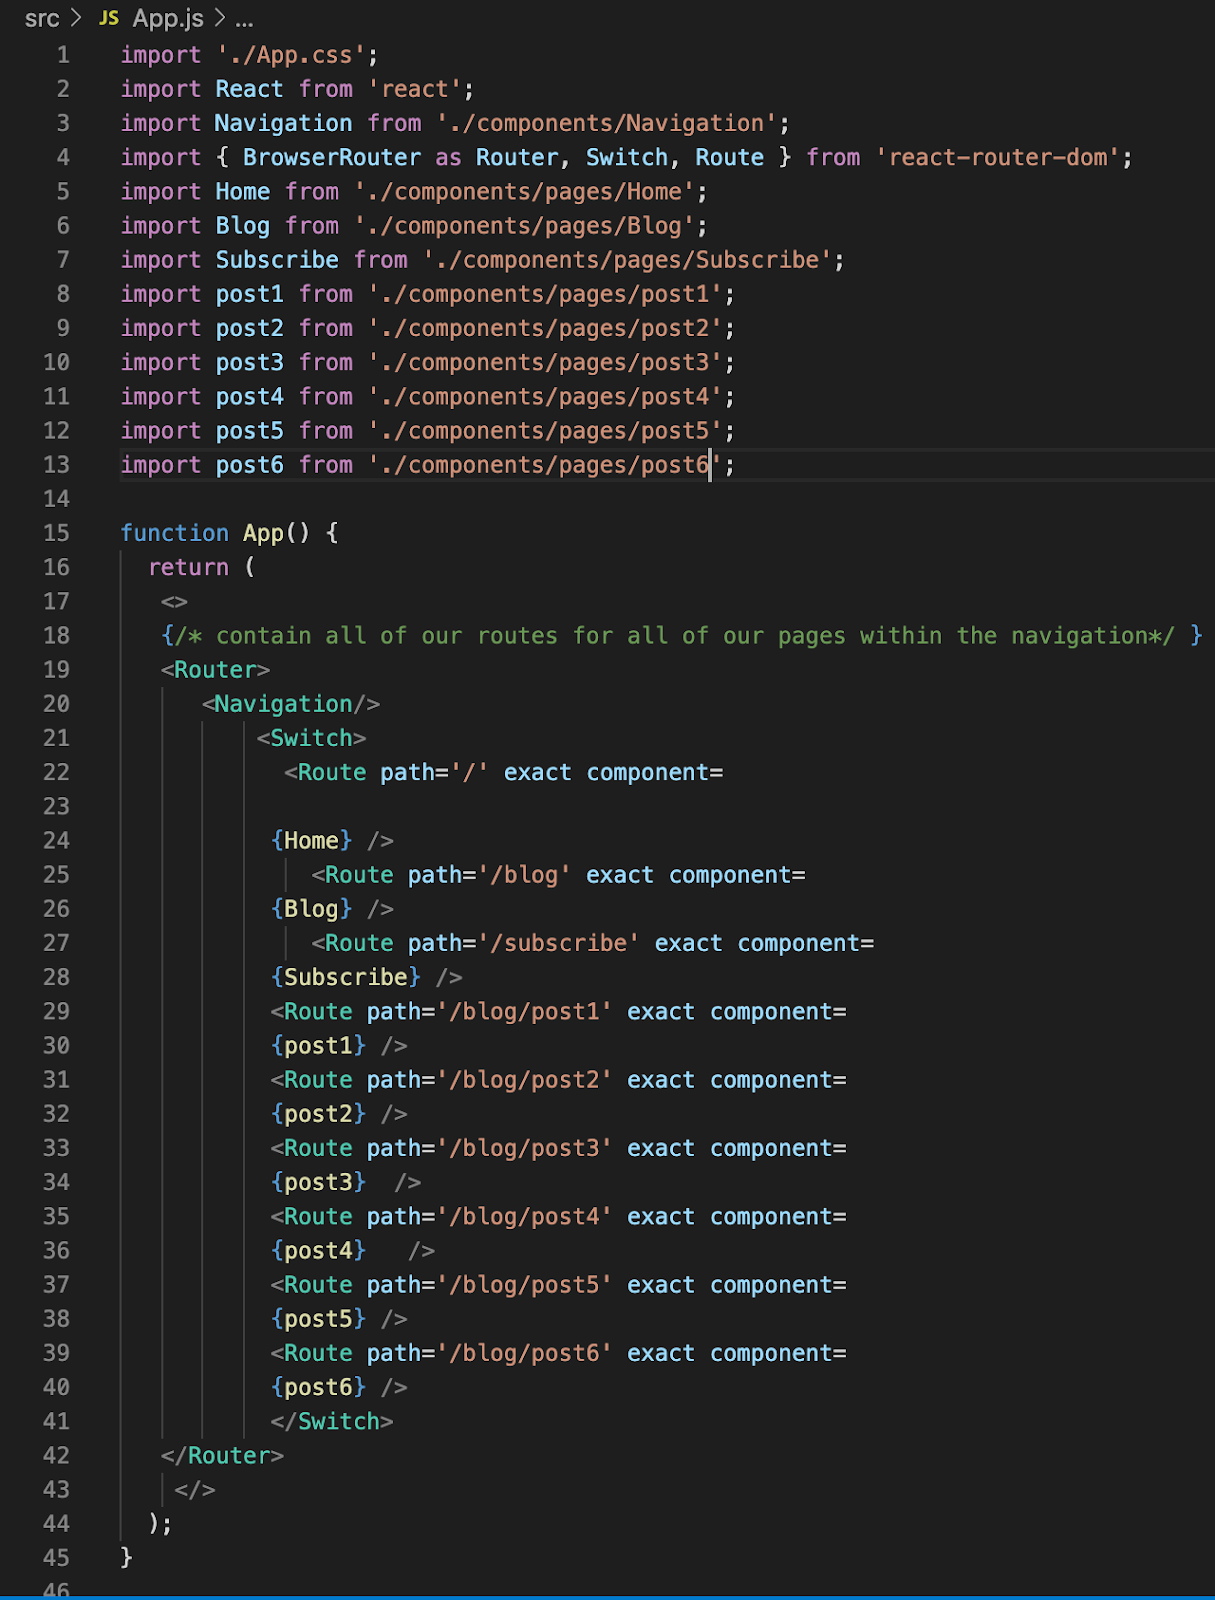
First, lets add some Javascript. App.js routes all of the navigation links to
their specific pages. Take a look at the code below and link off of your pages.
Notice that we import React! We will be importing react in all of our
.js files in this project. We also import Navigation, but we will code
that later.
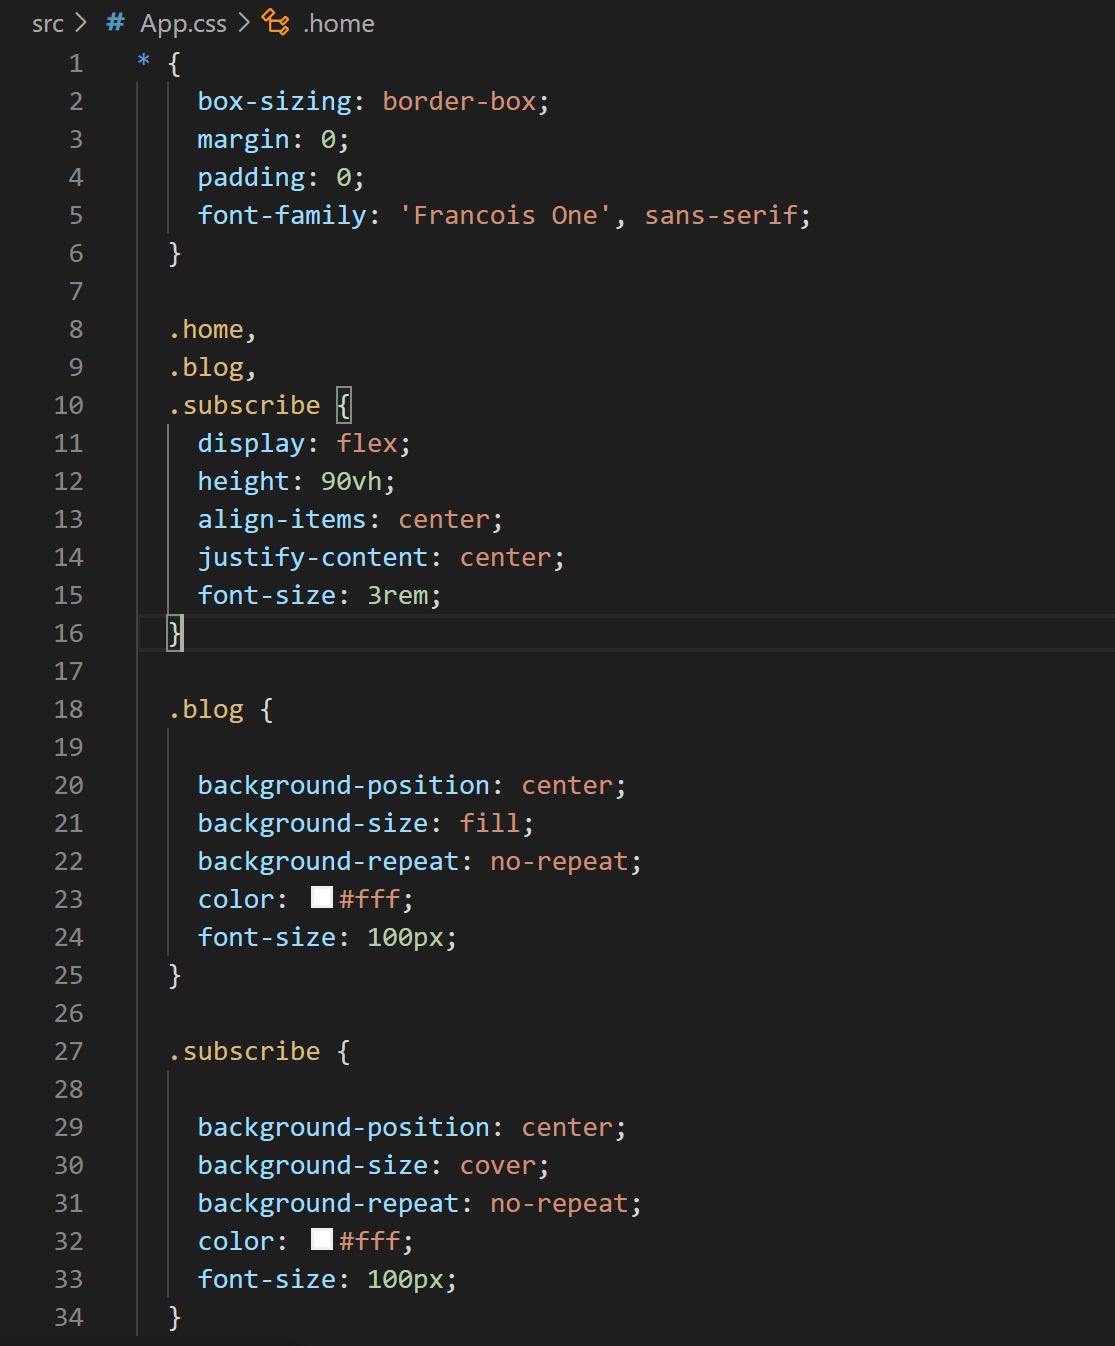
Now, lets style. Open app.css and type in the following code. This is the css
styling for the entire web application. This is how we styled it, but you
can style it however you see fit.
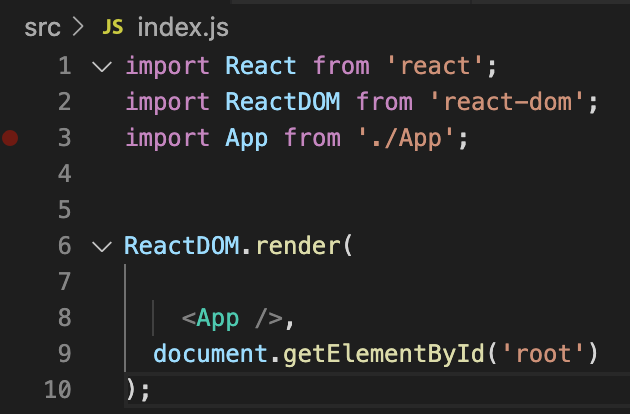
Click on your index.js folder and add the following code. Index.js renders the application
to the DOM.This should be the only code within the index.js. Anything else can get deleted because
we are not implementing them. This calls our pages that are routed in App.js to show up on the index page.
NAVIGATION SYSTEM
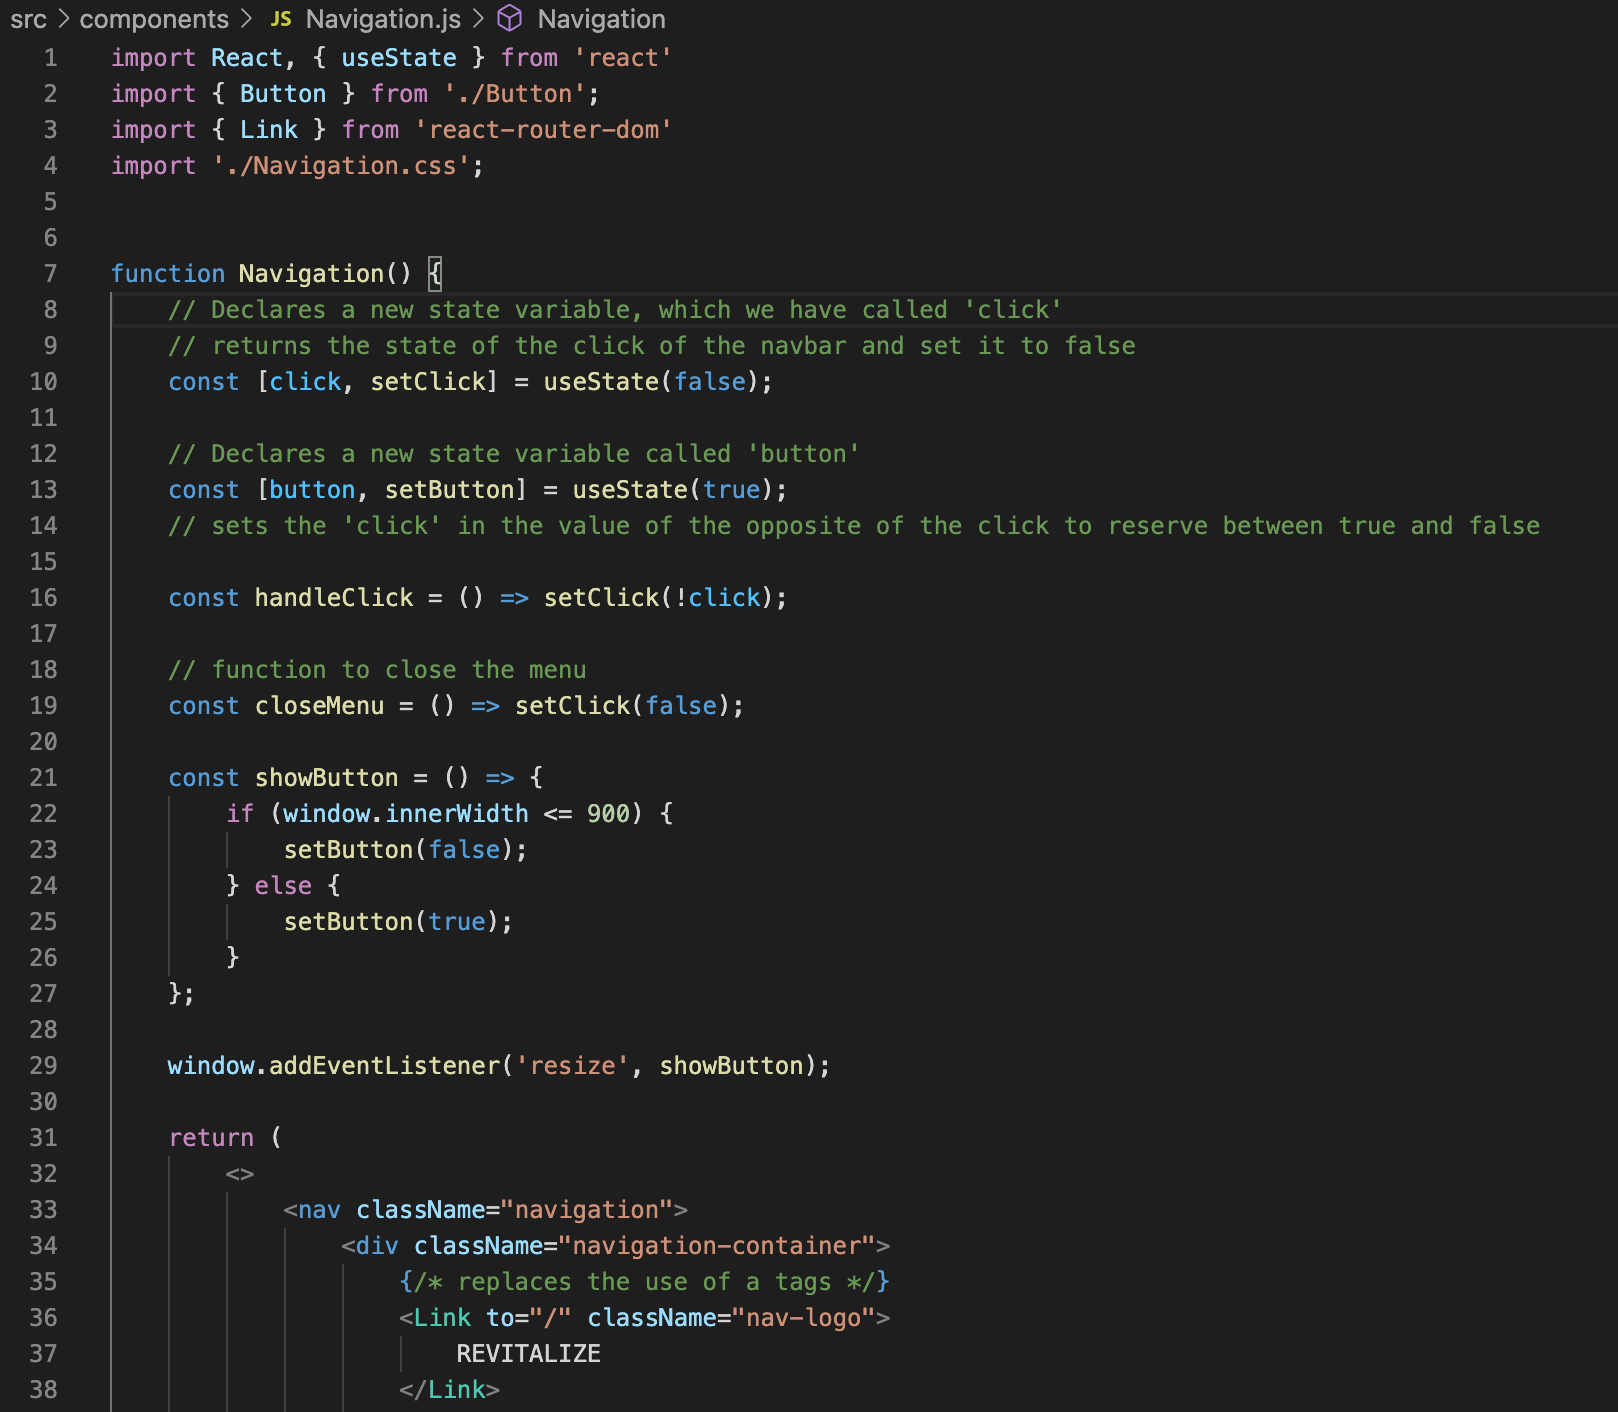
Before we start coding our navigation system, we need to learn about Hooks. React
hooks are fairly new and they let you "hook" into React features. Here, we will be using the useState hook
for our buttons. If we create a state variable, we cannot use this.state to assign or read
the state of the button. Instead, we use the useState Hook directly inside our component. React
will preserve the state between renders and will return the current state and a function to
update that state.
Important: Hooks do not work with in classes. Instead, they allow you to use react without classes.
This can be a little confusing, but take a look at the comments to guide you. You can also use
React's website to help explain this in detail.
Take a look at the funky JSX.
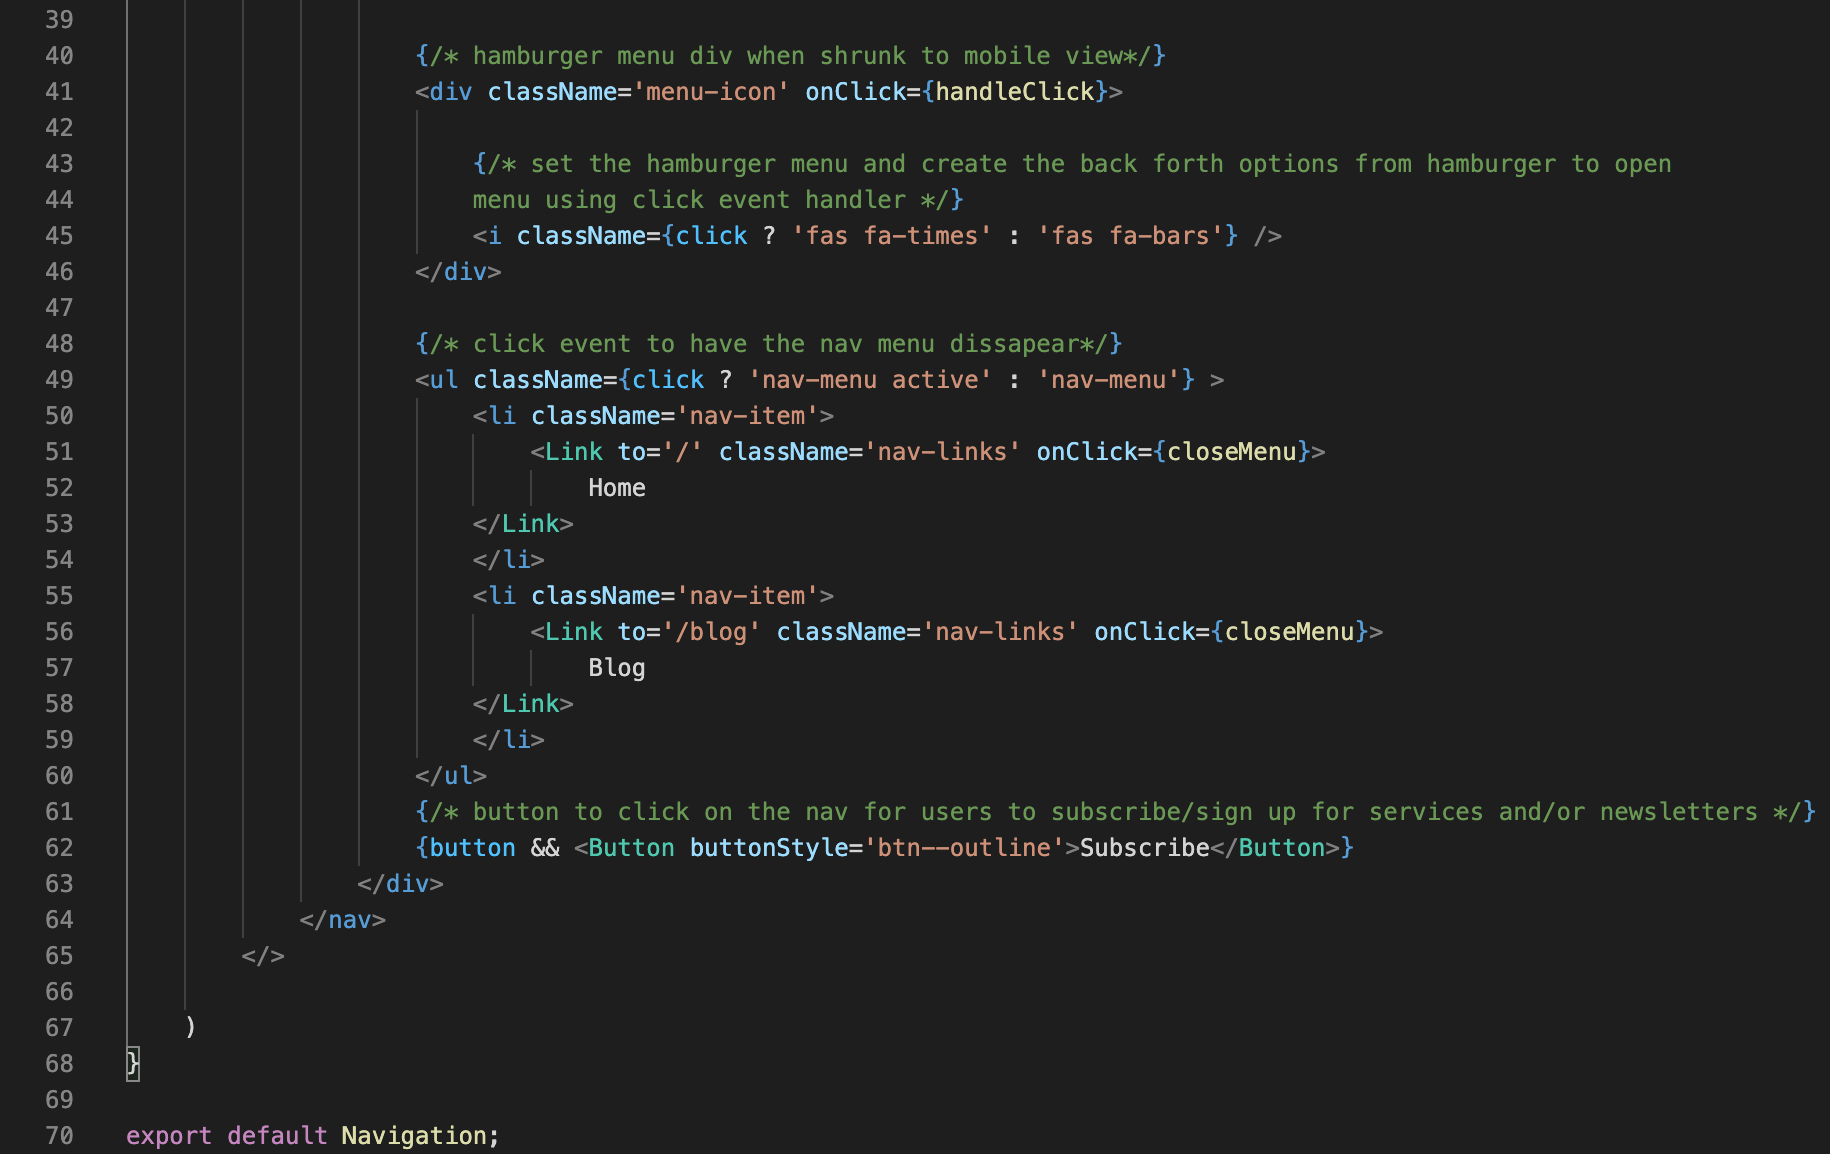
Don't forget to add css to you Navigation.css!
Tip: You can go to terminal and type in npm start to compile and view your code.
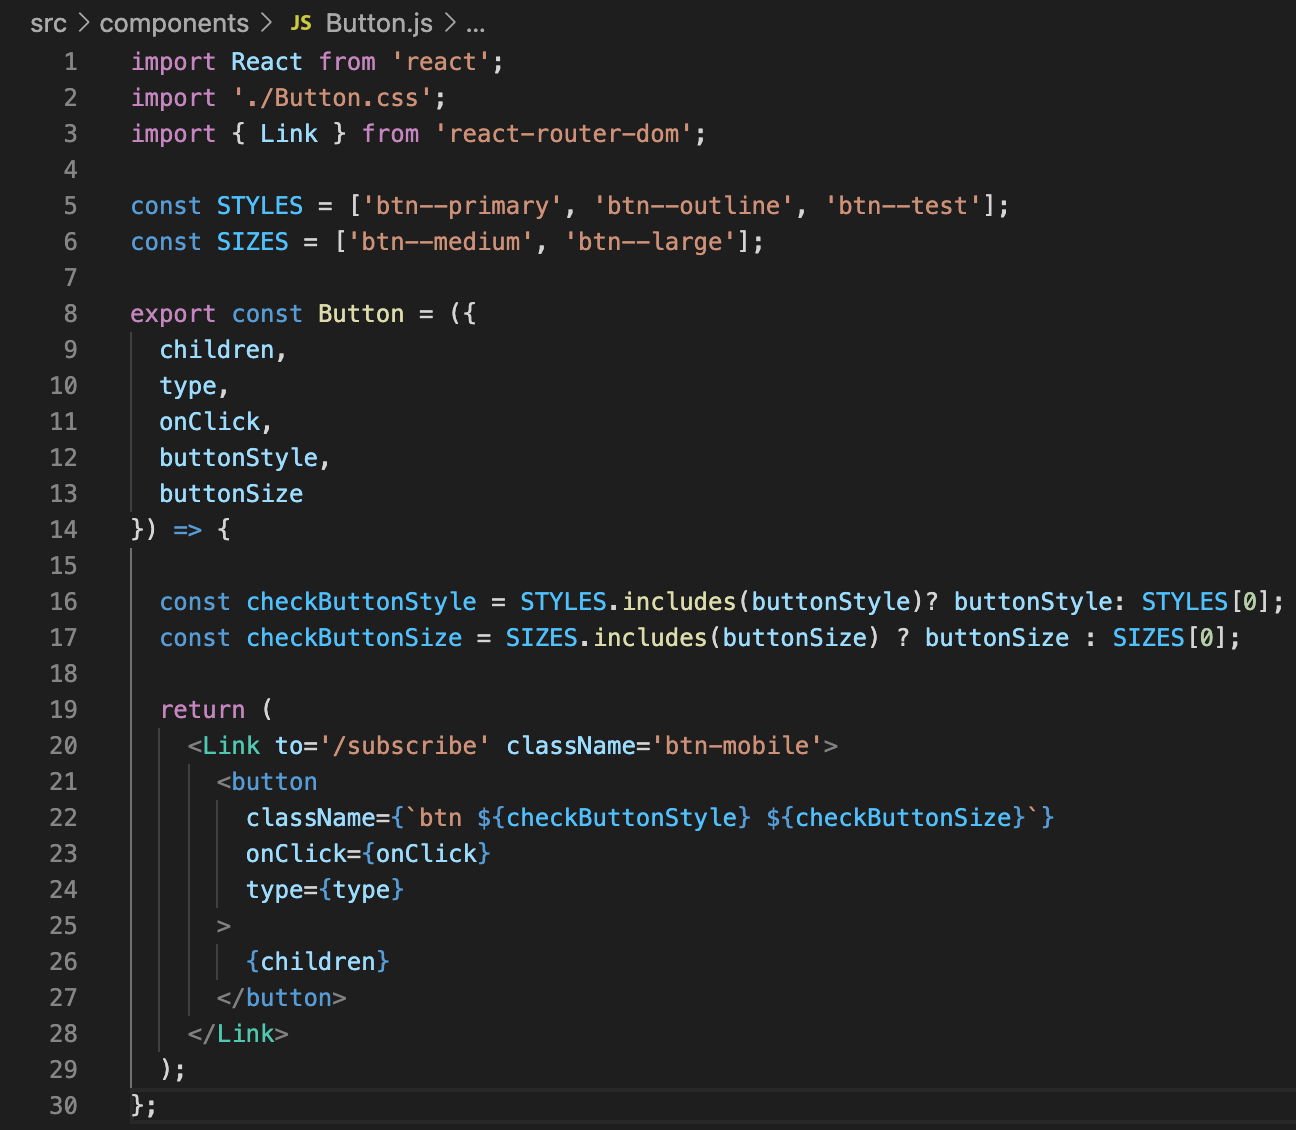
BUTTONS
This is going to be reusable throughtout the webpage. Don't forget to check CSS for the button class to gain a better understanding.
The const checkButtonStyle function is meant to check if the button style is true an dif it's not true then it will set it to the first tyle within the STYLE array.
The STYLE array that are essentially CSS class that are created within Button.js. The SIZES array does the same functionality
as the STYLE array. The main purpose is to style the button when the buttonStyle class is called. If you dont have any classes applied to it,
It will apply the default style and size. This class can be used across the entire app for the purpose of having a set style for the buttons.
Within the return, we pit in a link that will update the buttons to whichever classes that are called based on the onlick function.
This references to the HeaderPage.js button 'Get Started'.
HOME PAGE HEADER
Now we will make the header for the webpage. This part is a little easier. Here,
we will add our first button!
As you can see from our previous example from Button.js, We implented the the style and size of our button
just by calling the classes from Button.js. The 'Get Started' button is called to be "children" to the return statement.
The purpose of this header is to introduce the page to the user and also have the user decide to go to the subscription
page that we are going to later mention.
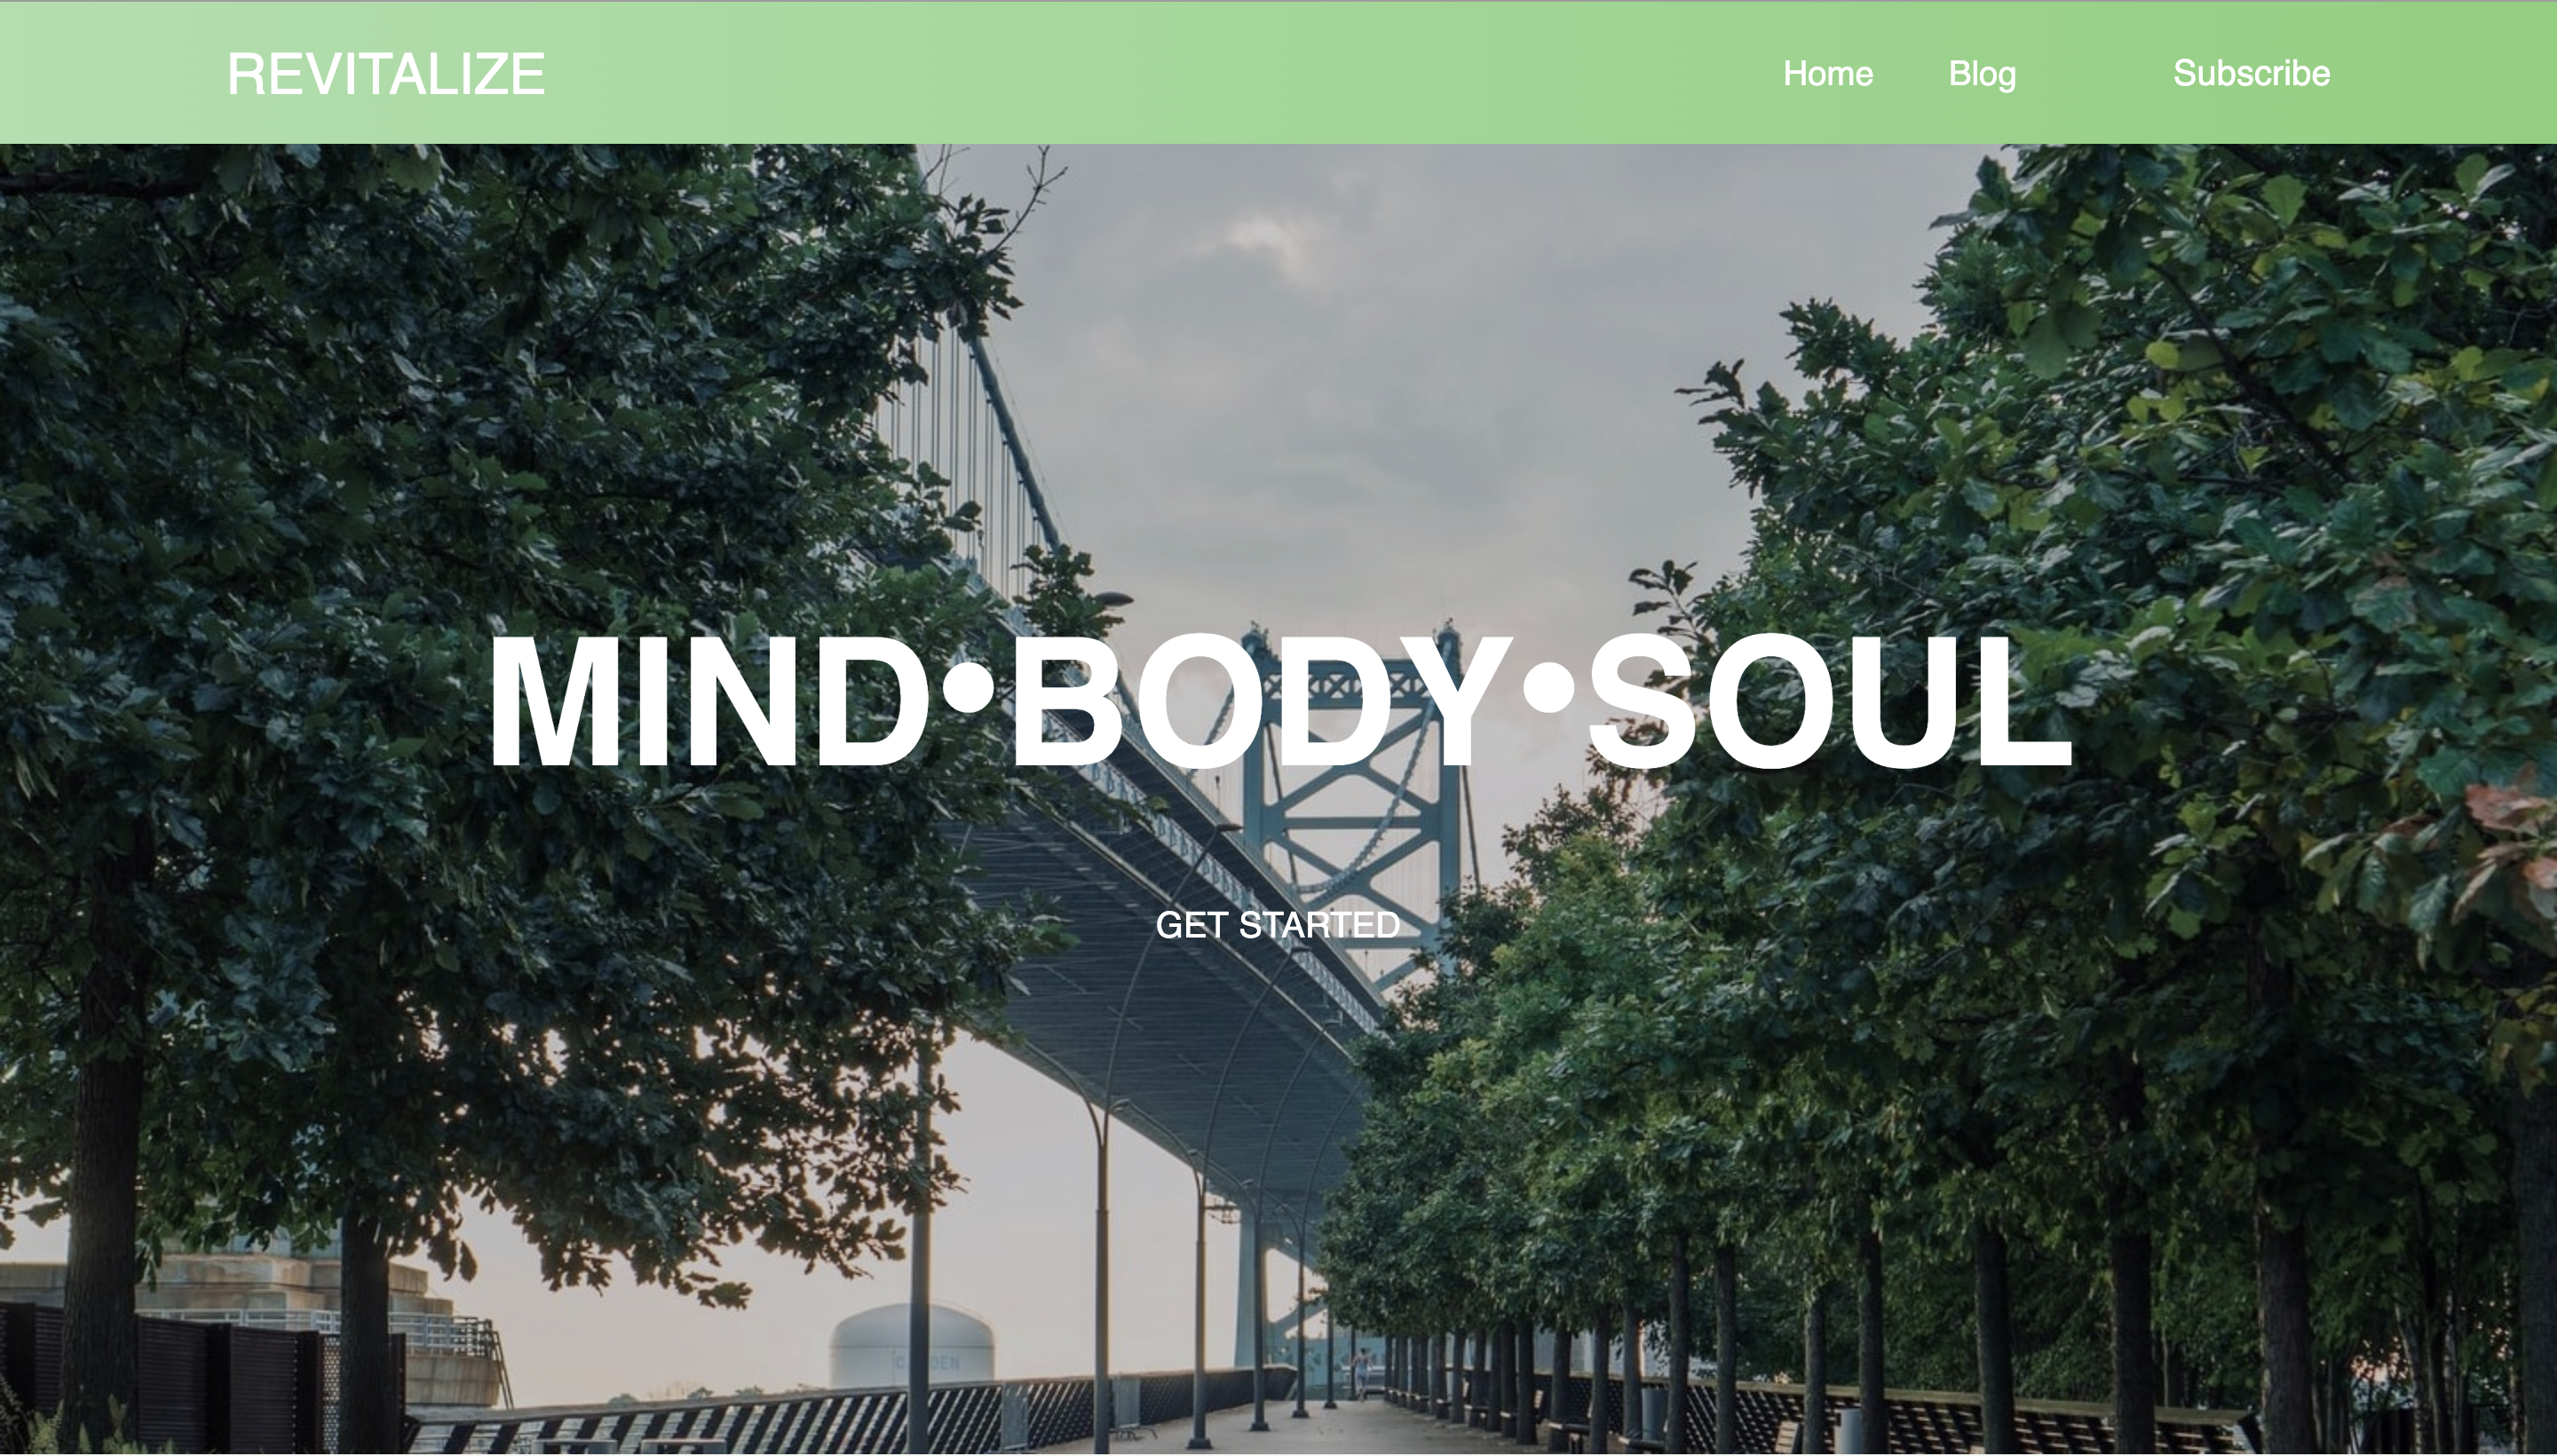
CHECKPOINT
This is what your React page should look like:
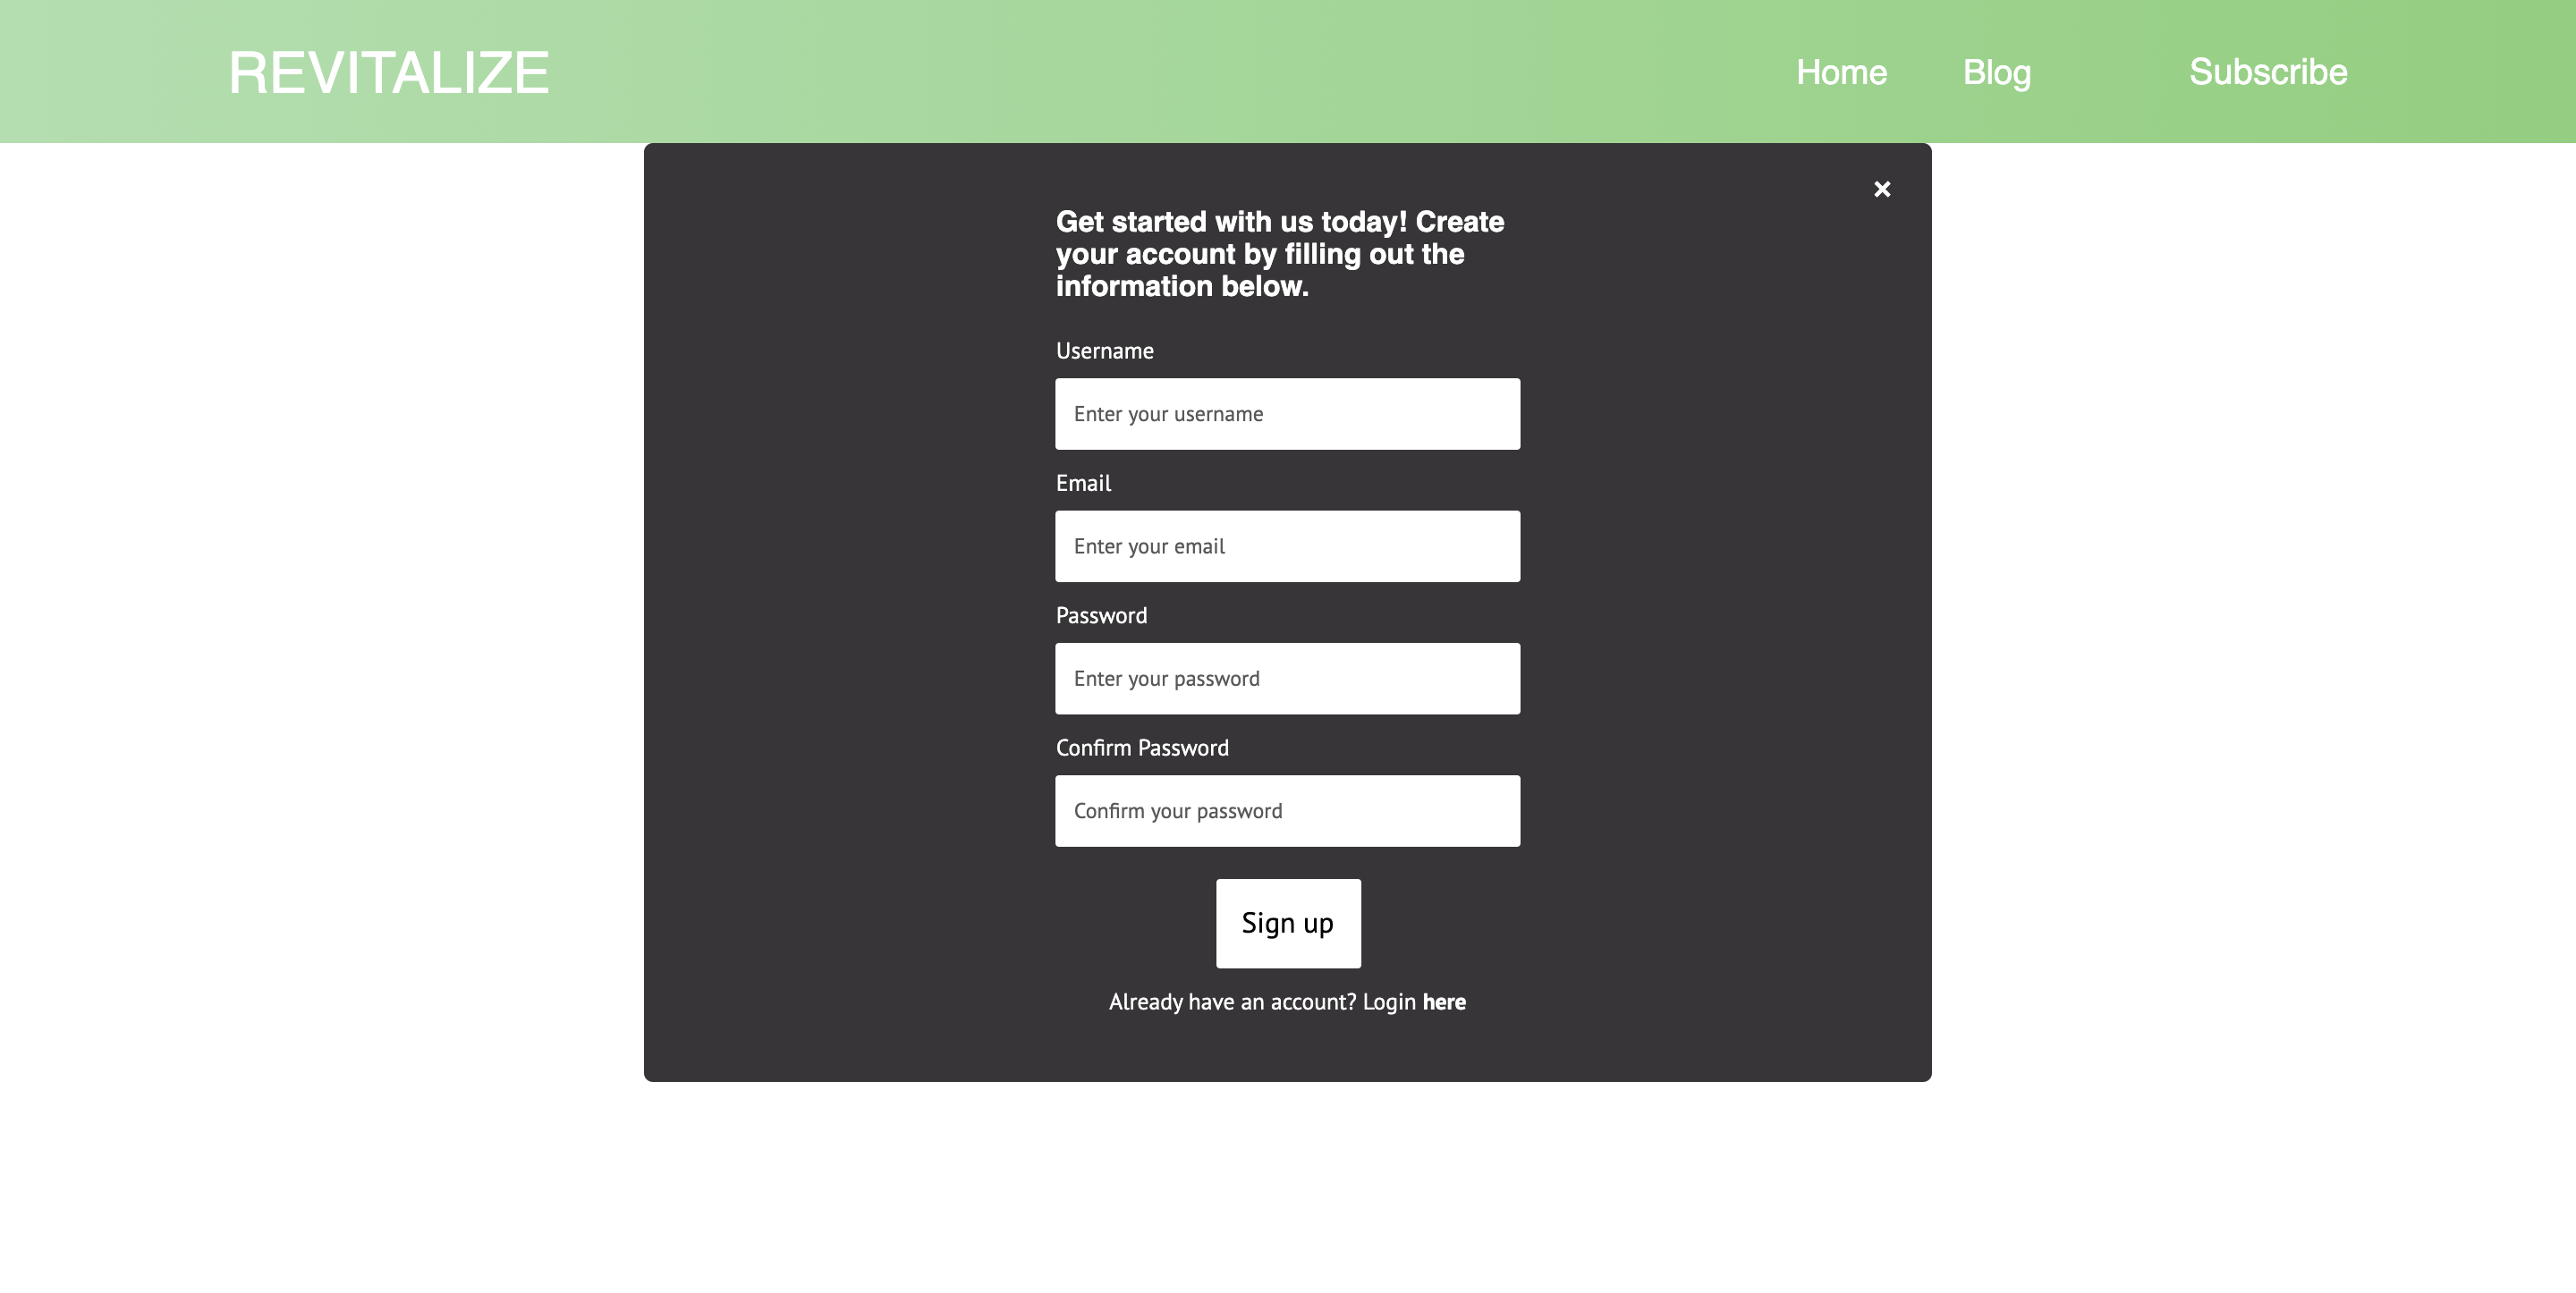
SUBSCRIPTION
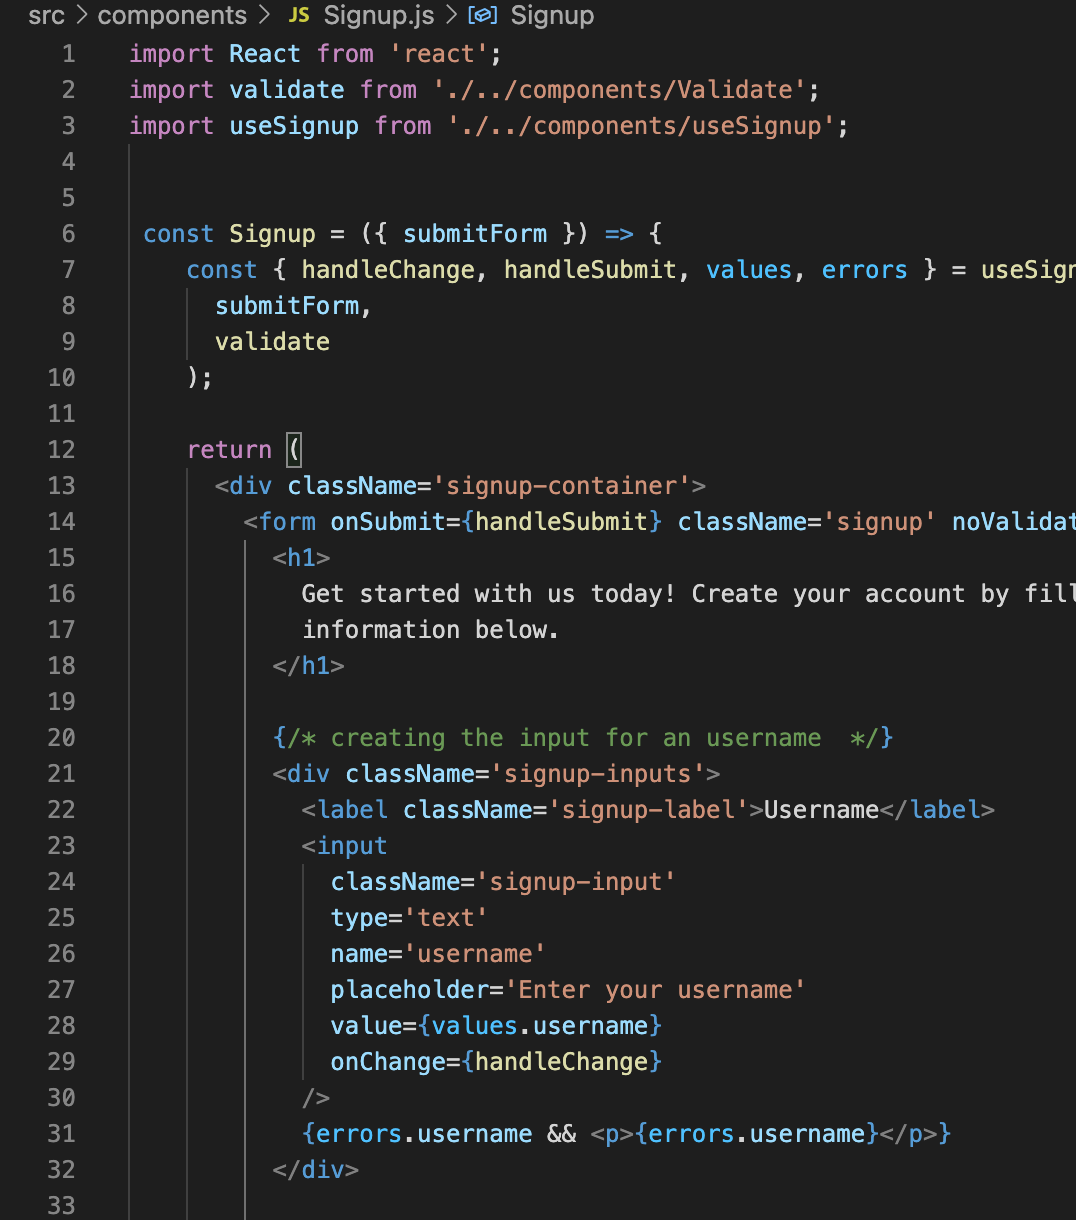
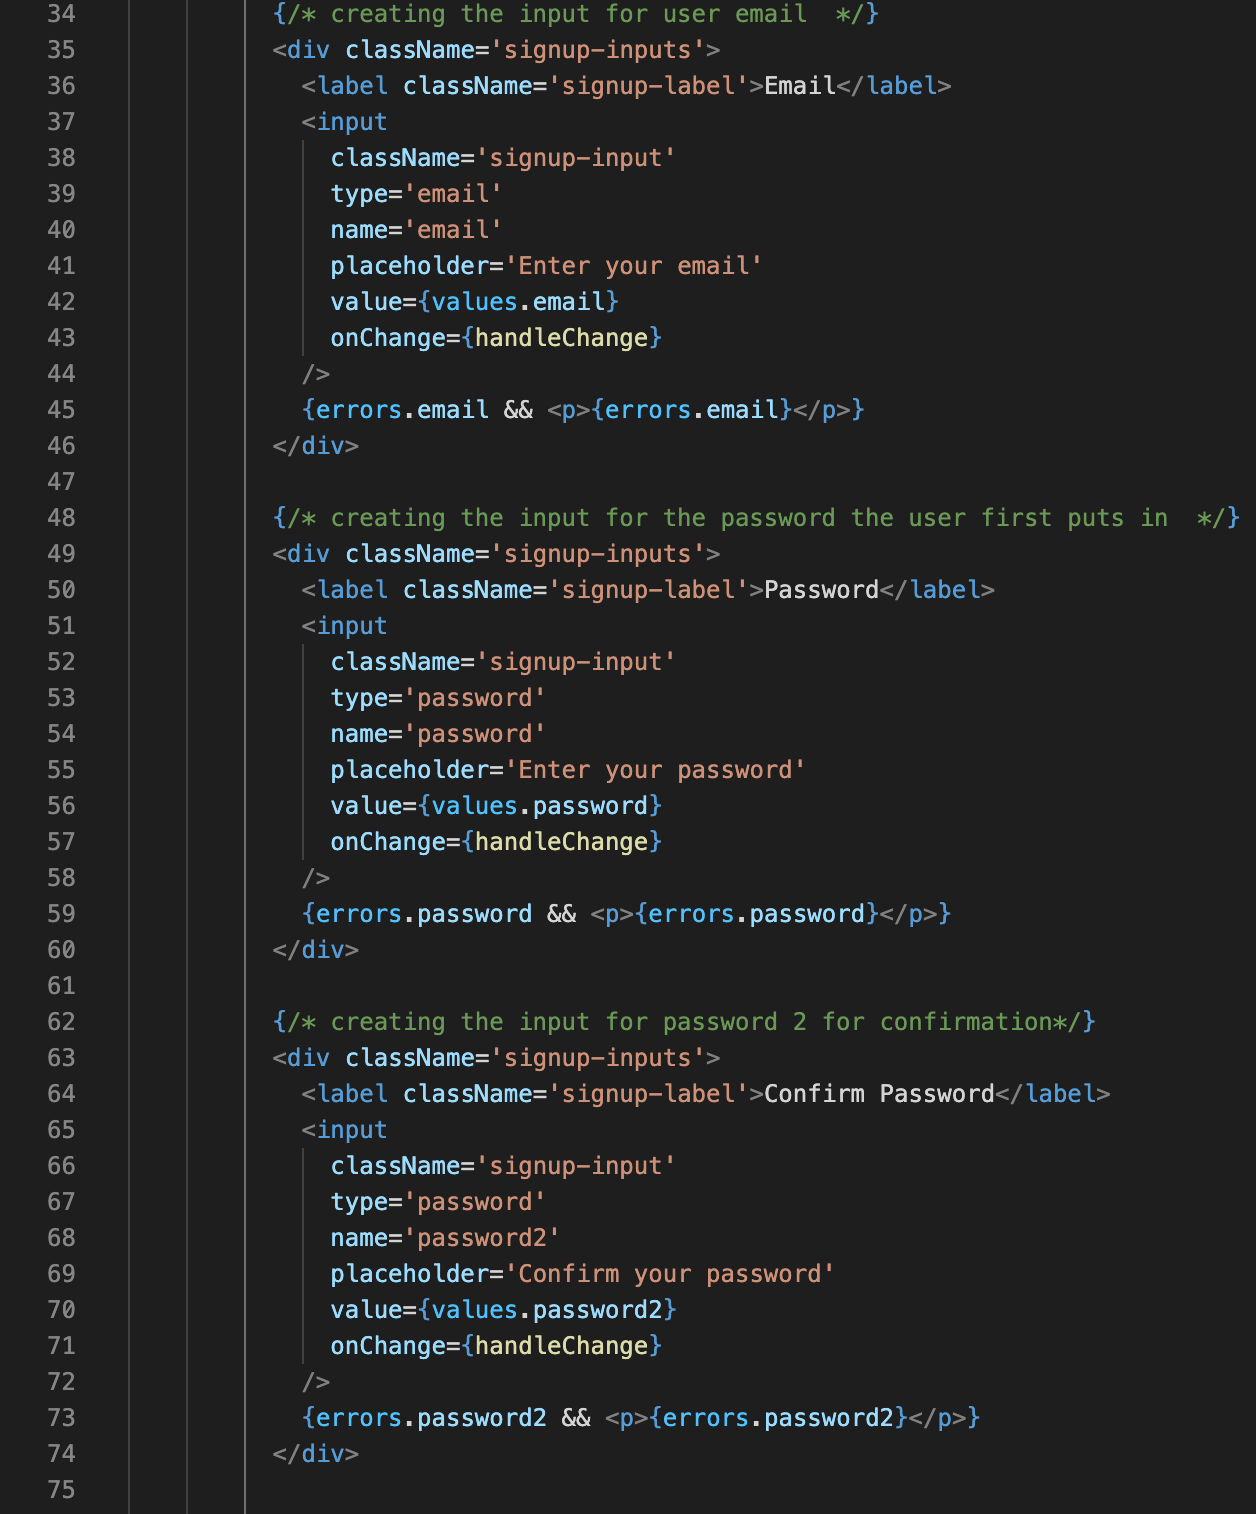
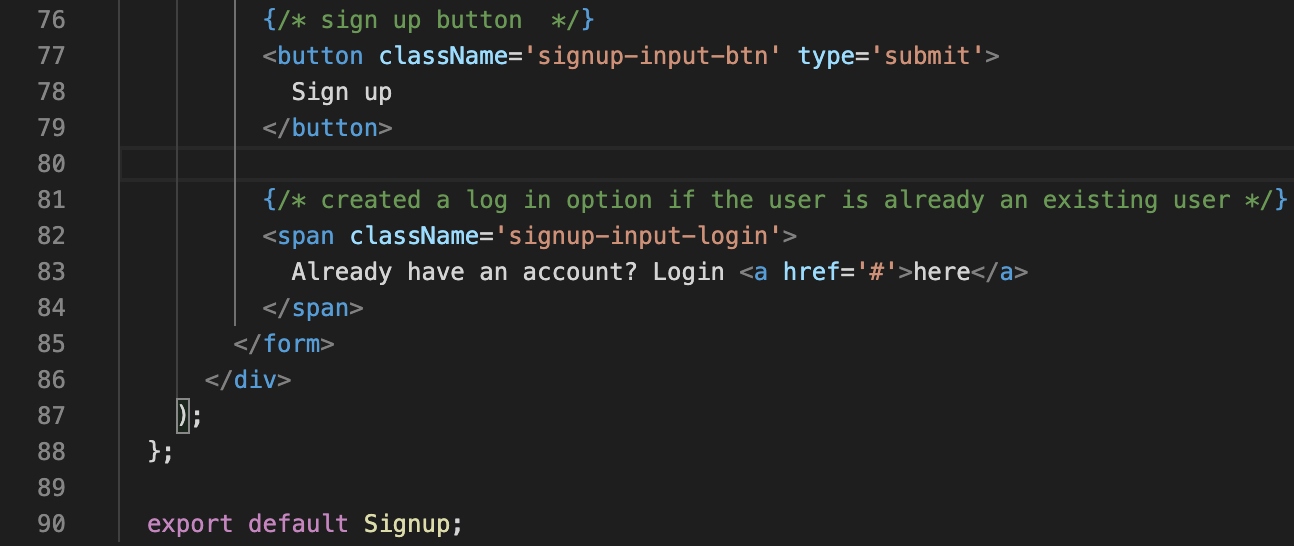
Lets code the subscription part of the webpage. We are going to start with the signup page.
First, we will code the signup page. This sets up the signup page with elements for user input.
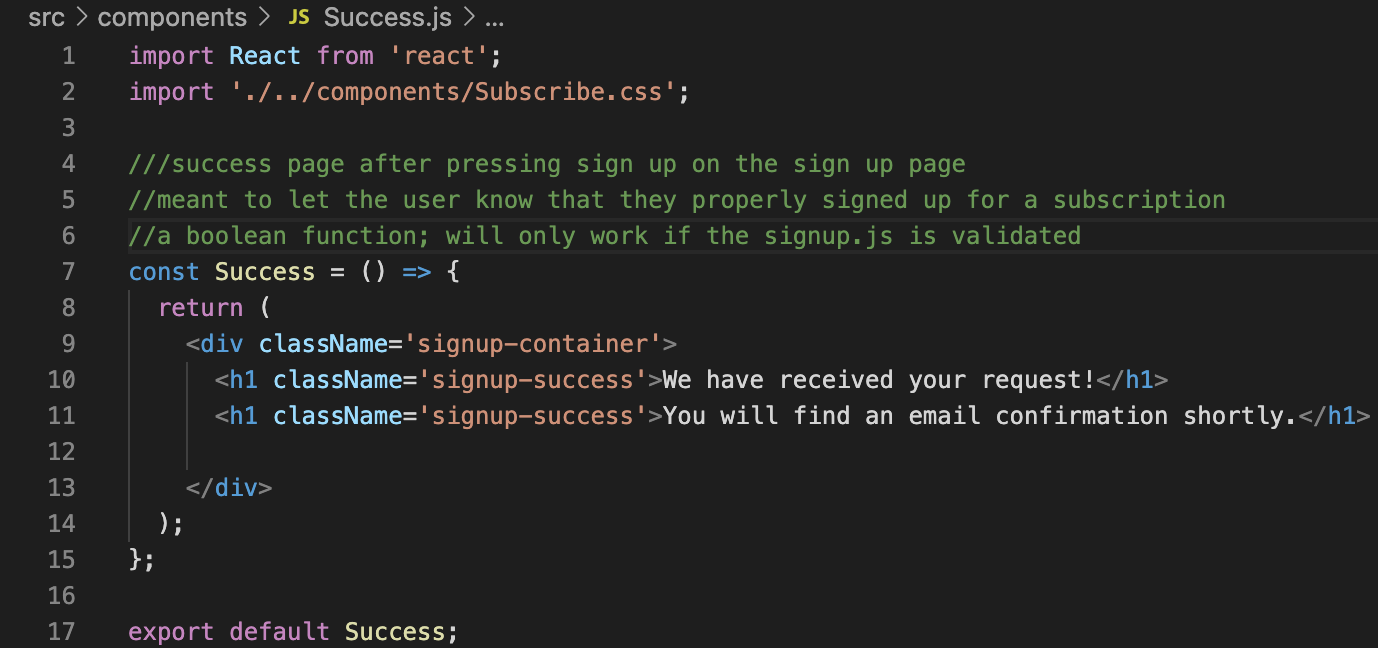
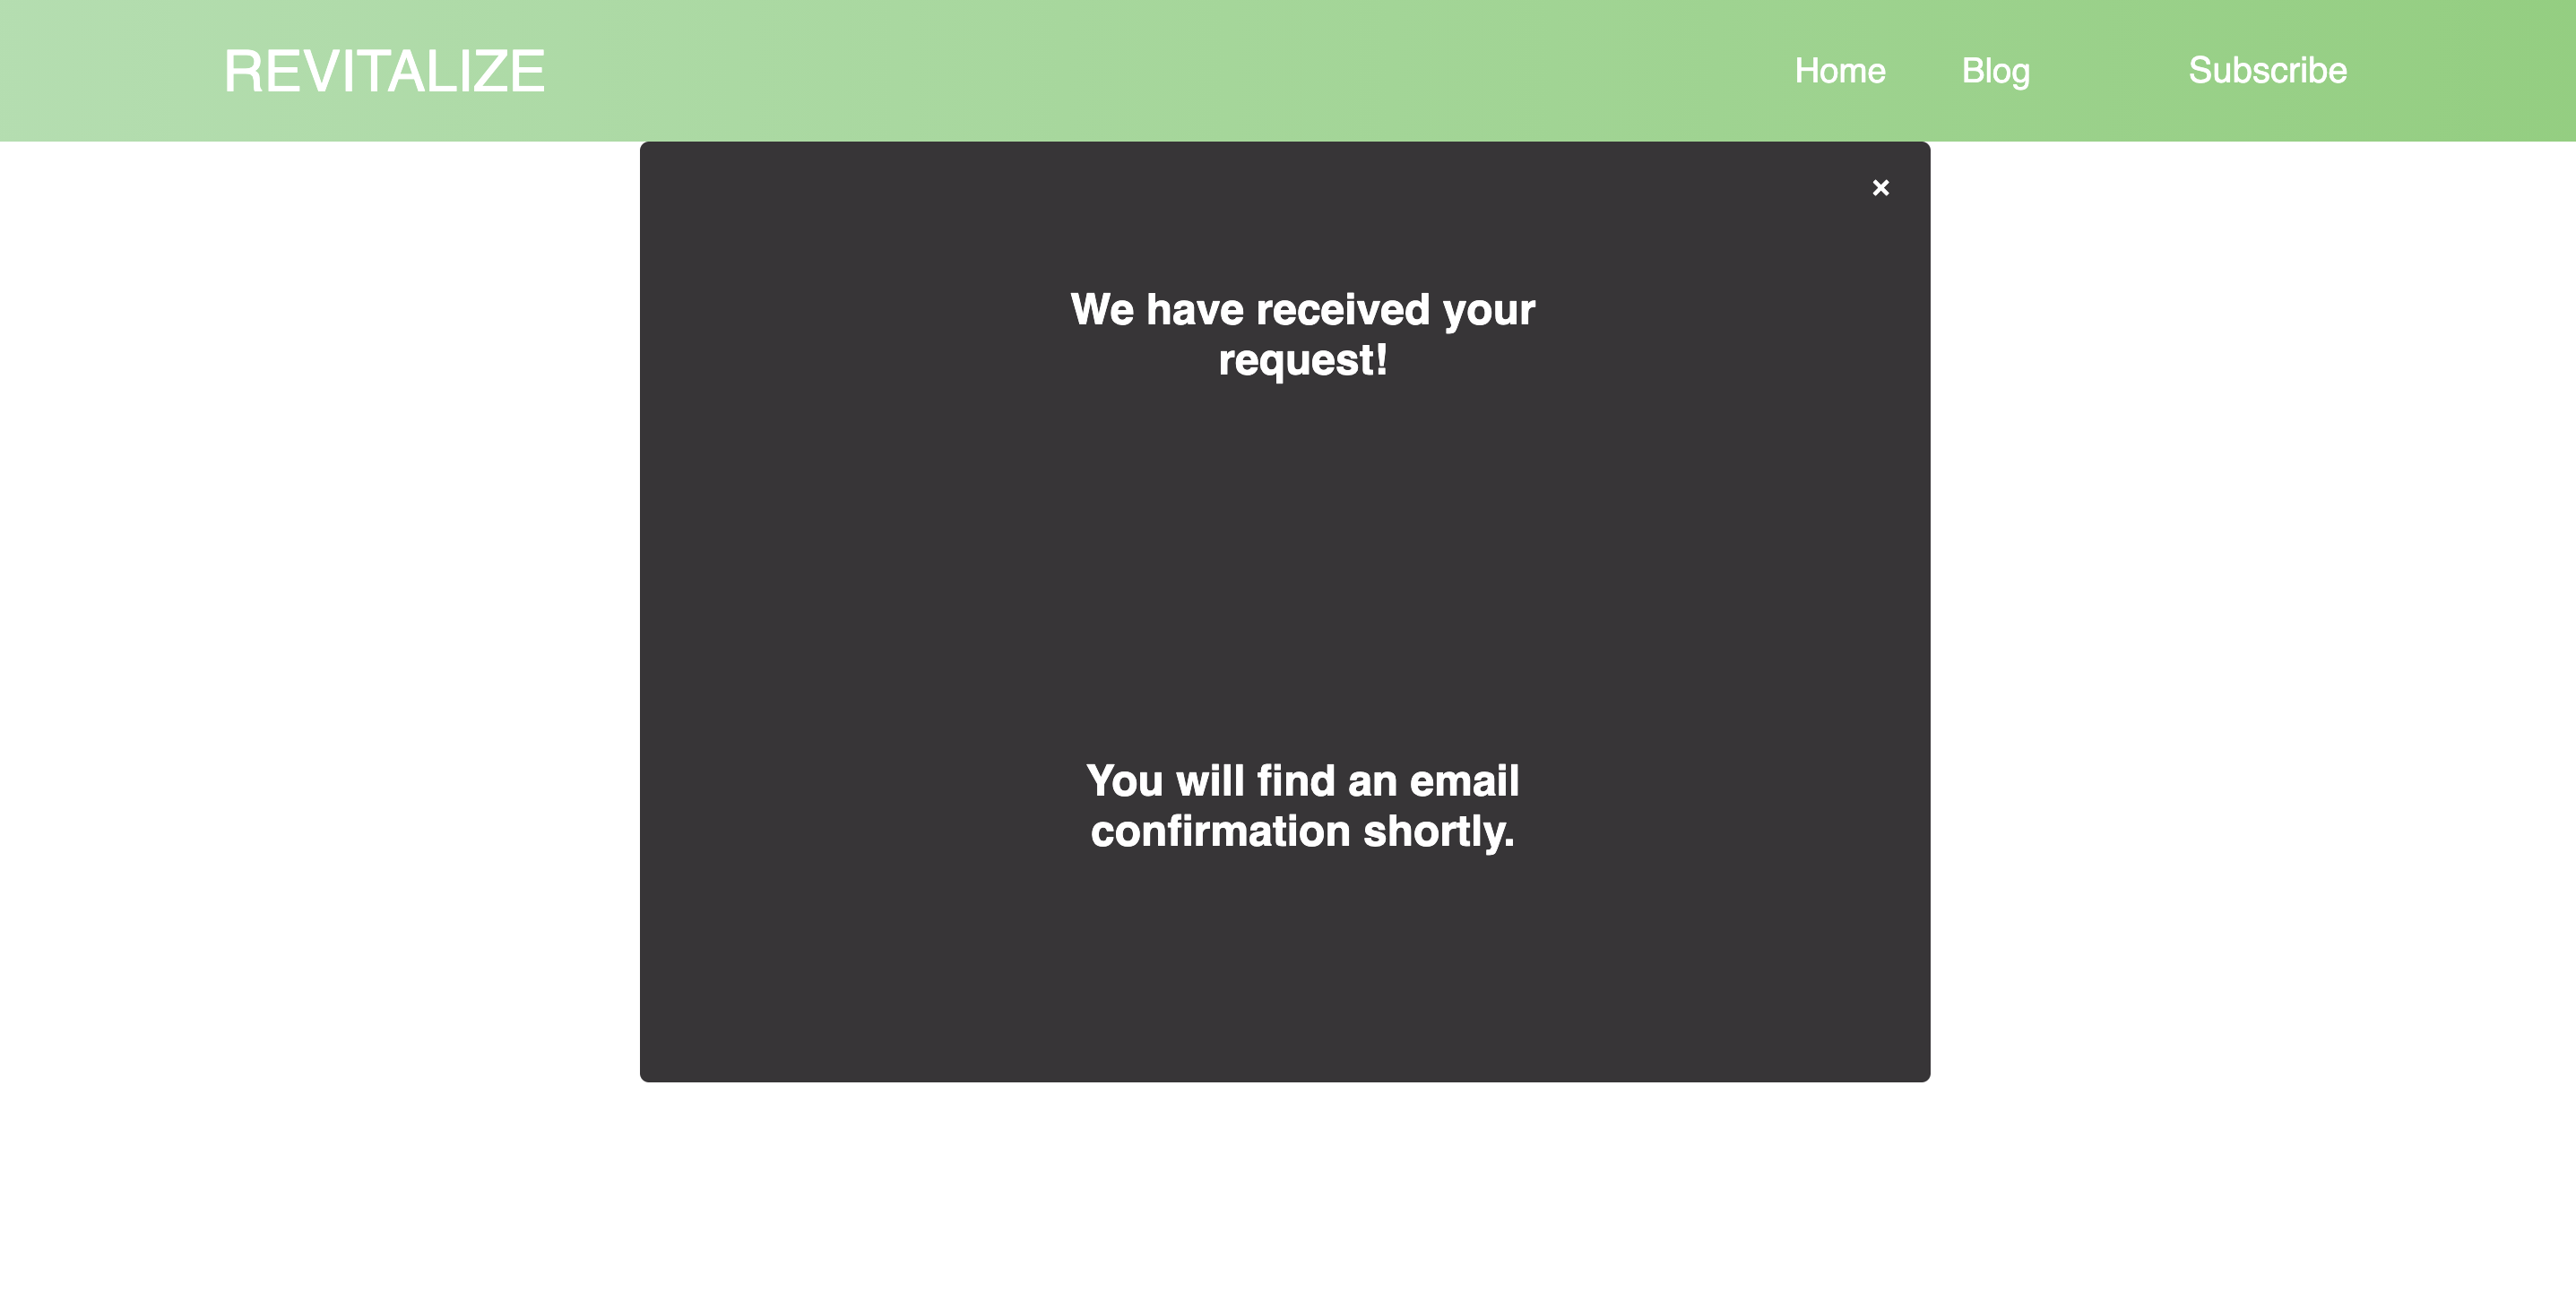
Creating Successful Subscription Page
Before we use and validate out user input, we will create a response that pops up letting the
user know that they were able to sign up successfully.
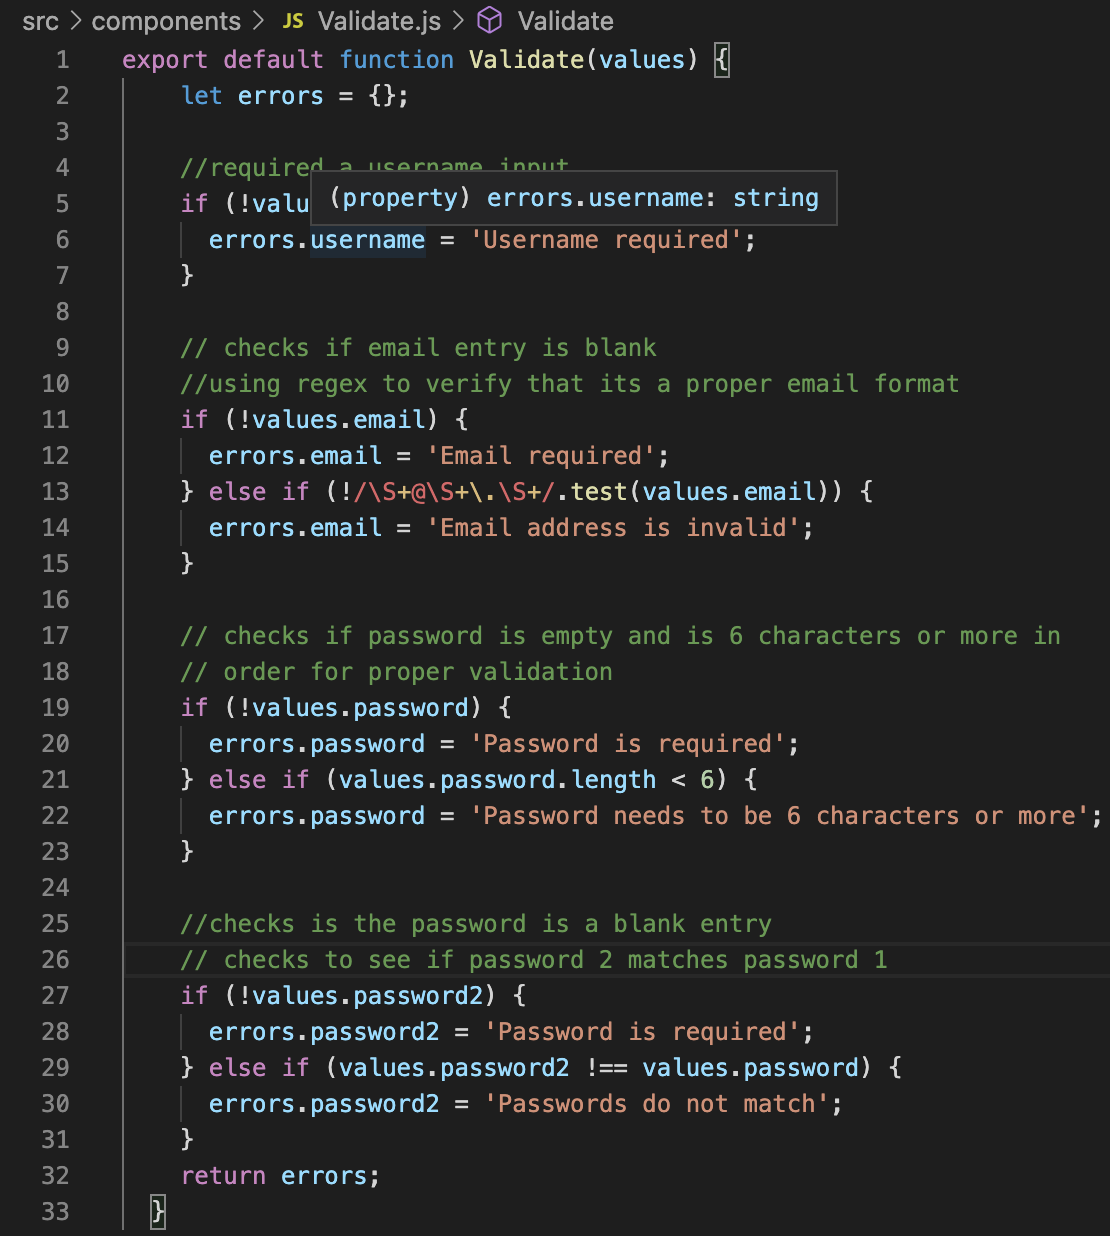
Lets validate the user input
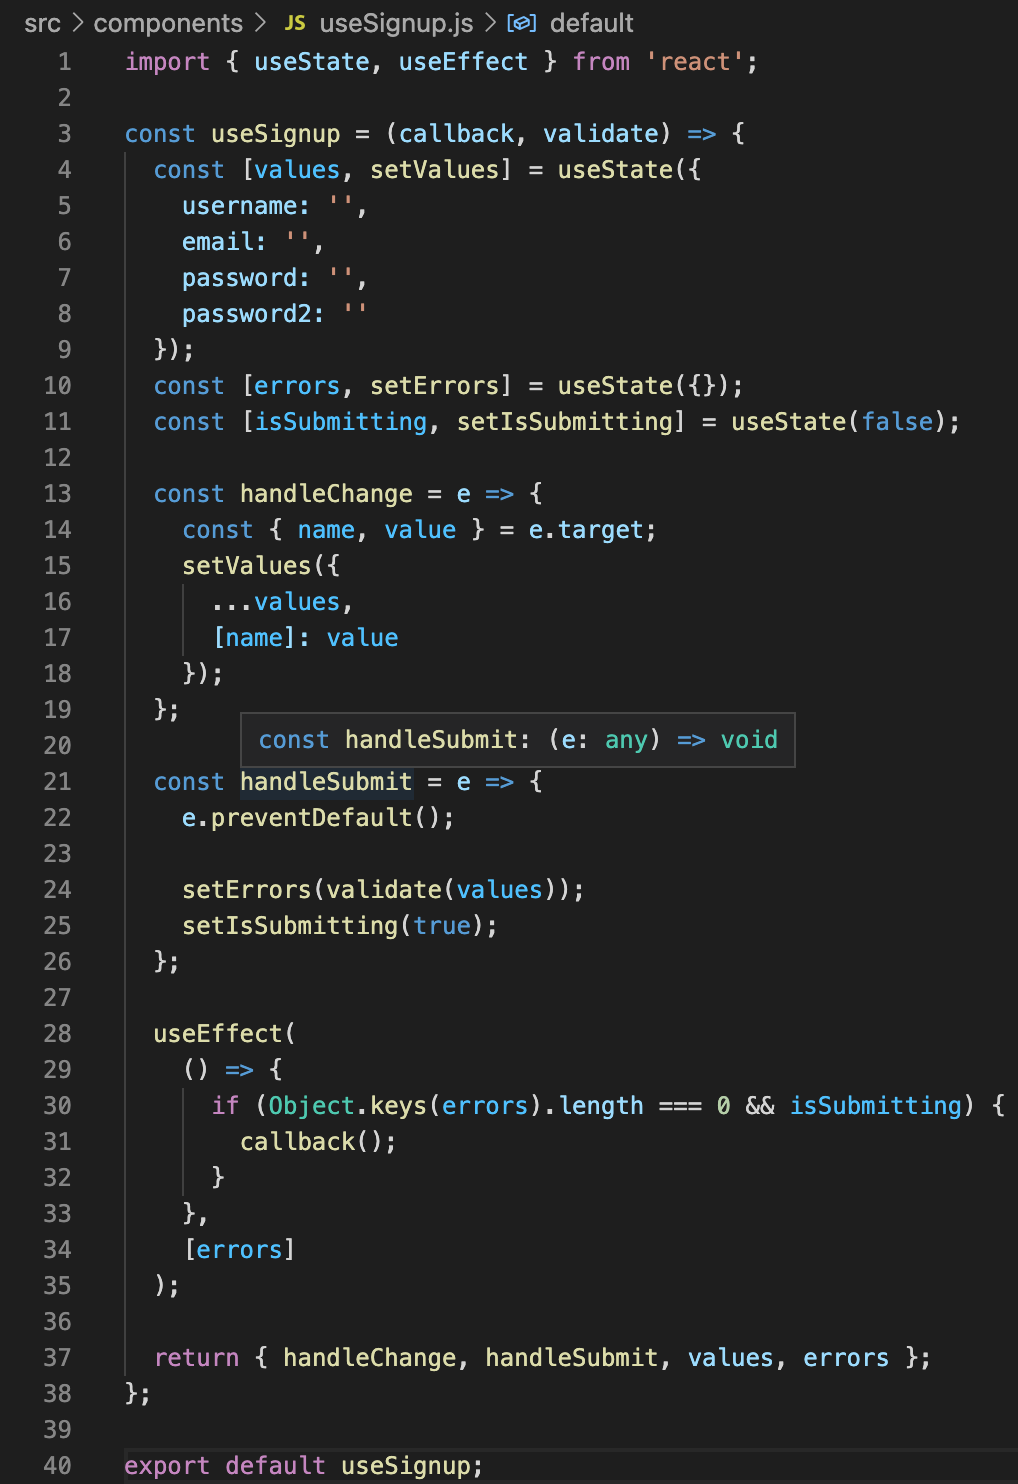
Now lets use the signup page. Go to useSignup.js
Here we validate our data and make sure that the user is okay to move to the
success page.
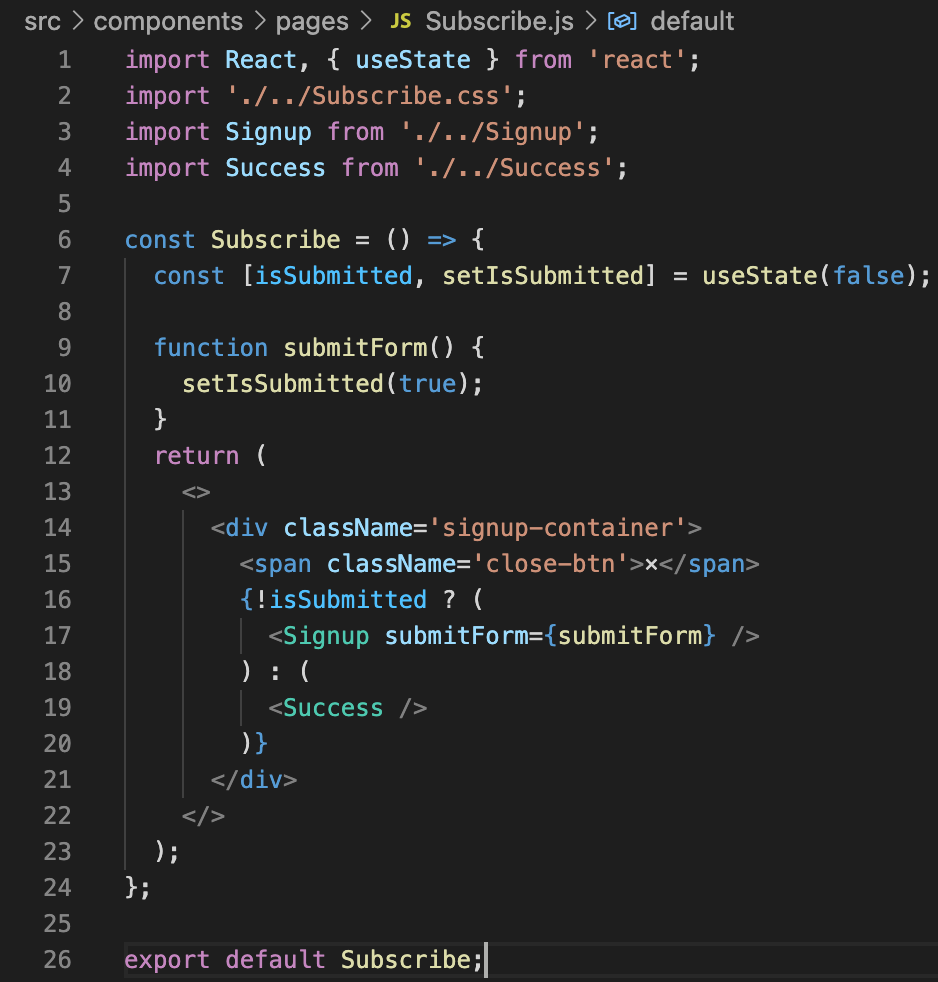
Now we will add all of the previous scripts and styling to our page.
Go to your Subscribe page under pages. Notice that we import our css and
the signup and success pages.
The subscribe page holds both the success.js and the signup.js.
CHECKPOINT
This is what your subscription portion should look like:
After the signup page validates that the user has inputed the correct information that
it needed, the page now displays the success.js which lets the user know they have succesfully signed up to subscribe.
BLOGS
We will now being coding out Blogs!!
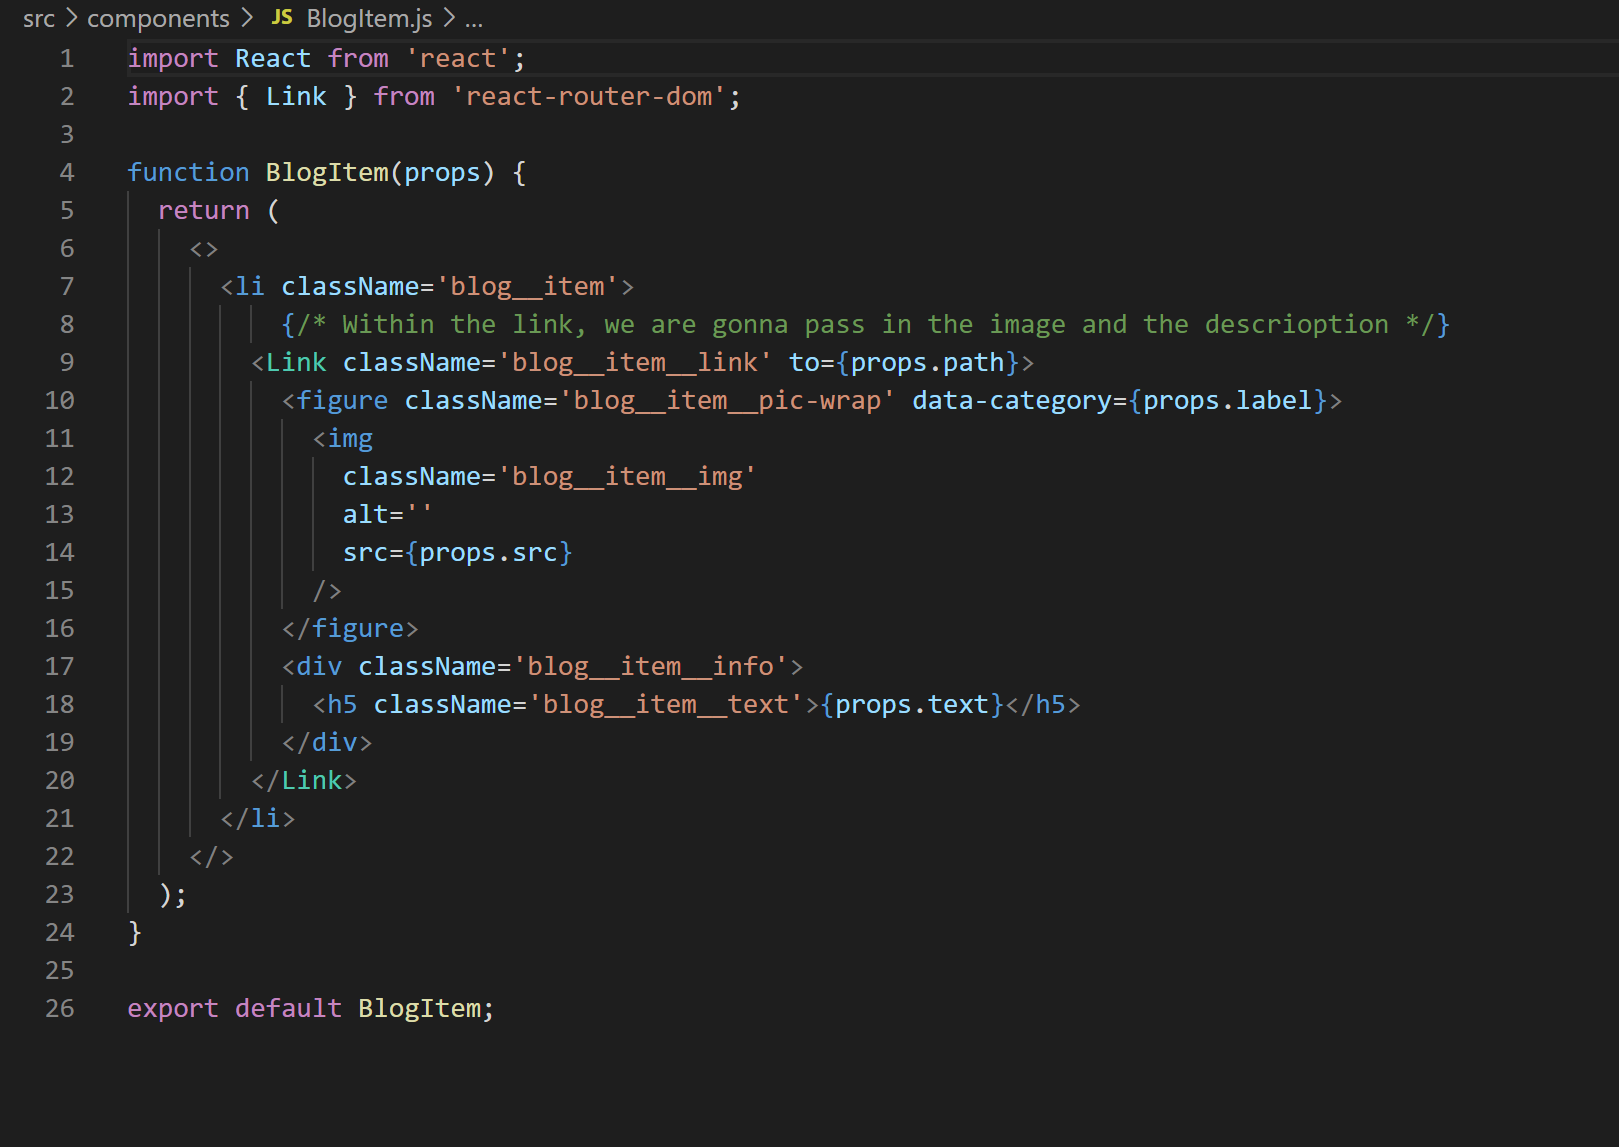
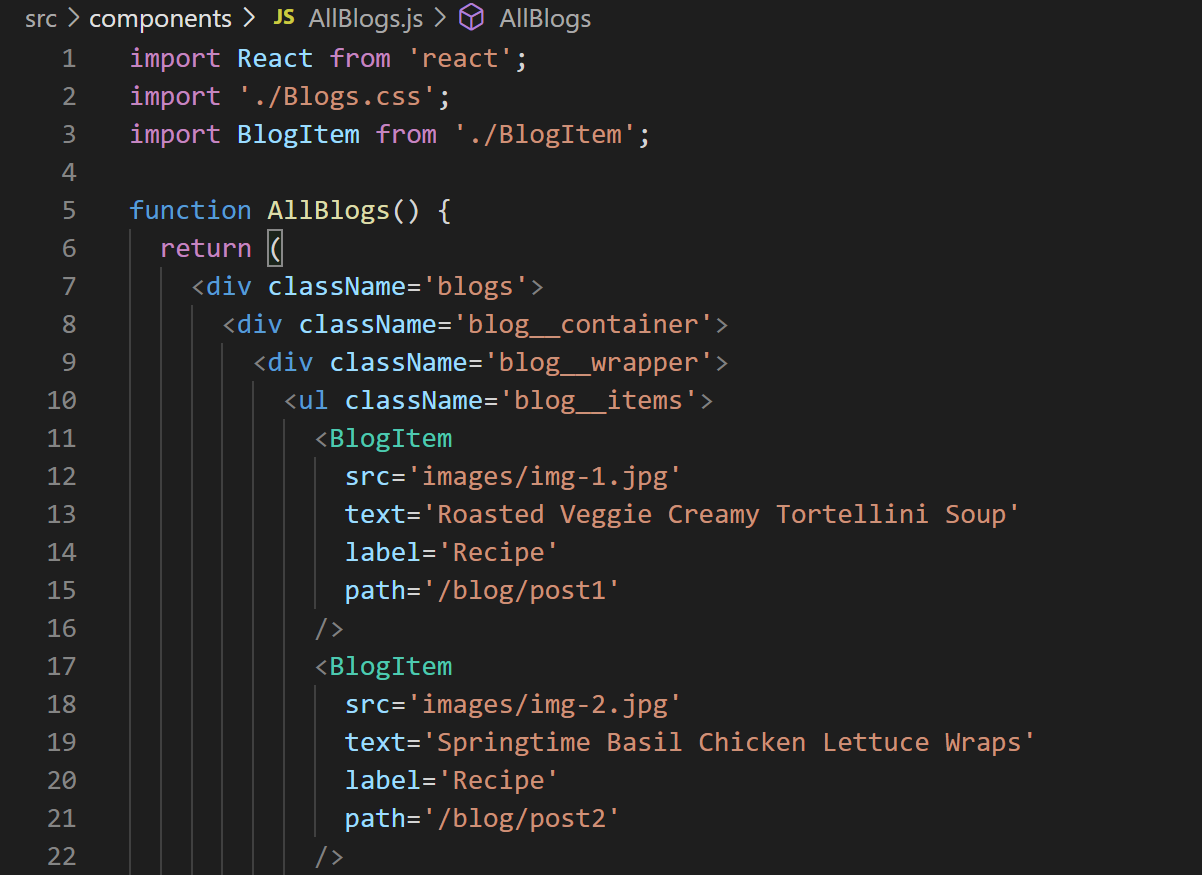
We are first going to start by coding how to make the Blog cards. These cards will hold the
picture and info as well as a label of what kind of blog post it is.
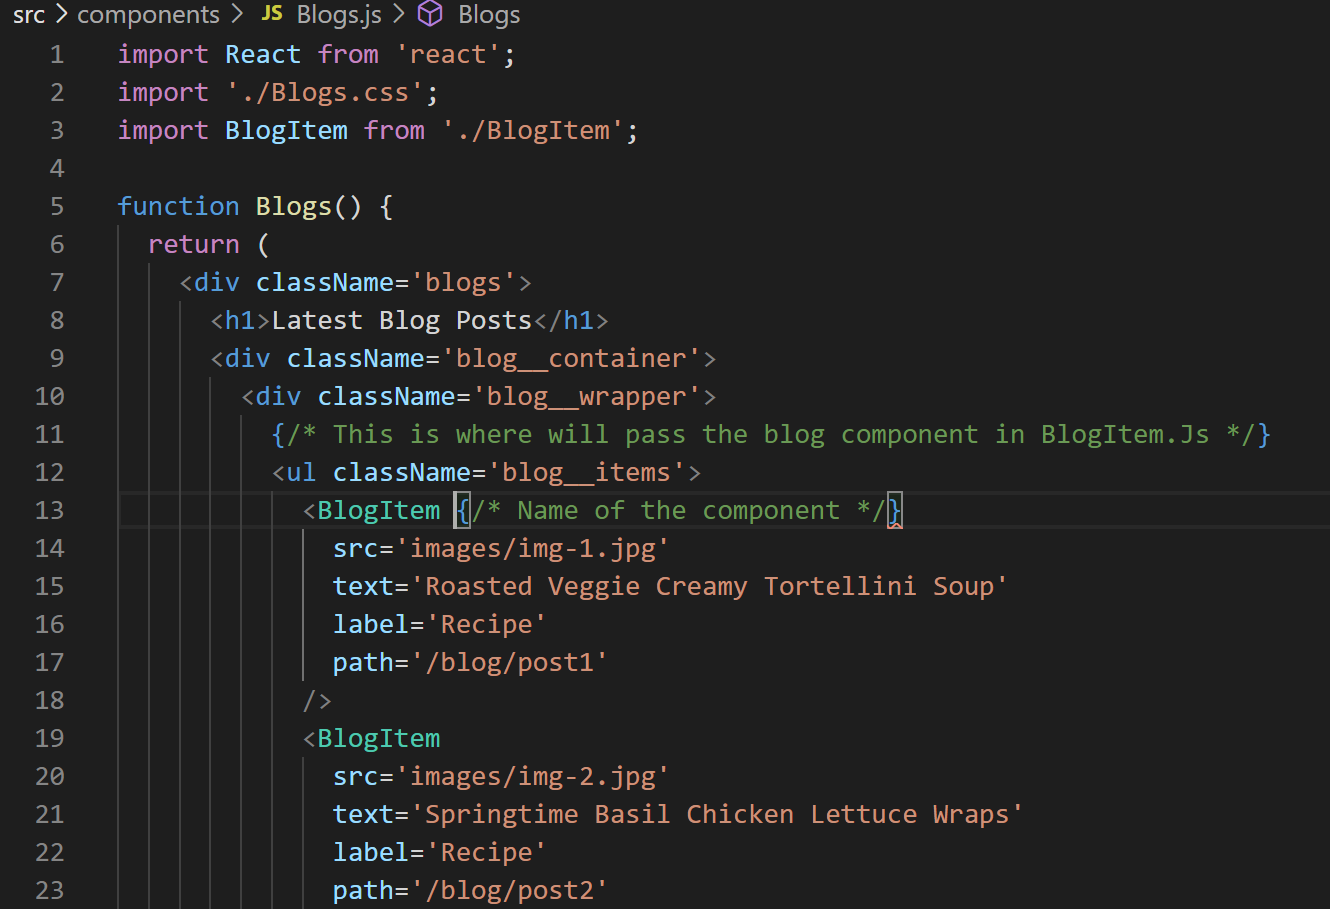
Now we will call BlogItem from Blogs.js and AllBlogs.js. The purpose of two of these pages
is beause Blogs.js will be showcased on our Home.js page where it shows a preview of the few
blogs we have and AllBlogs.js will be on the Blog.js page where it shows all the blogs that are on the application.
Each are 99% identical but AllBlogs.js contains a much longer list of blogs.
Now for blogs to show up on the Home page, we have to import the js file to Home.js in the pages folder.
CHECKPOINT
This is what your Home page with the blog portion right underneath the HeaderHome
portion should look like:
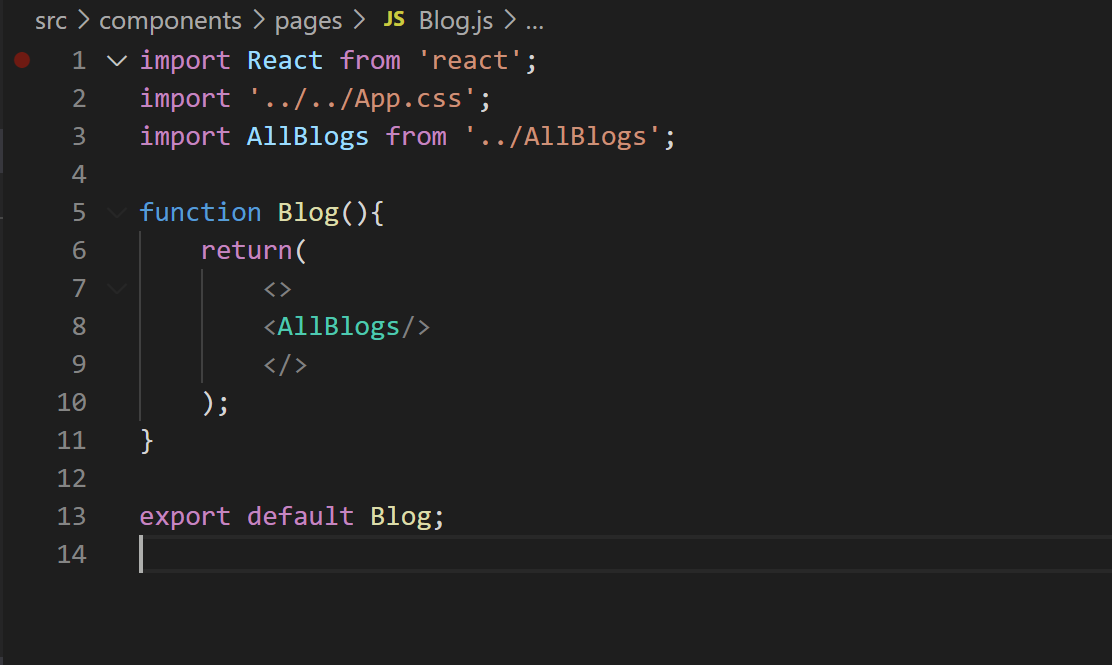
BLOGS
Now, we will route AllBlogs.js to the Blogs page and show the entire list of blogs we have avaialble.
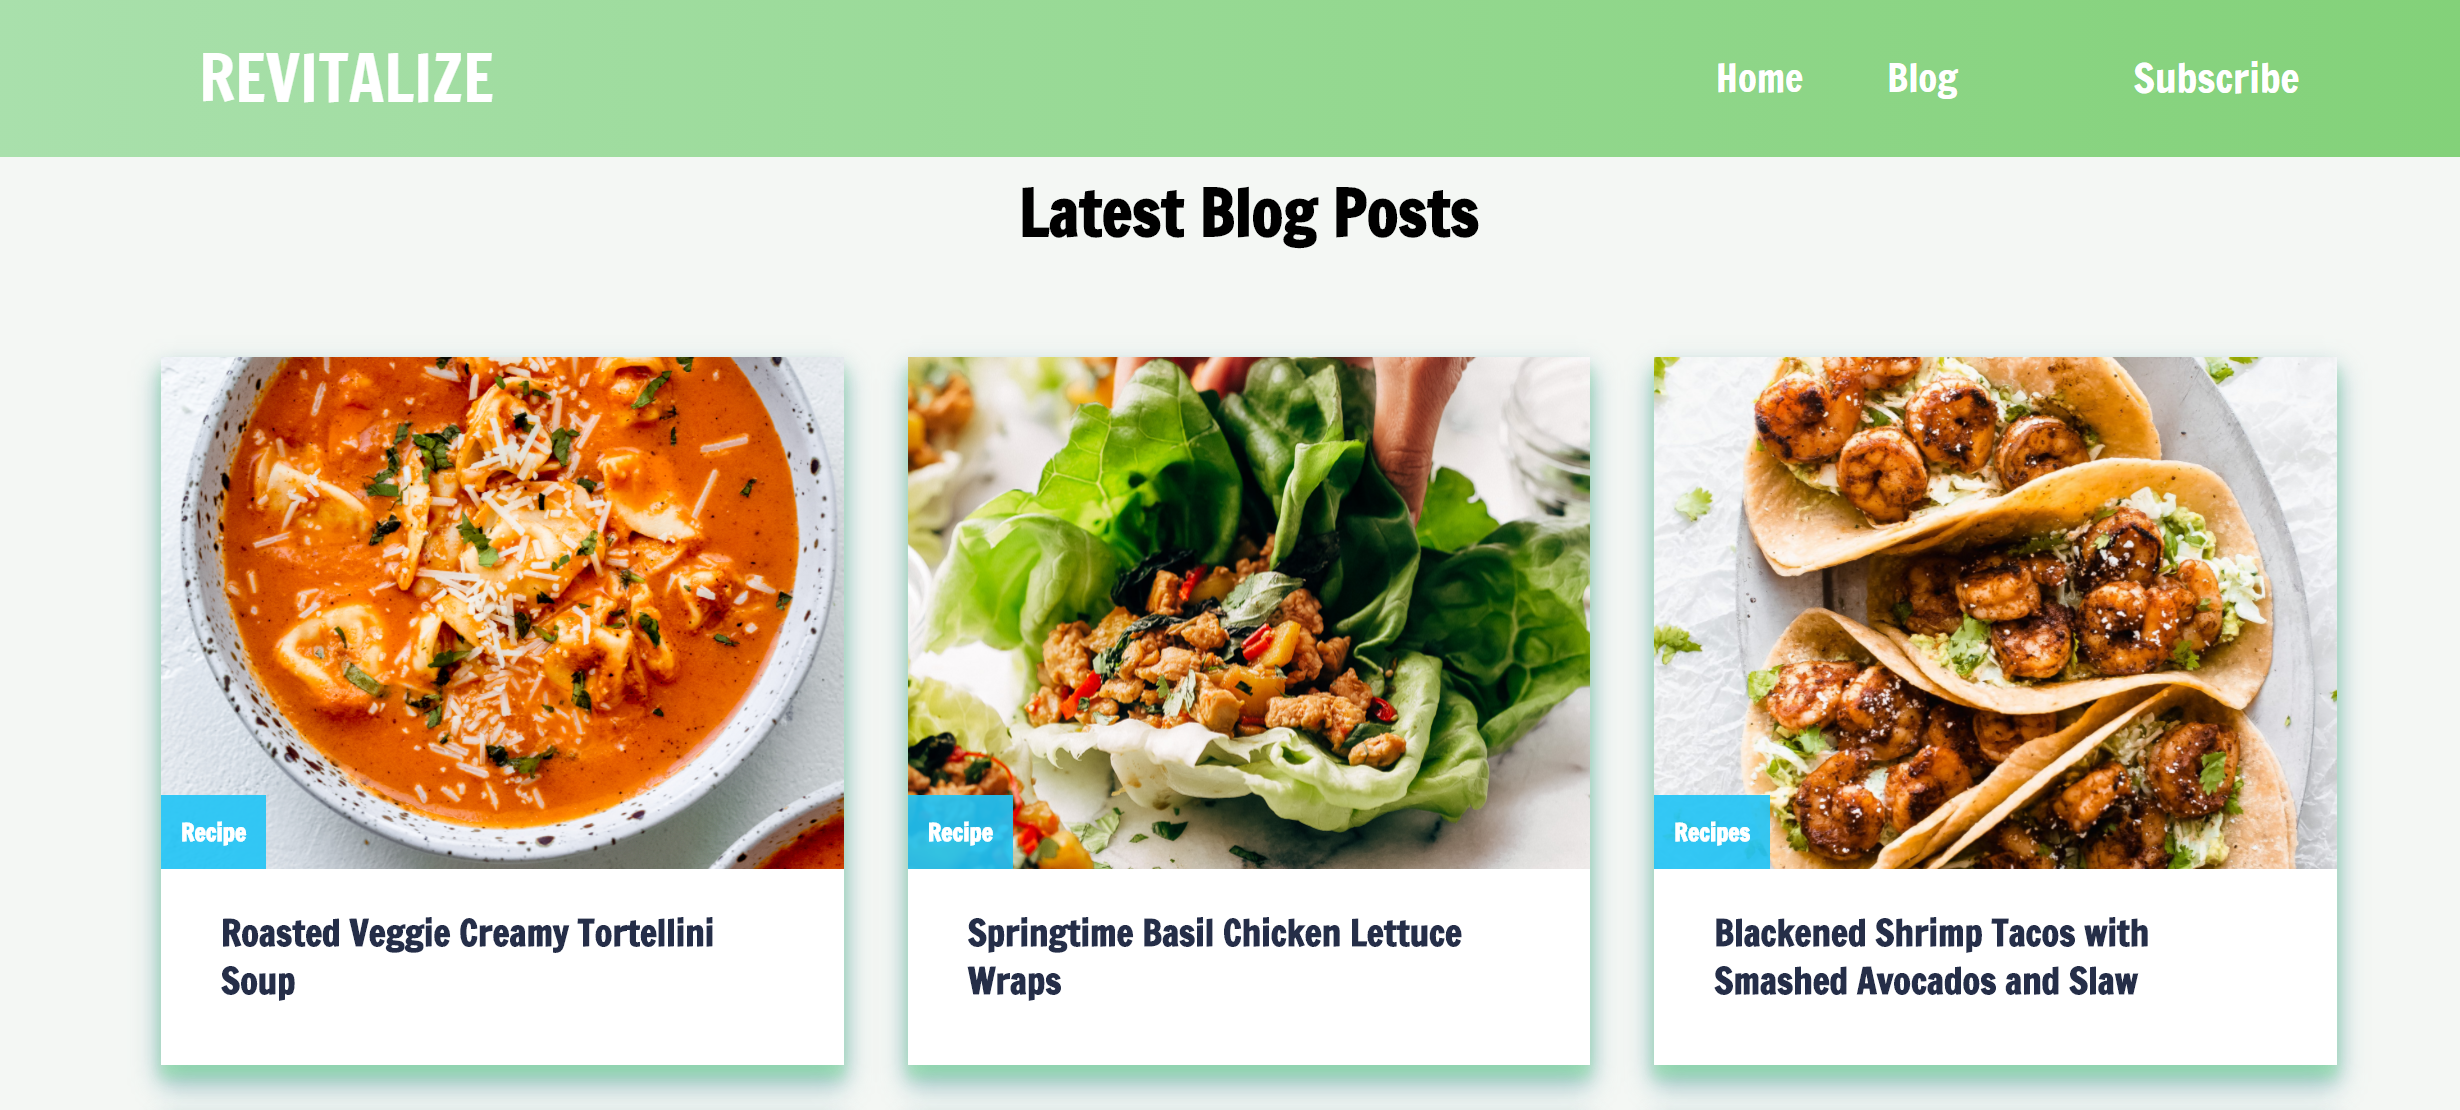
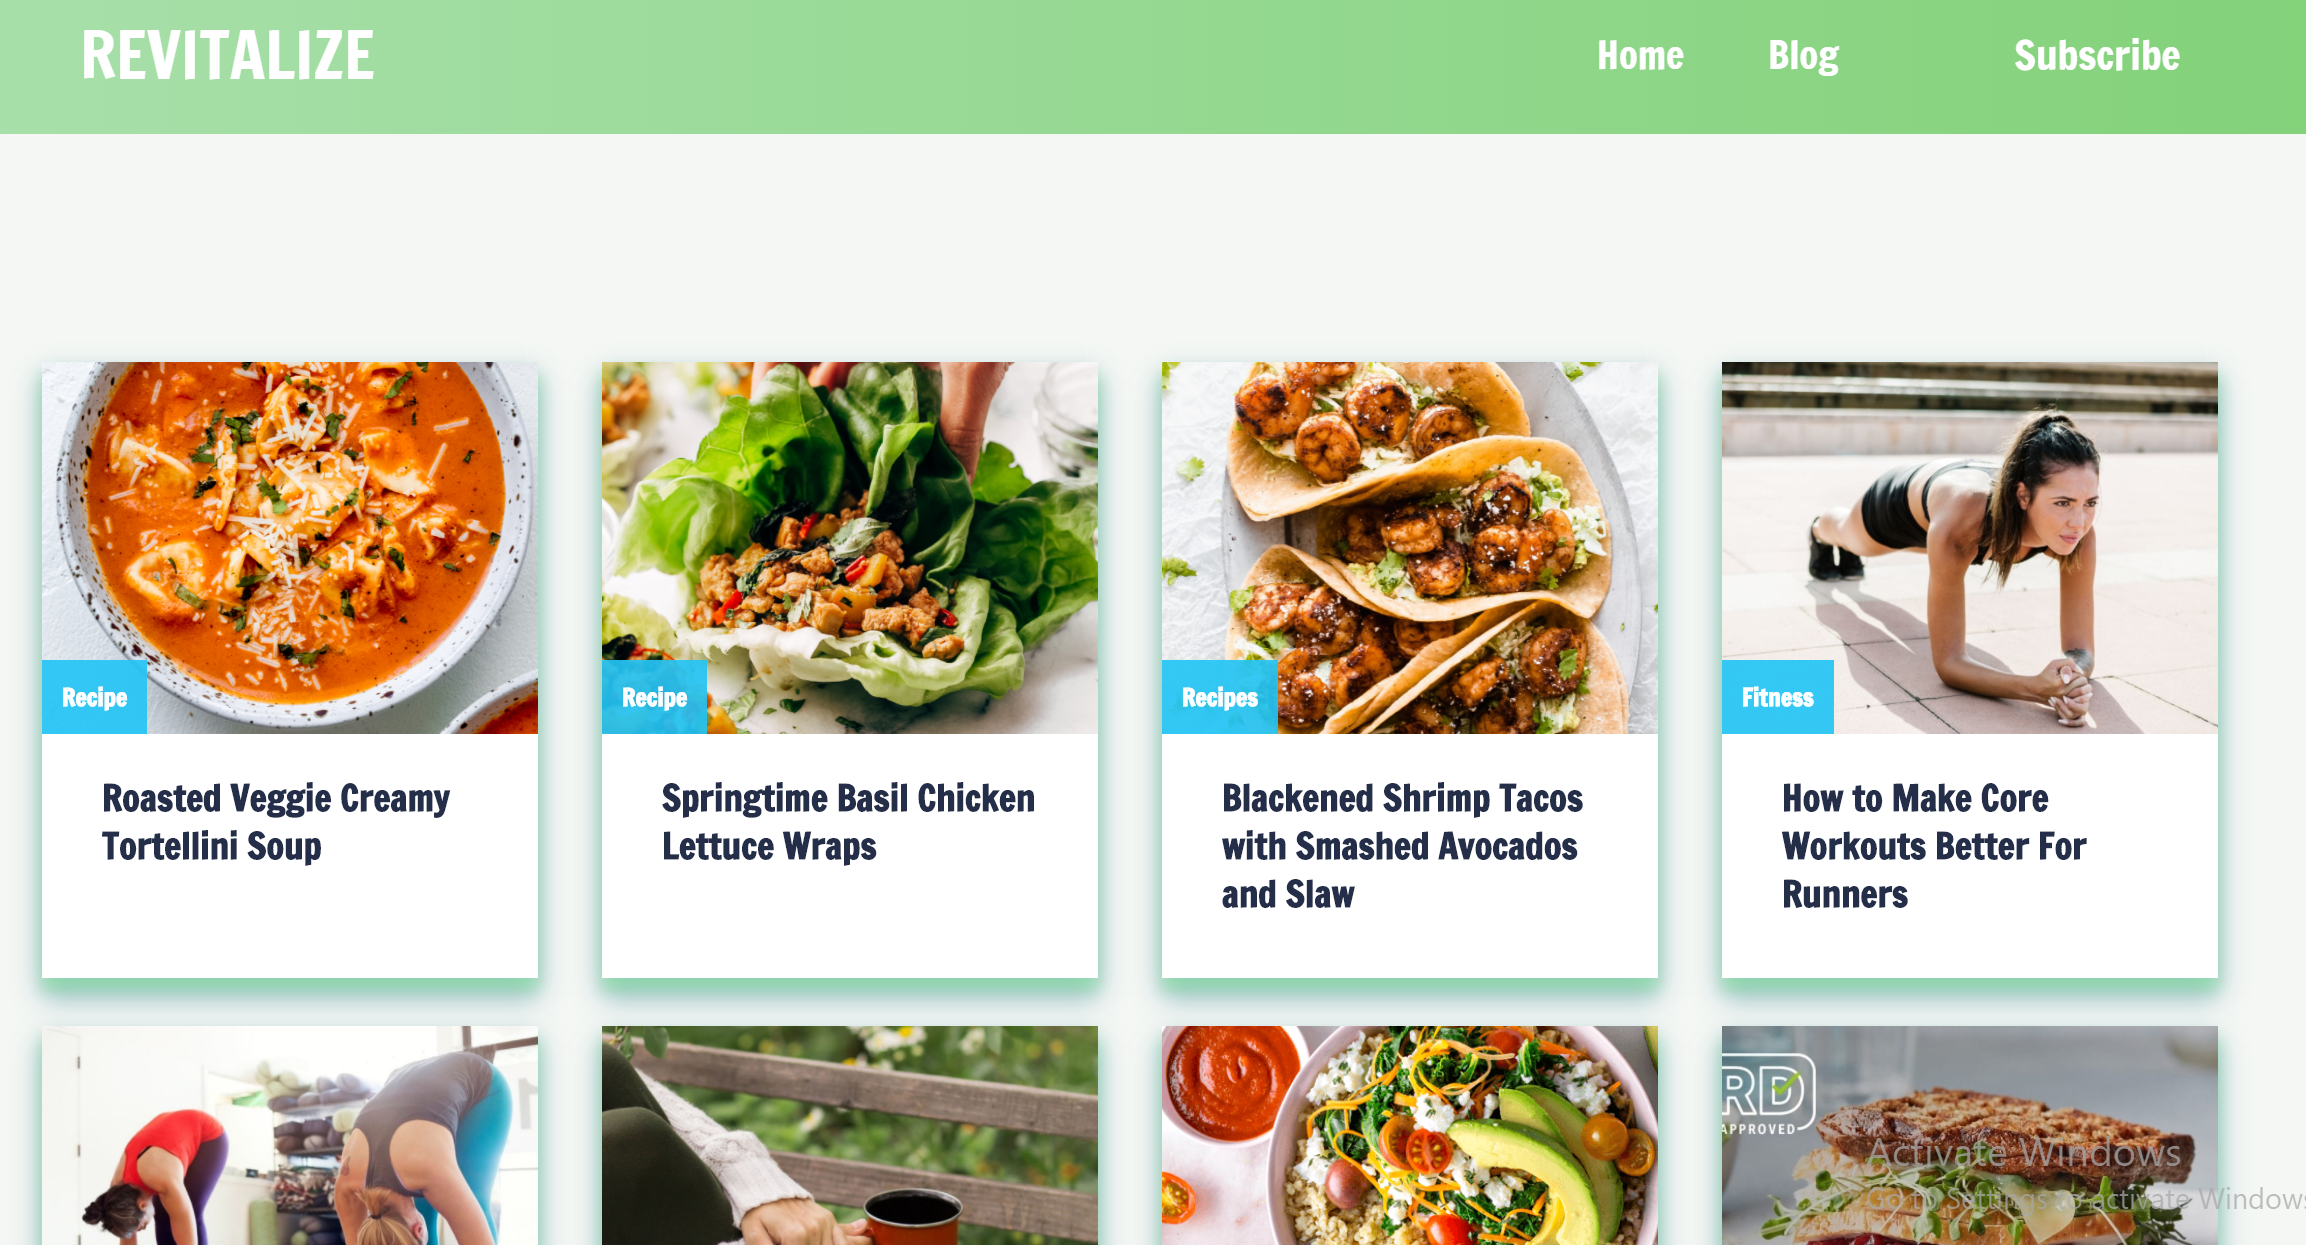
CHECKPOINT
This is what your Blog page should look like with all the blogs now referenced here.
BLOGS
The blogs from the homepage and blog page need to be routed on App.js as well as creating the posts in the pages folder.