How To
☰ Tutorial
Step 1) Creating the Phaser scene
The first thing you have to do when making a Phaser game is creating
the skeleton of the code. Every Phaser game has a basic skeleton
of code that is required to run the game.
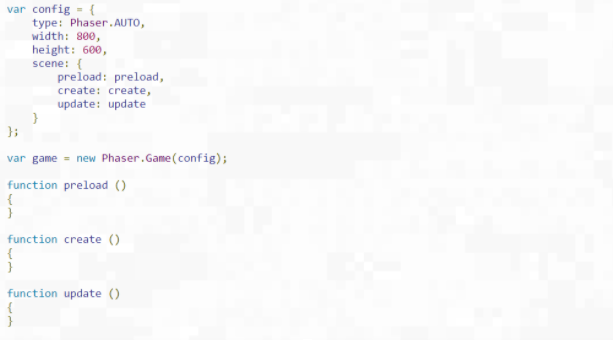
This is added in between our two script tags in between the two body
tags. As you can see, we declare the ``config`` variable and assign type to Phaser.AUTO,
which selects our renderer for us (WebGL or Canvas), sets the game’s screen width to 800px by 600px
and provides function names for each of the preload, create, and update, functions.
These functions must be designed ourselves, and in this case we will simply name them preload, update, and create also.
The preload function executes code that once finished will then lead to the top of the create function.
The create function is executed, and then phaser executes the update() function at a high speed
to allow for actions to occur as the game plays out.
Step 2) Preloading our assets.
First we will need to download our assets from the internet.
Once you download this zip, unzip it and drag and drop the assets folder
on top of the project file you have open in Visual Studio.
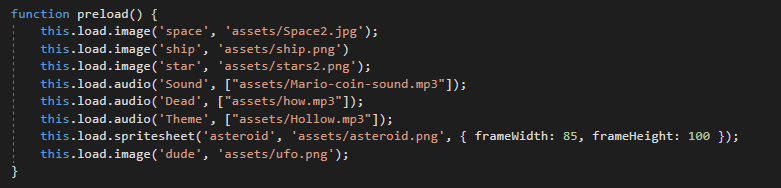
The load.image function works by taking a key and an asset file location.
The spritesheet load function has an extra parameter that declares
the width and height of each frame from inside of our asteroid sprite sheet.
Each frame then gets given a 0 based index in the spritesheet.
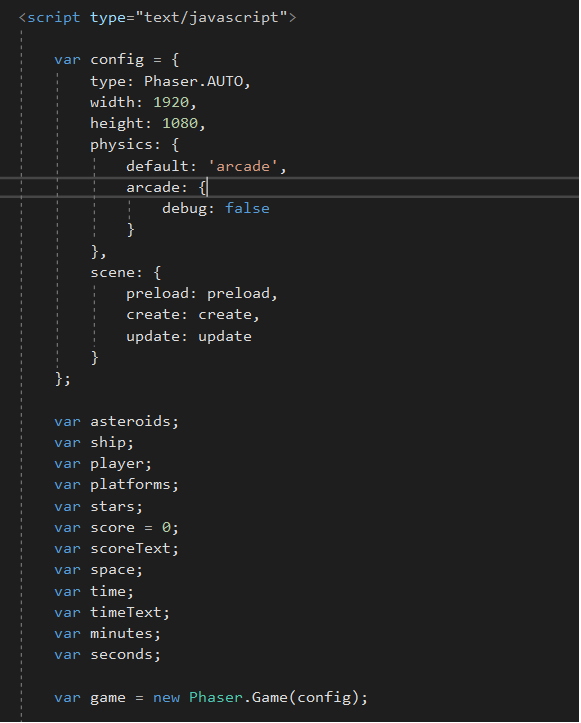
Because we will want to reference some of these assets later,
we will also define the following variables on the same scope
that our functions are defined at.
Step 3) Create the scene
Now that we have the assets loaded and the variables declared (but not defined),
we will want to begin adding the assets to our scene.
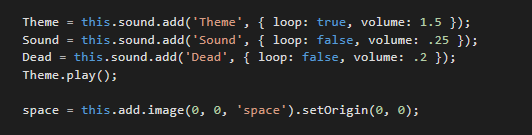
This code adds the given sounds (specified by their key declared in preload)
and sets their volume, as well as playing the theme. We also designate the space
variable to the image loaded we titled `space`. Because phaser sets the anchor
point of every image at it’s center, we want to specify the origin as (0,0), the top left,
to make the image properly cover the entire game screen.
Step 4) Check Your Progress
Now that we’ve added a decent amount of code, let’s try to load the pag
At this point, you should see only the space background, and hear the theme song playing.
Step 5) Check Your Progress
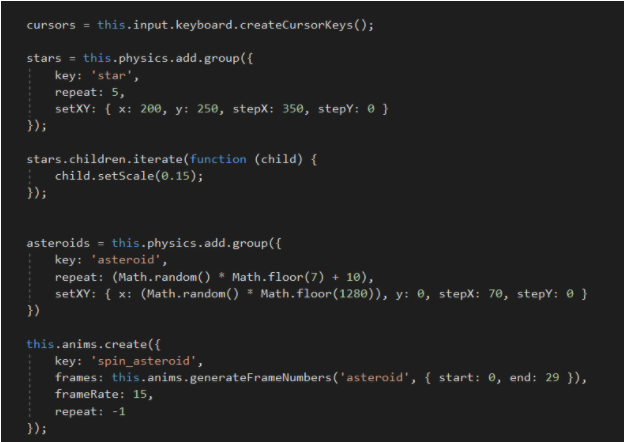
The cursors variable is defined by using phasers keyboard input function.
With stars, we define a group of them where their image key is `star`,
we create 5 of them, and set their X, Y position with a space between
each member of the group, and individually set the scaleof the star’s sprite
to 15% of what it’s image dimensions are.
For our asteroids we add the `asteroid` spritesheet as the image,
create a random number between 7 and 17, and set their locations
to any random location inside of the play area.
Now we create an animation object for the asteroid, but don’t start the animation yet.
We designate a key ‘spin_asteroid` to our animation. We also have to define the frames
using Phaser’s anims.generateFrameNumbers function, where we define the image as
being of key ‘asteroid’ starting at the first frame, and ending at the last.
The framerate of our animation is set to 15, so we will see 15 images per second (the whole
animation will then only run for 2 seconds before looping). Then we designate
it to loop infinitely, specified by repeat: -1.
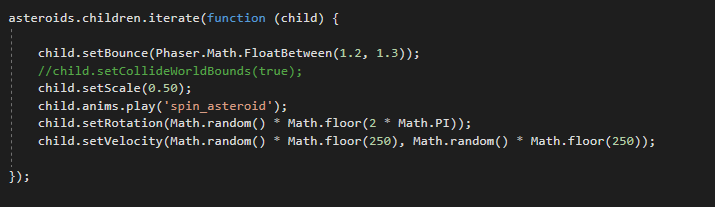
Step 6) Adding Animations
Here we set up everything we need to get our asteroids moving,
bouncing, animated, and moving in different directions.
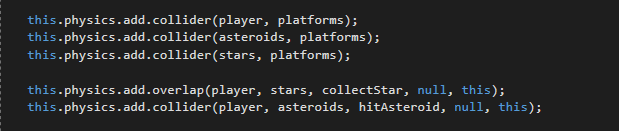
Step 7) Defining collisions between physics groups.
And finally here at the end of our create function,
we add some score text, a timer, and add colliders and
overlaps between physics objects we defined above.
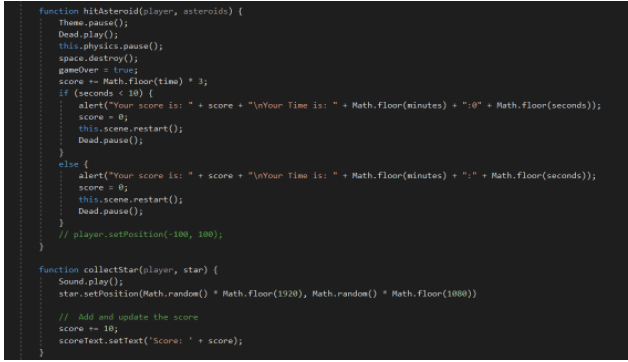
Step 8) Defining our collider functions
Here we define what happens when a player and asteroid collide
and when a player and star collide. For player and asteroid
collisions we pause the theme song, play the death song, and
end the simulation. Then we determine what the player’s score
should be arbitrarily
When a player and star collide, we play the ``Sound`` variable
which contains the star collection noise. We then set the position
of that star somewhere else so that the player can collect it again.
We also increment their score by some arbitrary amount (10)
and update the score text accordingly.
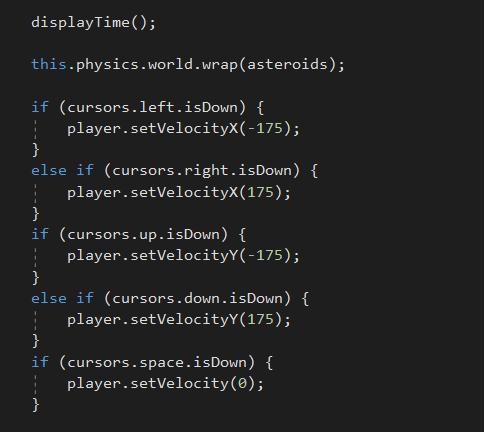
9)Defining our keystrokes
Now that everything is created, we need to define our update function.
This function serves to act as an area where listener-like code is created.
In essence, code that needs to know what is happening all the time.
Here we tell the physics engine to run our displayTime function,
wrap the asteroids group around the map instead of bumping into the edges,
and what to do on keypress.
Phaser made it easy to do this, as when we defined our ``cursors`` variable
in the create() method, it automatically defines keys easily for us to use here.
We simply say that if a given key is being pressed, move in the respective location.
We also want the space key to stop the player altogether as a brake.
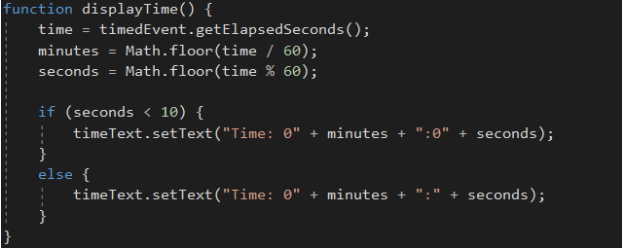
10) Finally, we need to define our displayTime() function.
Here we do a little math on the timedEvent object
to get elapsed seconds and display that text in a
recognizable format of minutes:seconds on our timeText variable.
11) That's It!
Run your game by clicking the green arrow at the top of Visual Studio.
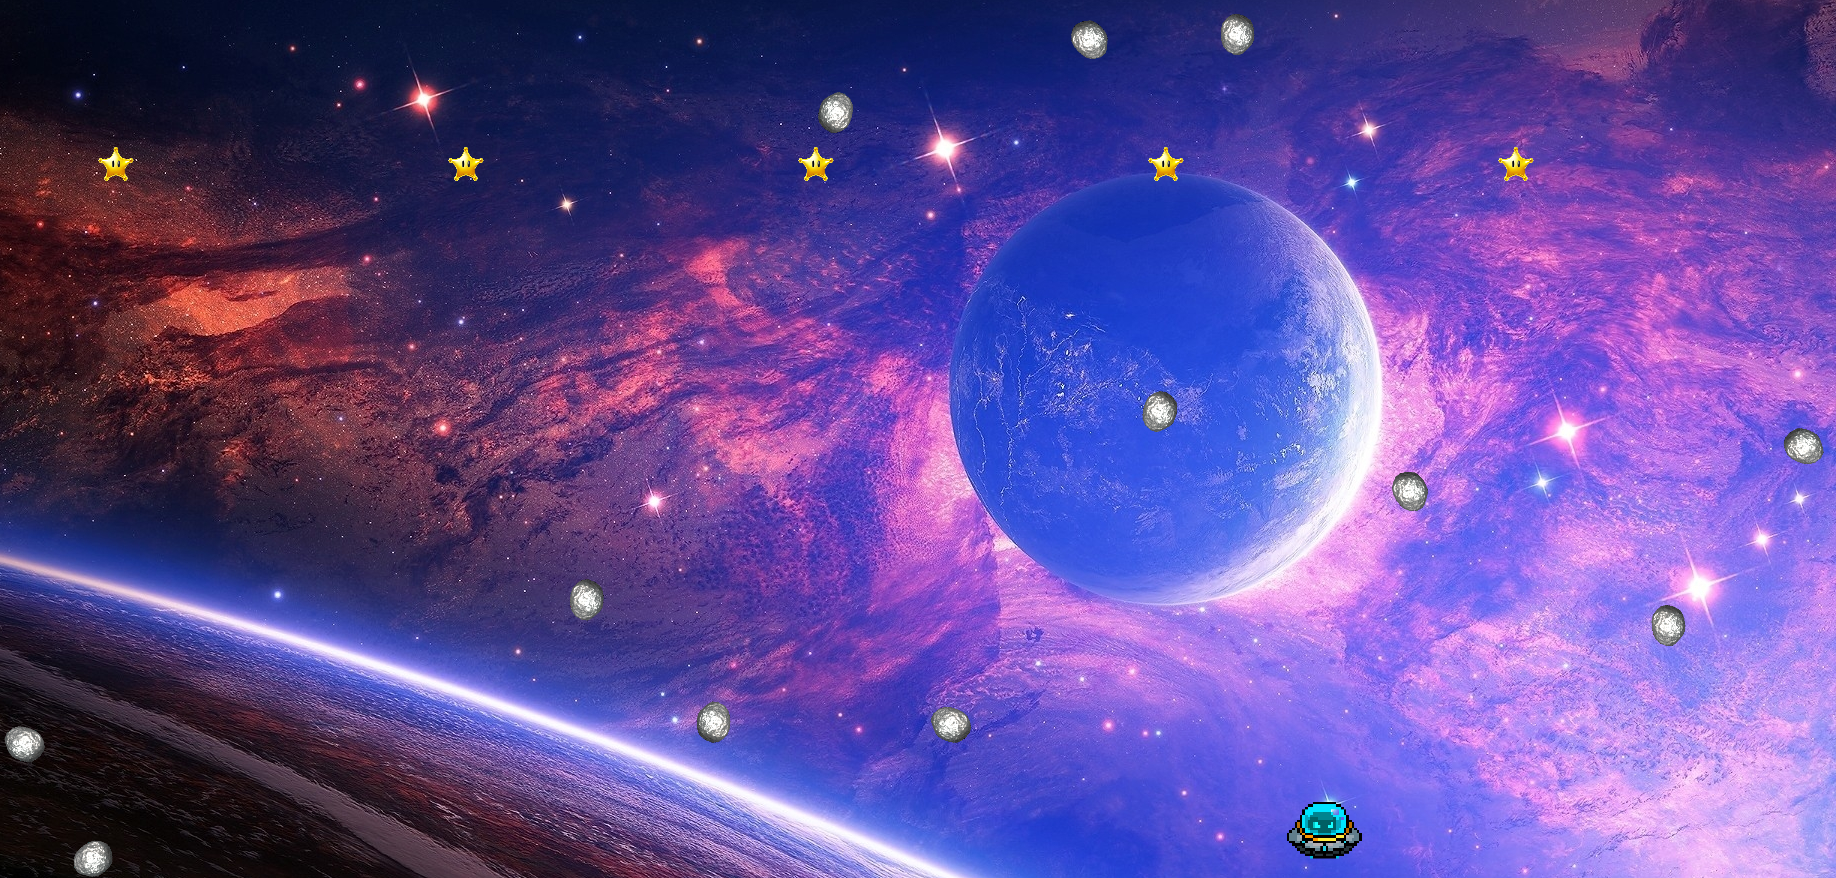
You should see that the character now moves, asteroids of random sizes
spin and fly around, bouncing off of each other and wrapping around
the game’s map. Music is playing and you should hear sounds
when collecting stars. The score should be updated with each star collected,
and the clock continually counting upwards. When you die,
your final score is tabulated and the death music triggers.
That’s it! You successfully made a game with a JavaScript framework.